GENERAL SETUP and NOTES
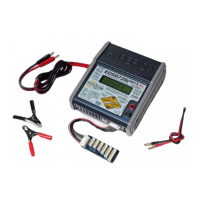
The EOS NET/DUO come with male 4mm Bullet connectors (aka ‘banana plugs’) attached to the power INPUT cables.
These cables are appropriate for attaching directly to most high-quality AC-DC power supply units, such as the BK Precision
(USA) model 1692(15V, 40A, 600W). Also included are large Terminal Clips with matching 4mm female bullet connectors, for
attaching directly to 12V~24V lead-acid batteries.
Output side 4mm Male Connector + Cable assemblies (#HP-EOSOUTCORD) are also supplied. Carefully solder your
preferred battery connector to the free ends, with correct Red (+) / Black (-) Polarity. If you make additional output cables,
note that MINIMUM inner cable diameter should be 2.5mm (14ga) and MAXIMUM cable length is 30cm (12”).
It is critically important that you use either a fully charged lead-acid automobile INPUT battery (or better, deep-cycle
marine battery) - or a high quality AC-DC power supply. See specs table page #1 for recommended AC>DC power supplies.
When charging high voltage batteries at high current the Power supply should meet or exceed our recommendations. Note that
PS load control features DO allow you to use lower-rated power supplies reliably, but that total charger output wattage will be
limited accordingly. (See details later in this manual).
If you have any trouble charging after confirming that input and output cables are properly connected and of the proper
materials, be sure to check the charger on an automotive battery. Many problems are associated with poor quality or
inadequate switching AC-DC power supplies. Use PS Load control as needed to reduce load on your PS, or upgrade your PS.
If, after carefully reading the following pages on usage, you have any difficulty using the charger please refer to the
troubleshooting guide and warranty terms at the end of these instructions. It is best to carefully check your charger before
making a return, as problems in setup, cabling, or power supply are much more common than defects in the charger. Chargers
returned by the user and later found not defective will only be returned to the user at the user’s expense and may incur a service
charge.
ALWAYS power charger ON before you attach a battery to output or balance connectors!!
Memory Positions for Charging, and Settings per Battery Type
Twenty MEMORY positions on Each Channel allow you to set and store parameters for CHARGING your packs, such as BATTERY
TYPE [NiMH, NiCd, LiPo, LiIon (LiIo), LiFePO4 (LiFe), Lead-Acid], battery CAPACITY, Charge RATE, Cutoff Voltage, Temperature,
etc.
BATTERY CHARGING - Let’s try it once to learn it….
(Example: LiPo battery with balance connector. Follow the flow charts as you go…)
MODE: Before Charging/Discharging is started: Scrolls between MENUS for MEMORY (Charging), USER
SETUP, DATA VIEW, BALANCER.
MODE also selects SOLO and SYNC modes for charging packs greater than 6S
MODE: Dur
ing Charging/Discharging: Scrolls between VIEW MODES: MEMORY, DATA VIEW, And DATA
QUICK VIEW screens.
UP/DOWN: Scroll through the settings within Menus, Data Views, and Selects values for Settings
ENTER: Selects any Setting to CHANGE / Charge START / Charge STOP
CH: (not pictured left) Selects which screen you are reading: Port #1 or Port #2.
Attach the charger to an appropriate DC power supply (or wall power if NET ACDC). Connect the Output Cable 4mm bullet
connectors to the Red (+) and Black (-) CH#1 output port on left side of the charger. Connect your Battery Main Connector to
the Mating Connector you have previously soldered to the Output Cable set. Connect your Lithium Polymer battery Balance
Connector to the EOS Balance Multi-Adapter. ALWAYS USE THE BALANCER(s) WHEN CHARGING LITHIUM BASED PACKS FOR
SAFETY!!
(See end of these instructions for more information and balance multi-adapters for various brand lithium packs).
Note: Always connect the Output Cable set to charger first, then power CHARGER ON, then connect Battery MAIN Wires,
then Battery BALANCE adapter. Never connect a pack to a charger which is powered OFF. After charging is finished,
always disconnect the Battery main wire connectors from Output Cable set first; then disconnect Output Cable set from charger.
After the Welcome screen, the charger will start and display the most recently used memory position.
(see flowchart (2) MEMORY DISPLAY at this time)
Press CH to select which charger or port screen you are reading, ‘1 or 2’ will be shown in the top, right-hand corner
Pressing ENTER once will make the Memory Position start flashing. Flashing values can be changed with UP / DOWN keys.
While Mem Position is flashing, Press DOWN to scroll through the ten available memory positions.
Press ENTER again to confirm the memory position that you wish to use.
From the memory screen, now press DOWN to get to BATT TYPE, press ENTER to start BATT TYPE flashing for selection.
Press DOWN until you see your desired Battery Type (LiPo in this case). Press ENTER to confirm.
Press DOWN again to select Pack Voltage which matches your battery
Note: the Charger shows both pack voltage and the number of cells in Series (S) on this screen, matching the Voltage and
Battery Type you have selected. If the “S” and the Voltage don’t match your battery, you have the Wrong Battery Type
selected (like confusing LiIon 3.6v with LiPo 3.7v types). Use UP key to reach BATT TYPE again, and reset BATT TYPE properly.
Press DOWN to get to BATT CAPACITY; press ENTER to make the mAh value flash and adjust with the UP or DOWN buttons
until it matches your battery, by increments of 100mAh (to max of 50,000mAh). Press ENTER to confirm.
If your battery is 730mAh, for example, you could set this to 700mAh. The common CHARGE RATE (set in next screen) for
lithium is 1C of capacity (equal to 0.7A for a 700mAh setting).
Press DOWN to get to CHG CURRENT. Max allowed charge rate for Lithium Polymer (LiPo 3.7v/cell) is 2C default, but selectable
in USER SETUP, LIPO MAX C setting (1C~5C). CAUTION! For other cell types, there is no restriction, up to the max amps limit
of the charger, so BE SURE you know what CHG CURRENT setting to use for your battery (see also below text on cell types).
2
Pres
s DOWN to TEMPERATURE CUT-OFF. Requires option part #HP-EOSTMPSEN, temp sensor. This is most often used by
advanced users for NiMH charging. The Default setting is 50 degrees Celsius.
 Loading...