Questions or Setup Issues?
Contact the HyperX support team or see the user manual at hyperxgaming.com/support/headsets
Quick Start Guide
FRANÇAIS
Présentation
A - Molette de réglage
du volume
B - Port microphone
C - Port de chargement USB
D - Port de casque
analogique
E - Bouton Marche/ Arrêt
F - Bouton de désactivation
du micro
G - Microphone amovible
H - Adaptateur sans l
I - Voyant Statut sans l
J - Câble de chargement USB
K - Câble de casque 3,5mm
Utilisation
Chargement de la batterie
Il est recommandé de charger
complètement votre casque-
micro avant sa première
utilisation.
Lorsque le câble de chargement
est connecté, le voyant LED de
l’écouteur indique le statut.
Écouteur LED
Statut de
chargement
Respiration Chargement
de la batterie
Désactiver Chargement
complet
Bouton Marche/ Arrêt
Marche - maintenez le bouton
Marche/Arrêt pendant 3
secondes jusqu’à ce qu’un bip
retentisse.
Arrêt - maintenez le bouton
Marche/Arrêt pendant 3
secondes jusqu’à ce qu’un bip
retentisse.
Eet LED - Appuyez sur le
bouton Marche/ Arrêt pour
changer l’eet LED.
Utilisation avec un PC, une
PS4 ou un Mac
1. Branchez l’adaptateur sans l
sur le port USB d’un PC/ PS4 ou
Mac. (Le voyant Statut sans l de
l’adaptateur va clignoter)
2. Allumez le casque-micro.
3. Lorsque le voyant Statut sans
l de l’adaptateur est allumé
(xe), le casque-micro est
connecté.
Remarque : Si vous utilisez votre
casque-micro pour la première
fois, il peut être nécessaire de le
congurer comme Périphérique
d’entrée/ sortie par défaut.
Utilisation comme
casque analogique
1. Connectez le câble 3,5mm au
port Casque du casque-micro.
2. Branchez le câble 3,5mm du
casque à votre système.
Remarque : Le microphone
ne fonctionne pas dans cette
conguration.
Questions ou problèmes
de conguration?
Contactez l’équipe d’assistance
HyperX ou consultez le manuel
d’utilisation : hyperxgaming.
com/support/headsets
ITALIANO
Panoramica
A - Regolazione volume
B - Ingresso microfono
C - Porta USB con funzione
di ricarica
D - Ingresso analogico
per cuat
E - Pulsante di accensione
F - Pulsante di esclusione
microfono
G - Microfono scollegabile
H - Adattatore wireless
I - Spia dello stato wirelesst
J - Cavo di ricarica USB
K - Cavo cue con jack
da 3,5 mm
Istruzioni d’uso
Ricarica
In occasione del primo utilizzo,
si consiglia di eettuare un ciclo
completo di ricarica.
Una volta connesso il cavo
di ricarica, il LED presente
sul padiglione indicherà
che le cue sono in stato di
caricamento.
LED sul
padiglione
Stato di
ricarica
Acceso Ricarica
Spento Ricarica
completata
Pulsante di accensione
Accensione - Tenere premuto
il pulsante di accensione per
3 secondi no ad avvertire
un beep.
Spegnimento - Tenere premuto
il pulsante di accensione per
3 secondi no ad avvertire
un beep.
Eetti LED - Premere il pulsante
di accensione per passare al
successivo eetto LED.
Uso con PC, PS4 o Mac
1. Collegare l’adattatore wireless
a una porta USB presente su
pc, PS4 o Mac. (il LED di stato
dell’adattatore wireless inizierà a
lampeggiare)
2. Accendere le cue
3. La connessione con le cue
sarà stabilità una volta che il
LED di stato dell’adattatore
wireless resterà acceso senza
lampeggiare
Nota: la prima volta che si
utilizzano le cue potrebbe
essere necessario impostarle
come dispositivo di ingresso e
uscita audio predenito.
Uso di una cua analogica
1. Collegare il cavo delle cue
con il jack da 3,5mm all’apposito
ingresso della cua.
2. Inserire il jack da 3,5mm
dell’altra estremità del cavo delle
cue nel dispositivo.
Nota: in questa congurazione il
microfono non funziona.
Domande o dubbi sulla
congurazione?
Contattare il team di
supporto HyperX oppure
consultare il manuale utente
hyperxgaming.com/support/
headsets
DEUTSCH
Übersicht
A - Lautstärkeregler
B - Mikrofonbuchse
C - USB-Ladeanschluss
D - Analaoger
Kopfhöreranschluss
E - Ein/Ausschalter
F - Mikrofon-Stummschalten
G - Abnehmbares Mikrofon
H - Drahtloser Adapter
I - Drahtlose Statusanzeige
J - USB-Ladekabel
K - 3,5 mm Kopfhörerkabel
Nutzung
Laden
Es wird empfohlen, dein
Headset vollständig zu laden,
bevor Du es zum ersten Mal
verwendest.
Wenn das Ladekabel
angeschlossen ist, zeigt die LED
das in der Ohrmuscheln an.
Ohrmuscheln
-LED
Ladestatus
Atmung Laden
Aus Vollständig
geladen
An-/Ausschalter
Spannung ein - Halte den Ein/
Ausschaltknopf 3 Sekunden
gedrückt, bis du ein Piepen
hörst.
Spannung aus - Halte den Ein/
Ausschaltknopf 3 Sekunden
gedrückt, bis du ein Piepen
hörst.
Spannung aus - Betätigen Sie
den An-/Ausschalter, um durch
die verschiedenen LED-Eekte
zu schalten.
Nutzung mit einem PC,
einer PS4 oder einem Mac
1. Verbinde den drahtlosen
Adapter mit einem USB-Port an
deinem PC, PS4 oder deinem
Mac. (Das Statuslicht deines
drahtlosen Adapters blinkt auf.)
2. Das Headset einschalten
3. Wenn das Statuslicht am
drahtlosen Adapter nicht
mehr blinkt, ist das Headset
verbunden.
Hinweis: Wenn Du das Headset
zum ersten Mal verwendest,
musst Du es möglicherweise
erst als Standard-Eingabe- und
Ausgabegerät festlegen.
Verwendung von
analogen Kopfhörern
1. Verbinde das 3,5 mm
Kopfhörerkabel mit der
Kopfhörerbuchse am Kopfhörer.
2. Stecke das 3,5 mm
Kopfhörerkabel in das Gerät.
Hinweis: Das Mikrofon
funktioniert mit dieser
Konguration nicht.
Hast du Fragen oder
Probleme bei der
Installation?
Wenden Sie sich an das
HyperX-Support-Team oder
beziehen Sie sich auf die
Bedienungsanleitung unter:
hyperxgaming.com/support/
headsets
POLSKI
Prezentacja
A - Pokrętło głośności
B - Port mikrofonu
C - Port USB ładowania
D - Analogowy port słuchawek
E - Przycisk zasilania
F - Przycisk wyciszenia
mikrofonu
G - Odłączany mikrofon
H - Moduł łączności
bezprzewodowej
I - Wskaźnik stanu łączności
bezprzewodowej
J - Przewód USB do ładowania
K - Przewód słuchawek 3,5 mm
Użytkowanie
Ładowanie
Przed rozpoczęciem
użytkowania zestawu
słuchawkowego zalecamy jego
pełne naładowanie.
Po podłączeniu przewodu do
ładowania wskaźnik LED na
nauszniku pozwala określić
stan baterii.
Wskaźnik
LED na
nauszniku
Stan
ładowania
Pulsowanie Ładowanie w
toku
Nie świeci Ładowanie
zakończone
Przycisk zasilania
Włączanie zestawu - naciśnij
i przytrzymaj przycisk zasilania
przez 3 sekund do chwili
wyemitowania sygnału
dźwiękowego.
Wyłączanie zestawu - naciśnij
i przytrzymaj przycisk zasilania
przez 3 sekundy do chwili
wyemitowania sygnału
dźwiękowego.
Efekt świetlny - do przełączania
sposobu świecenia wskaźnika
LED służy przełącznik zasilania.
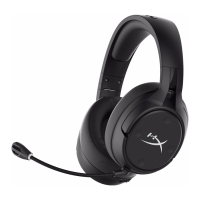
HyperX Cloud Flight
Wireless Gaming Headset
3
 Loading...