Hypnocube 4Cube Instructions v 6.5, December 2013
- 24 -
Don’t allow the LEDs to be rotated - they should all be parallel. Make the strip as straight across as possible.
Once the strips are soldered together you cannot reorient them easily, so do it correctly now.
Next, attach the second strip right below the first, so the LEDs are in line with the previous row, and repeat until
all 8 strips are arranged, oriented the same, spaced nicely, centered, and bound to the jig.
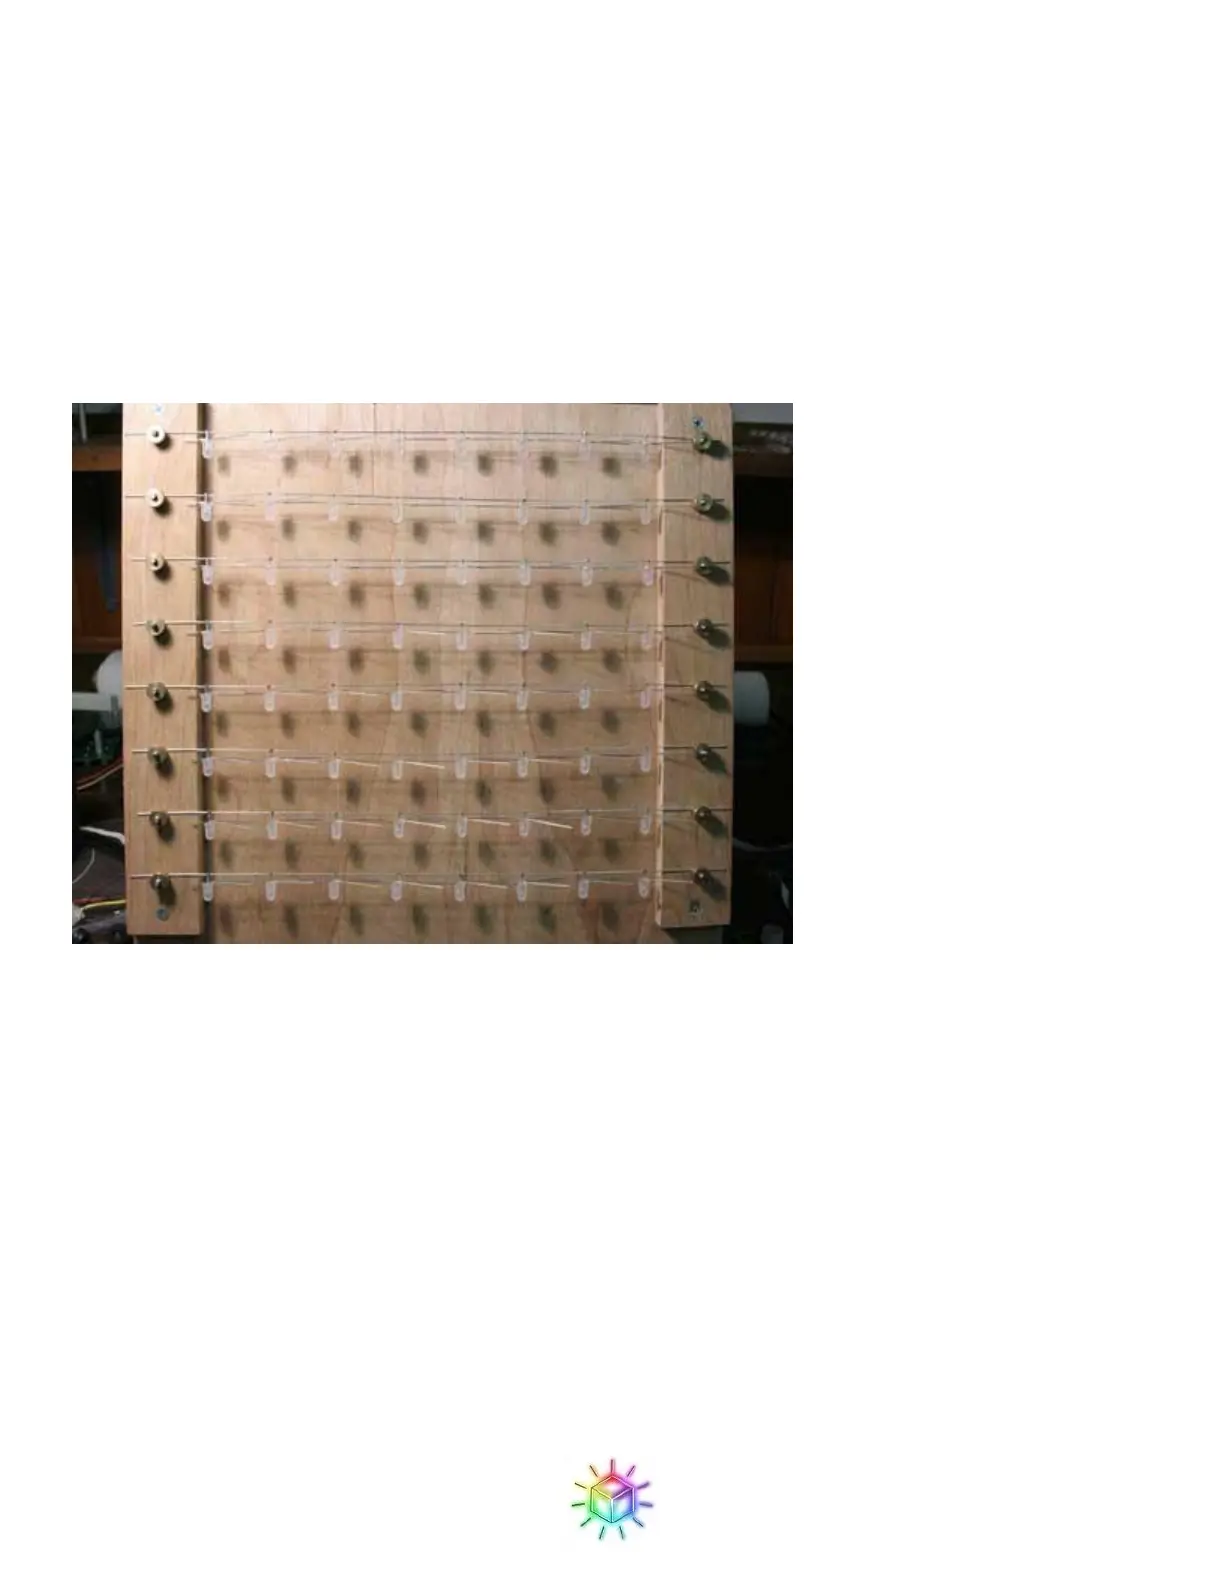
Figure 43 shows the loaded jig. For the cardboard jig using electrical, duct, or even scotch tape to hold the
wires in place is acceptable. The cardboard jig however is more wobbly than the wood one, making it more
important to be careful that things are lined up well before each solder joint.
Figure 43: Loaded jig.
Note that you may need to clip the leads on the edge LEDs to fit the jig. Do not cut them shorter than necessary,
since you will need to solder drop wires across those leads (see the following steps if you are concerned if you
are leaving sufficient lead length, though 3/8 inch or 1 cm should do.)
Before starting to solder double check that all LED flat sides are oriented the same way. If you solder one in
backwards it can be very difficult to correct once in the lattice.
We will be doing the red drop wire first, by laying a vertical wire along the red leads. Position the wire so that
the one end of the wire is aligned with the top LED, and all of the extra length of wire hangs off the bottom, as
shown below.
 Loading...