Valve Repair 2000 SRM 1025
3. Turn key switch to OFF position and disconnect
battery.
4. Block load wheels to prevent lift truck from mov-
ing. Refer to Periodic Maintenance 8000 SRM
1027.
5. Remove the drive unit compartment cover. On
W25/30/40ZC lift trucks, also remove the hy-
draulic compartment cover.
6. Discharge the capacitor. See Special Precau-
tions.
WARNING
There are pin
ch points on the reach carriage
that can caus
e an injury. Use clamps and
blocks to sto
p the scissor arms from moving.
7. On W20/30ZR l
ift trucks, install clamps and
blocks (on b
oth sides) between the load bearings
and the bott
om of the rear frame of the reach
assembly to
keep the forks from retracting. See
Figure 8.
8. Remove the l
ocking screw from the control wiring
plug. Disco
nnect the plug from the coil. See Fig-
ure 12.
9. Remove the
nut and slide the coil off the valve
cartridge
.
WARNING
Hydraulic oil hoses and lines may be under
high pressure. Hydraulic oil can be injected
into the body by pressure. To prevent possible
injury, shield yourself from any escaping oil.
Wrap a rag around the fitting and loosen the
fitting and loosen the connection slowly.
10. Loosen the selector valve cartridge slightly to re-
lieve pressure.
11. Remove the valve cartridge.
Install
1. Verify that the selector valve cartridge O-rings
are not damaged. Replace as needed.
2. Verify that the selector valve cartridge and valve
block are clean and not damaged.
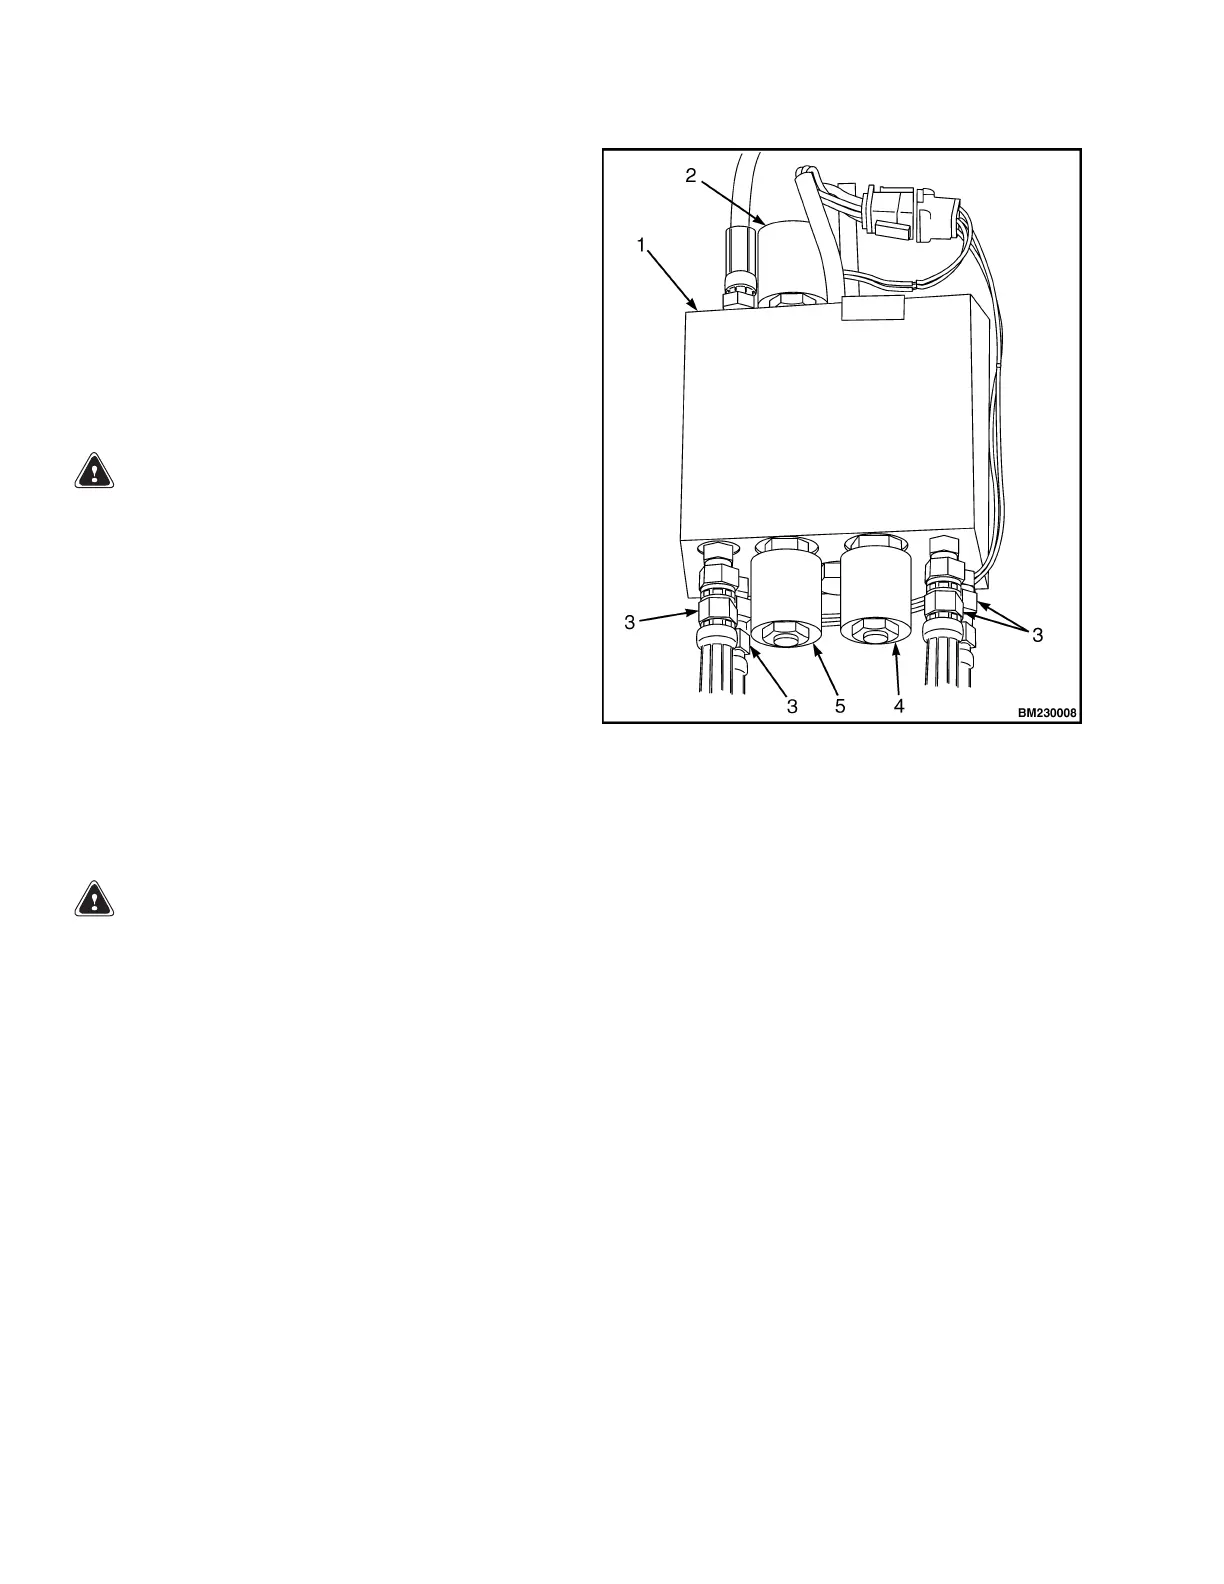
1. VALVE BLOCK
2. REACH VAL
VE
3. HYDRAULIC HOSE FITTING
4. SIDESHIFT VALVE
5. TILT VALV
E
Figure 12
. Selector Valves
3. Lubricat
e the selector valve cartridge threads
and O-rin
gs with clean hydraulic oil.
4. Install t
hevalvecartridgeandtorqueto34N•m
(25 lbf ft
).
5. Slide the
coil onto the valve cartridge with the
letterin
g out towards the coil retainer.
6. Install t
he nut and torque to 7 N•m (60 lbf in)
7. Connect t
he control wiring plug to the coil.
8. Install t
he locking screw into the coil plug.
9. Remove t
he clamps and blocks.
10. Connect
battery and turn key switch to ON posi-
tion.
11. Operate
each hydraulic function several times to
purge th
e air from the hydraulic circuit.
20
 Loading...

