EasyManua.ls Logo

Hyundai AC110B4GG - User Manual

Hyundai AC110B4GG
24 pages
Print Icon
To Next Page IconTo Next Page
Loading...
¢
£
¤
¥
¦
§
Question and Answer IconNeed help?

Do you have a question about the Hyundai AC110B4GG and is the answer not in the manual?

Overview

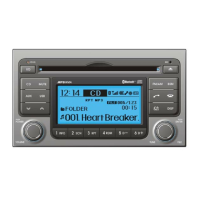
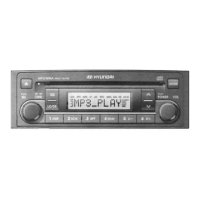
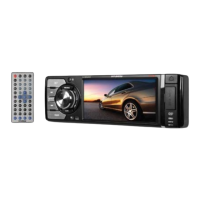
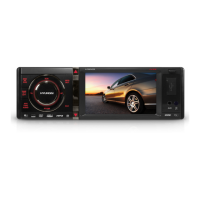
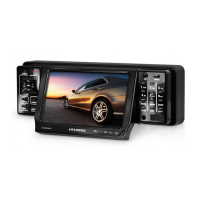
This document describes the features and functions of the Digital Car Audio System, model AC110B4GX.

System Controllers and Functions

The audio head unit includes several buttons and a knob for controlling various functions:

  • EJECT (1): Ejects the disc from the CD player.
  • RADIO (2): Changes the audio mode. Each press cycles through FM1 → FM2 → FMA → AM → AMA (for RDS models) or FM1 → FM2 → AM. The radio pop-up screen can be displayed in Setup > Display, and modes can be selected using the TUNE knob or keys 1-6.
  • MEDIA (3): Changes the audio mode. Each press cycles through CD, USB MP3, iPod, AUX, My Music, and BT Audio. The media pop-up screen can be displayed in Setup > Display, and modes can be selected using the TUNE knob or keys 1-5.
  • PHONE (4): Operates the Phone Screen. If a phone is not connected, the connection screen is displayed.
  • SEEK/TRACK (5):
    • Radio Mode: Automatically searches for broadcast frequencies.
    • CD, USB, iPod, My Music modes: A short press (under 0.8 seconds) moves to the next or previous song/file. Pressing and holding the key (over 0.8 seconds) rewinds or fast-forwards the current song.
  • PWR/VOL knob (6):
    • Power Knob: Turns power On/Off by pressing the knob.
    • Volume Knob: Sets the volume by turning the knob left/right.
  • PRESET (9) (1-6):
    • Radio Mode: Saves frequencies (channels) or receives saved frequencies.
    • CD, USB, iPod, My Music mode:
      • 1 RPT: Repeat function.
      • 2 RDM: Random function.
    • In Radio, Media, Setup, and Menu pop-up screens, these keys select number menu items.
  • FOLDER/PTY (10):
    • MP3, CD, USB mode: Folder Search.
    • iPod mode: Moves to the parent folder.
    • FM: RDS Program Type Search.
  • DISP (11): Each short press (under 0.8 seconds) toggles the screen Off/On. Audio operation is maintained when the screen is off. Pressing any key in the screen Off state turns the screen On again.
  • SCAN (12):
    • Radio Mode: Pressing and holding (over 0.8 seconds) previews each broadcast for 5 seconds. Pressing SCAN again continues listening to the current song.
    • CD, USB, iPod mode: Pressing and holding (over 0.8 seconds) previews each song/file for 10 seconds.
  • SETUP (13):
    • A short press (under 0.8 seconds) moves to Display, Sound, Clock, Phone, and System setting modes.
    • Pressing and holding (over 0.8 seconds) moves to the Time setting screen.
  • MENU (14): Displays menus for the current mode.
  • TUNE knob (15):
    • Radio mode: Changes frequency by turning the knob left/right.
    • CD, USB, iPod mode: Searches songs/files by turning the knob left/right. Pressing the knob plays the desired song.
    • Moves focus in all selection menus and selects menus.

Display Settings

  • Scroll Text: In Setup > Display, select [Scroll Text] > Set (On/Off). "On" maintains scroll, "Off" scrolls only once.
  • Song Info: In Setup > Display, select [Song Info] to display information from 'Folder/File' or 'Album/Artist/Song' when playing an MP3 file.
  • Mode Pop up: In Setup > Display, select [Mode Pop up] > Changes (On/Off). When On, pressing RADIO or MEDIA displays the mode change pop-up screen.

Sound Settings

  • Audio Settings: Adjusts Bass, Middle, Treble, Fader, and Balance. Select [Sound Settings] from Setup > Sound.
    • Bass, Middle, Treble: Sets the sound tone.
    • Fader, Balance: Moves the sound fader and balance.
    • Default: Restores default settings.
    • Return: While adjusting values, pressing the TUNE knob will restore the parent menu.
  • Power Bass: This feature provides live bass. In Setup > Sound, select [Power Bass] > Set (On/Off).
  • Speed Dependent Volume Control (SDVC): Automatically controls the volume level according to vehicle speed. In Setup > Sound, select [SDVC] > Set in 4 levels (Off/Low/Mid/High).
  • Volume Dialogue: Adjusts voice recognition volume. In Setup > Sound, select [Volume Dialogue] > Set volume.

Clock Settings

  • Clock: In Setup > Clock, select [Clock] to adjust the clock.
    • Day Settings: Sets the date (DD/MM/YYYY). Adjust the number in focus using the TUNE knob and press to move to the next setting.
    • Time Format: Sets 12/24 hour time format.
    • Clock Display when Power is OFF: Displays time/date on screen when power is off.
  • Automatic RDS Time: Automatically sets the time by synchronizing with RDS. In Setup > Clock, select [Automatic RDS Time] > Set (On/Off).

Phone Setup (if equipped)

  • Pair Phone: Allows pairing up to five Bluetooth® Wireless Technology enabled mobile phones.
    • CAUTION: Pairing is not possible while driving. Park the vehicle first.
    • To pair: Search for device names on your mobile phone and connect. Input the passkey (0000) displayed on the screen. The device name and passkey are displayed for up to 3 minutes. If pairing is not completed within this time, the process is canceled.
  • Phone List: Displays up to 5 paired phones.
    • Connecting a phone: Select a phone from the list and choose [Connect Phone].
    • Disconnecting a connected phone: Select the currently connected phone and choose [Disconnect Phone].
    • Changing connection sequence (Priority): Sets the order of automatic connection for paired phones.
    • Delete: Deletes a selected mobile phone.
      • CAUTION: Deleting a mobile phone also erases its contacts. For stable Bluetooth® communication, delete the mobile phone from both the audio system and your mobile phone.
  • Contacts Download: Downloads contacts and call histories into the audio system.
    • CAUTION: Download may not be supported on some phones. If another operation is performed during download, it will be discontinued. Downloaded contacts are saved. When downloading new contacts, delete previously saved ones first.
  • Auto Download: Automatically downloads new contacts and call histories when connecting a mobile phone.
  • Audio Streaming: Plays songs/files saved on a Bluetooth® enabled mobile phone through the audio system.
    • CAUTION: Audio streaming may not be supported on some phones.
  • Outgoing Volume: Sets the volume of your voice as heard by the other party during a handsfree call. Can be changed during a call using SEEK/TRACK keys.
  • Bluetooth® Wireless Technology System Off: Turns off the Bluetooth® system.
    • CAUTION: Bluetooth® connection may be interrupted. To reconnect:
      1. Turn the Bluetooth® function on/off and try to connect again.
      2. Turn the mobile phone power on/off and try to connect again.
      3. Completely remove the mobile phone battery, reboot, and try to connect again.
      4. Reboot the audio system and try to connect again.
      5. Delete all paired devices in your mobile phone and the audio system and pair again.
  • Using the Bluetooth® Wireless Technology System: To use Bluetooth® when the system is off, follow the next steps.
    • Turning On Bluetooth® Wireless Technology: Press PHONE key > Screen Guidance. A screen asks whether to turn on Bluetooth® Wireless Technology. Select YES.
    • If a phone is already connected, disconnect it and turn the Bluetooth® system off.
    • If the Bluetooth® system is turned on, the system will automatically try to connect the most recently connected Bluetooth® mobile phone.

System Settings

  • Memory Information (if equipped): Displays currently used memory and total system memory.
  • Language: Sets the display and voice recognition language. The system will reboot after language change. Supports Deutsch, English (UK), Français, Italiano, Español, Nederlands, Svenska, Dansk, Русский, Polski.
  • VRS mode: Changes voice command feedback between Normal and Expert modes.
    • Normal: Provides detailed instructions.
    • Expert: Provides concise information for expert users.

Radio (for RDS equipped model)

  • Changing RADIO mode: Press the RADIO key to change mode (FM1 → FM2 → FMA → AM → AMA). Press FM or AM to change mode (FM1 → FM2 and AM). When power is off, press RADIO to turn on the audio system and receive broadcasts. The mode pop-up screen allows changing radio mode using the TUNE knob or keys 1-5.
  • Adjust Volume: Turn the VOL knob left/right.
  • SEEK:
    • A short press (under 0.8 seconds) changes the frequency.
    • Pressing and holding (over 0.8 seconds) automatically searches for the next frequency.
  • Preset SEEK:
    • A short press (under 0.8 seconds) plays the frequency saved in the corresponding key.
    • Pressing and holding (over 0.8 seconds) a desired key (1-6) saves the current broadcast to that key with a BEEP.
  • SCAN:
    • Pressing and holding (over 0.8 seconds) previews each broadcast for 5 seconds. After scanning all frequencies, it returns and plays the current broadcast frequency.
  • Selecting through manual search: Turn the TUNE knob left/right to adjust frequency.
    • AC100A6EE / AC110A6EE / AC101A6EE / AC111A6EE: FM changes by 50KHz, AM by 9khz.
    • AC100A6EG / AC110A6EG: FM changes by 100KHz, AM by 9khz.
    • AC100A6EN / AC110A6EN: FM changes by 200KHz, AM by 10khz.
  • Traffic Announcement (TA): A short press of the SCAN key (under 0.8 seconds) sets On/Off TA Traffic Announcement mode.
  • PTY Up/Down: Press the PTY FORDER key when searching PTY in RDS Broadcasting Program Type selection.
  • MENU (Radio): Accesses A.Store (Auto Store) and Info functions.
    • AST (Auto Store): Saves frequencies with superior reception to presets 1-6. If no frequencies are received, the most recently received frequency is broadcast.
    • AF (Alternative Frequency): Turns On/Off the Alternative Frequency option.
    • Region: Turns On/Off the Region option.
    • News: Turns On/Off the News option.
    • Info Volume: Controls the sound volume upon receiving News or Traffic information. AF, Region, and News are RDS Radio menus.

Basic Method of Use: Audio CD / MP3 CD / USB / iPod / My Music

  • Press the MEDIA key to change the mode in order of CD → USB (iPod) → AUX → My Music → BT Audio.
  • The folder/file name is displayed on the screen.
  • The CD is automatically played when a CD is inserted.
  • The USB music is automatically played when a USB is connected.
  • Upgrade models: Toggled mode as follows whenever RPT button is pressed.
  • Repeat: Repeats the current song. Press RPT again to turn off.
  • Random: Randomly plays songs within the current folder. Press RDM again to turn off.
  • Scan: Scans all songs from the next song for 10 seconds each. Press SCAN again to turn off. SCAN function is not supported in iPod mode.
  • Folder Search (MP3 CD, USB Mode):
    • Folder Up: Searches the next folder.
    • Folder Down: Searches the parent folder.
    • If a folder is selected by pressing the TUNE knob, the first file within the selected folder will be played.
    • In iPod mode, moves to the Parent Folder.
  • Searching Songs (File):
    • Turning TUNE knob: Searches for songs (files).
    • Pressing TUNE knob: Plays selected song (file).
  • Information: Displays information of the current song. Press MENU again to turn off info display.
  • Folder Random: Randomly plays songs within the current folder. Press F.RDM again to turn off.
  • Folder Repeat: Repeats songs within the current folder. Press F.RPT again to turn off.
  • All Random: Randomly plays all songs within the CD. Press A.RDM again to turn off.
  • Copy: Copies the current song into My Music.
    • If another key is pressed while copying, a pop-up asks to cancel.
    • If another media is connected or inserted, copying is canceled.
    • Music will not be played while copying is in progress.
  • Album Random: Plays albums within the currently playing category in random order. Press Alb.RDM again to turn off.
  • Delete: Deletes the currently playing file. In the play screen, pressing delete will delete the currently playing song. Deletes file from list.
    • To delete from list: Select the file using the TUNE knob. Press MENU and select delete.
  • Delete All: Deletes all songs of My Music.
  • Delete Selection: Selects and deletes songs within My Music.
    • To delete: Select songs from the list. After selecting, press MENU and select delete.

AUX

  • AUX is used to play external MEDIA currently connected with the AUX terminal.
  • AUX mode automatically starts when an external device is connected.
  • If an external device is connected, you can also press the MEDIA key to change to AUX mode.
  • NOTICE FOR USING THE AUX: Fully insert the AUX cable into the AUX terminal for use.
  • AUX mode cannot be started unless an external device is connected to the AUX terminal.

Caring for disc

  • Ventilate the car if the temperature is too high before using the system.
  • It is illegal to copy and use MP3/WMA files without permission. Use CDs created by lawful means.
  • Do not apply volatile agents, thinners, cleaners, or magnetic sprays to CDs.
  • Hold CDs by the edges or center hole to prevent damage.
  • Clean the disc surface with a soft cloth before playback (wipe from center to outside edge).
  • Do not damage the disc surface or attach sticky tape/paper.
  • Insert only one CD at a time into the CD player.
  • Keep CDs in their cases after use.
  • Certain CD-R/CD-RW CDs may not operate normally depending on manufacturing or recording methods, potentially causing malfunctions.
  • NOTICE - Playing an Incompatible Copy Protected Audio CD: Some copy-protected CDs may not play on your car audio. Inability to play may indicate a defective CD, not the CD player.
  • NOTE: Order of playing files (folders):
    1. Song playing order: 1 to 9 sequentially.
    2. Folder playing order: If no song file is contained in the folder, that folder is not displayed.

Appendix Homologation

  • FCC Compliance Statement: This device complies with part 15 of the FCC Rules. Operation is subject to two conditions: (1) this device may not cause harmful interference, and (2) this device must accept any interference received, including interference that may cause undesired operation.
    • This equipment has been tested and found to comply with limits for a Class B digital device.
    • CAUTION: Reorient or relocate the receiving antenna. Increase the separation between the equipment and receiver. Connect the equipment into an outlet on a circuit different from that to which the receiver is connected. Consult the dealer or an experienced radio/TV technician for help.
  • Do Not: Any changes or modifications to the equipment not expressly approved by the party responsible for compliance could void user's authority to operate the equipment.
  • Be sure: The antenna(s) used for this device must be installed to provide a separation distance of at least 20 cm from all persons and must not be co-located or operating in conjunction with any other antenna or transmitter.
  • IC Compliance Statement: This device complies with Industry Canada licence-exempt RSS standard(s). Operation is subject to two conditions: (1) this device may not cause interference, and (2) this device must accept any interference, including interference that may cause undesired operation of the device.

Hyundai AC110B4GG Specifications

General IconGeneral
BrandHyundai
ModelAC110B4GG
CategoryCar Receiver
LanguageEnglish

Related product manuals