6.3.3.2 Performing a combustion test and adjustment
The High Fire (gas-air ratio) adjustment screw will have to be adjusted to attain optimum
combustion results whenever fuel conversion is undertaken, however, no mixture adjustment must
be performed unless done by a qualified technician using properly functioning and calibrated
combustion analyzing equipment.
1. Turn on the boiler’s external gas shut-off valve.
2. Give the boiler a call for heat.
3. To run the boiler at high fire, you can set the heat-out value in Test Operation mode to the
maximum MBH for the boiler. To do this, on the controller, go to > Test Operation > In
the Fan Test: Heat Out field, tap 0 MBtu, then enter the maximum MBH.
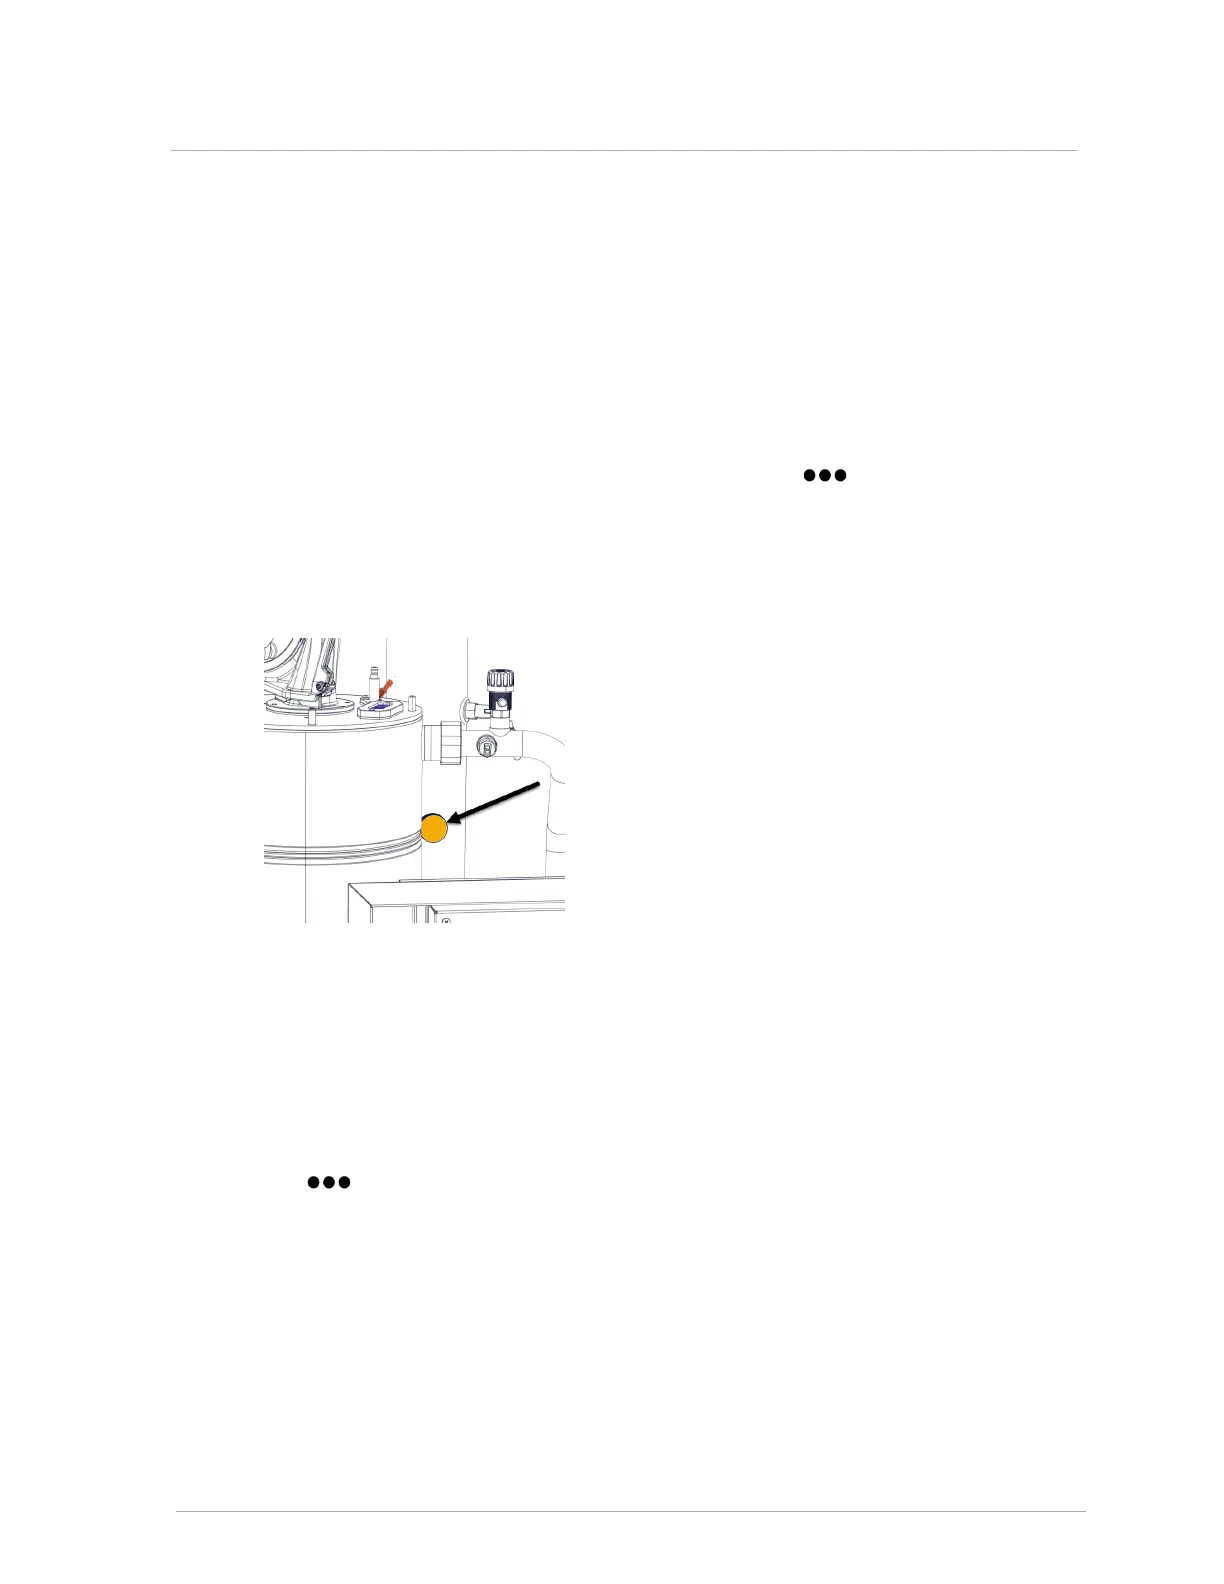
When the boiler reaches high fire, insert the combustion analyzer test probe into the flue gas
test port. Then verify that the CO2 reading is within the combustion test targets at Table 11
values.
Figure 44 Flue gas test port
4. Adjust the high fire according to values in Table 11 using a Torx 15 screwdriver. Turn the
screwdriver clockwise no more than a maximum of one full rotation at a time to raise the
CO
2
% (to richen). Turn counter-clockwise no more than a maximum of one full rotation at a
time to lower CO
2
%.
5.
Set the heat-out value in Test Operation mode to the minimum MBH for the boiler. To do this,
go to > Test Operation > In the Fan Test: Heat Out field, tap 0 MBtu, then enter the
minimum MBH.
6. Adjust the low fire according to values in Table 11 using a Torx 15 screwdriver. Turn the
screwdriver clockwise to raise the CO
2
% (to richen). Turn counter-clockwise to lower
CO
2
%. Start with ⅛ of a turn until you see the analyzer measure a change then only make
1/16 adjustments. If changing direction on this adjustment you may notice a significant
backlash.
6.3.3 Adjusting the gas valve