Do you have a question about the ibis Ripley and is the answer not in the manual?
Guides internal cable routing for derailleur and dropper cables, using housing as a pilot and zip ties.
Explains how to determine correct chain length by shifting to largest chainring/cog and compressing suspension.
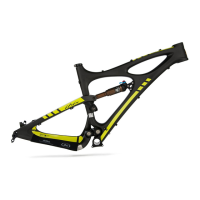
Discusses Ripley's tapered headtube compatibility with various headsets and adapters, including Cane Creek's AngleSet.
Details the Maxle rear axle, post-mount caliper compatibility, and derailleur hanger differences.
Presents a chart showing head angles for different fork lengths and suitability for terrain types.
Provides general understanding of fork setup or directs users to air pressure charts for immediate use.
Explains adjusting air pressure for optimal fork travel, aiming for 80-90% usage on typical rides.
Describes low speed compression damping for reducing unwanted movement and trail variations.
Details the fork lockout feature for stiffening the fork, often with an adjustable 'blowoff' threshold.
Explains high speed compression damping for controlling big hits and avoiding bottoming out.
Guides rebound adjustment to prevent the front end from bouncing after bumps and ensure proper suspension recovery.
Introduces Fox's CTD (Climb, Trail, Descend) feature for adjusting fork and shock settings via a lever.
Explains CTD (Climb, Trail, Descend) modes for fork compression settings and their use cases.
Recommends shock pressures for the Ripley based on rider weight and aims for 11mm sag.
Explains the RP23 CTD (Climb, Trail, Descend) modes for rear shock compression settings.
Details how to adjust rear shock rebound damping using the red dial to prevent packing down or excessive bouncing.
Describes the ProPedal damping system for minimizing suspension bob, controlled by a blue lever.
Explains the lever positions for controlling ProPedal settings on the RP23 shock.
Notes differences in Kashima RP23 shocks regarding Adaptive Logic and ProPedal settings.
Lists necessary tools for replacing bearings on the Ripley eccentric linkages.
Refers to future instructions for bearing removal/installation and mentions a special Ibis tool.
Lists specific bearing types and sizes (e.g., 6806-2RS, 608-RS, 698-RS) used in the Ripley.
Put bike on stand, remove derailleur, cranks, wheels, shock bolts, and clevis.
Remove both eccentric core bolts using 6mm Allen wrenches.
Remove the countersunk bolt from each eccentric core cap, using a 12mm open end wrench.
Gently remove the cap and push the eccentric core out of the frame.
Work in reverse order, add grease, align chamfered hole, use blue loctite.
Use a 12mm wrench to align eccentrics horizontally, then slide swingarm onto them.