Installing a hot-swap hard disk drive
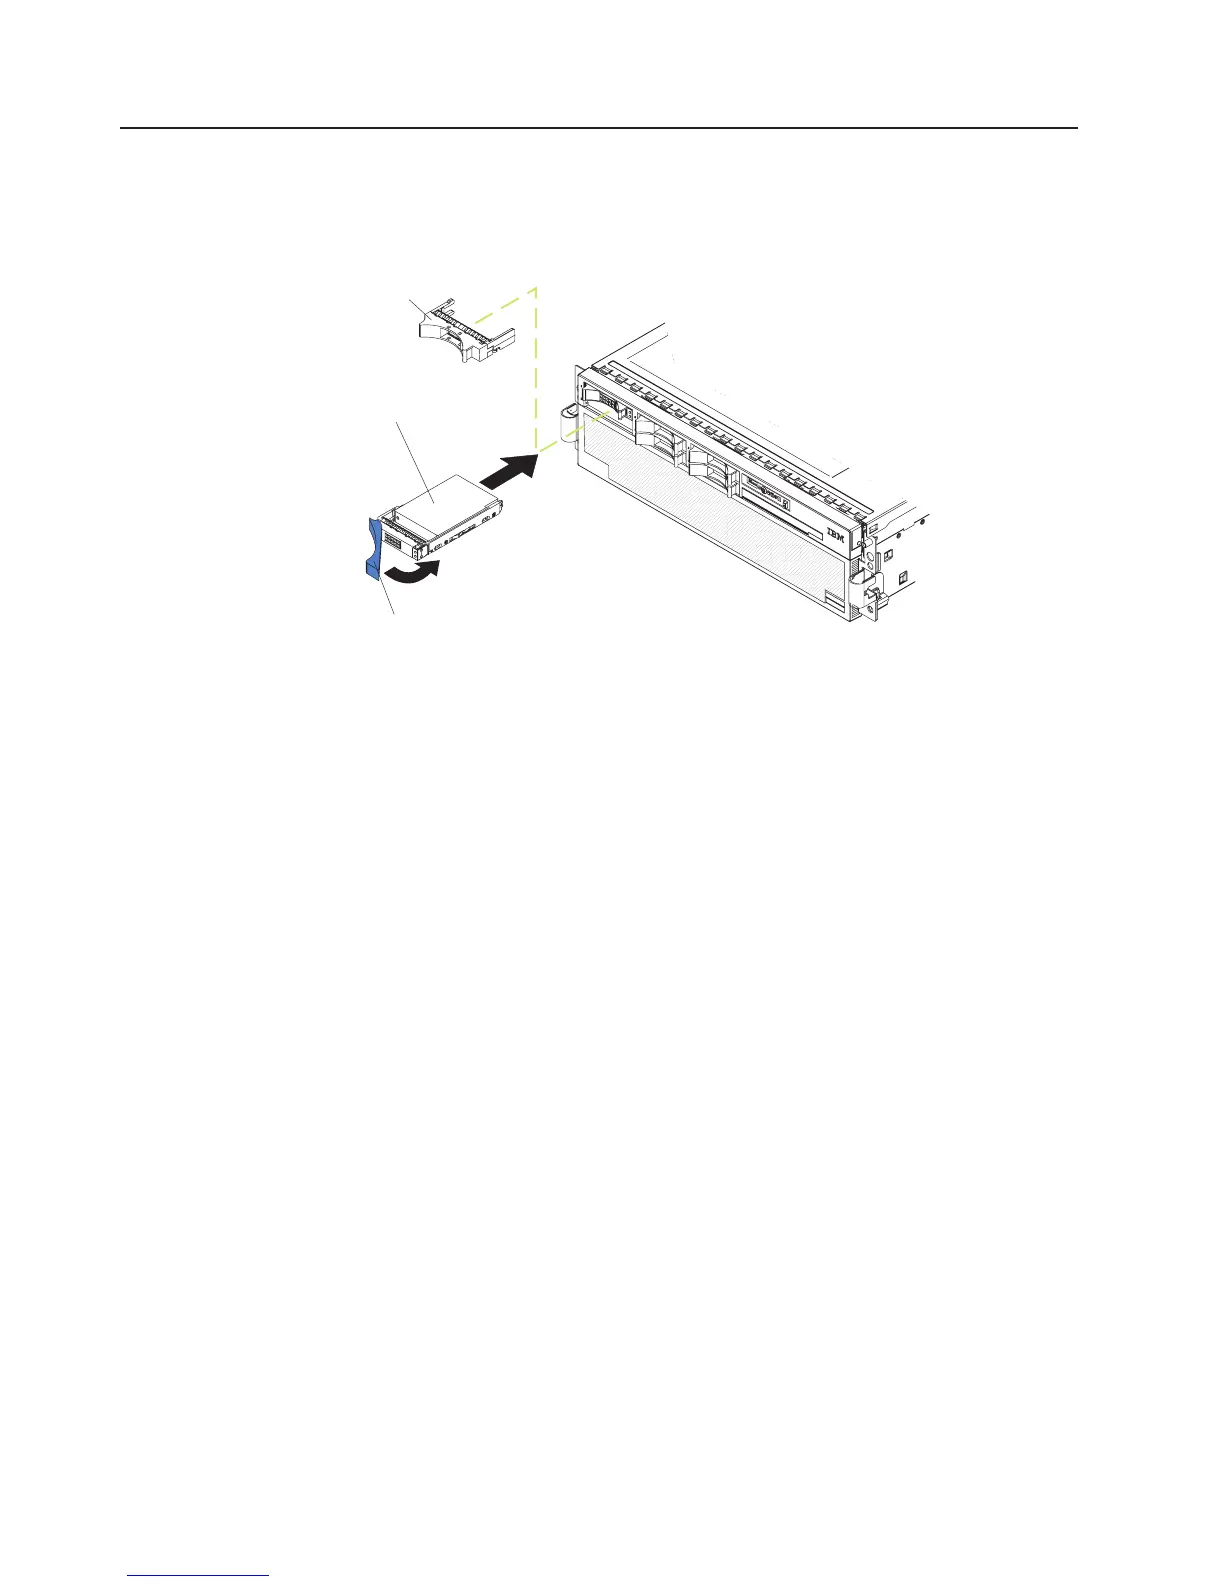
The following illustration shows how to install a hot-swap hard disk drive.
Filler panel
Drive-tray assembly
Drive handle
(in open position)
Complete the following steps to install a hot-swap hard disk drive:
1. Read the safety information beginning on page v, and “Installation guidelines”
on page 7.
2. Remove the filler panel from one of the empty hot-swap bays.
3. Make sure that the tray handle is open; then, install the hard disk drive into the
hot-swap bay.
Notes:
1. When you turn on the server, check the hard disk drive status LEDs to make
sure that the hard disk drive is operating correctly.
If the amber hard disk drive status LED for a drive is lit continuously, that drive
is faulty and must be replaced. If the green hard disk drive activity LED is
flashing, the drive is being accessed.
2. If the server will be configured for RAID operation using an optional
ServeRAID
™
controller, you must configure the disk arrays before installing the
operating system. See the ServeRAID documentation on the IBM ServeRAID
Support CD for additional information about RAID operation and complete
instructions for using ServeRAID Manager.
10 IBM xSeries 366 Type 8863: Installation Guide
 Loading...