Contents
Safety notices .................................v
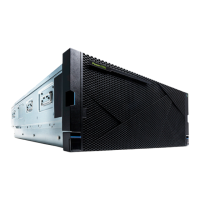
Power supplies for the 9117-MMB, 9117-MMC, 9179-MHB, or 9179-MHC ........1
Removing the 9117-MMB, 9117-MMC, 9179-MHB, or 9179-MHC power supply with the power turned off ....1
Removing the 9117-MMB, 9117-MMC, 9179-MHB, or 9179-MHC power supply with the power turned on ....3
Replacing the 9117-MMB, 9117-MMC, 9179-MHB, or 9179-MHC power supply with the power turned off ....4
Replacing the 9117-MMB, 9117-MMC, 9179-MHB, or 9179-MHC power supply with the power turned on ....6
Power supply LEDs .................................8
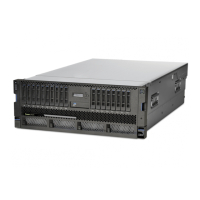
Power supplies, fans, and input power distribution assemblies in a 5802 or 5877 expansion unit .......9
Removing a power supply or fan from a 5802 or 5877 expansion unit with the power turned on ......9
Removing a power supply or fan from a 5802 or 5877 expansion unit with the power turned off ......13
Replacing a power supply or fan in a 5802 or 5877 expansion unit with the power turned on .......16
Replacing a power supply or fan in a 5802 or 5877 expansion unit with the power turned off .......21
Removing an input power distribution assembly from a 5802 or 5877 expansion unit with the power turned off 25
Replacing an input power distribution assembly in a 5802 or 5877 expansion unit with the power turned off. . 28
Replacing an input power distribution assembly in a 5802 or 5877 expansion unit with the power turned off. . 30
Common procedures for installable features ........................33
Before you begin ................................33
Identifying a part ................................35
Control panel LEDs...............................35
Identifying a failing part in an AIX system or logical partition ................37
Locating a failing part in an AIX system or logical partition ................37
Activating the indicator light for the failing part ....................37
Deactivating the failing-part indicator light ......................37
Identifying a failing part in an IBM i system or logical partition ................38
Identifying a failing part in a Linux system or logical partition ................38
Locating a failing part in a Linux system or logical partition ................38
Finding the location code of a failing part in a Linux system or logical partition .........38
Activating the indicator light for the failing part ....................38
Deactivating the failing-part indicator light ......................38
Locating a failing part in a Virtual I/O Server system or logical partition.............39
Identifying a part by using the Virtual I/O Server ...................39
Starting the system or logical partition .........................39
Starting a system that is not managed by an HMC or an SDMC ................39
Starting a system or logical partition by using the Hardware Management Console .........41
Starting a system or virtual server with the Systems Director Management Console .........41
Stopping a system or logical partition .........................41
Stopping a system that is not managed by an HMC or an SDMC ...............42
Stopping a system by using the Hardware Management Console ...............43
Stopping a system with the Systems Director Management Console ..............43
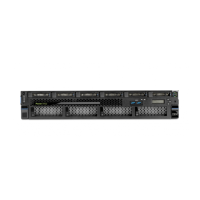
Placing the 8202-E4B, 8202-E4C, 8205-E6B, or 8205-E6C system into the service or operating position ....44
Placing a rack-mounted 8202-E4B, 8202-E4C, 8205-E6B, or 8205-E6C system into the service position . . . 44
Placing the rack-mounted 8202-E4B, 8202-E4C, 8205-E6B, or 8205-E6C system into the operating position . . 45
Removing and replacing covers for the 8202-E4B, 8202-E4C, 8205-E6B, or 8205-E6C ..........47
Removing the front cover on a rack-mounted 8202-E4B, 8202-E4C, 8205-E6B, or 8205-E6C system ....47
Removing the front cover on a stand-alone 8202-E4B, 8202-E4C, 8205-E6B, or 8205-E6C system .....48
Installing the front cover on a rack-mounted 8202-E4B, 8202-E4C, 8205-E6B, or 8205-E6C system .....49
Installing the front cover and front door on a stand-alone 8202-E4B, 8202-E4C, 8205-E6B, or 8205-E6C system 50
Removing the service access cover on a rack-mounted 8202-E4B, 8202-E4C, 8205-E6B, or 8205-E6C system. . 51
Removing the service access cover on a stand-alone 8202-E4B, 8202-E4C, 8205-E6B, or 8205-E6C system . . 52
Installing the service access cover on a rack-mounted 8202-E4B, 8202-E4C, 8205-E6B, or 8205-E6C system . . 54
Installing the service access cover on a stand-alone 8202-E4B, 8202-E4C, 8205-E6B, or 8205-E6C system . . . 54
Disconnecting the power cords from the 8202-E4B, 8202-E4C, 8205-E6B, or 8205-E6C system .......56
Connecting the power cords to the 8202-E4B, 8202-E4C, 8205-E6B, or 8205-E6C system .........58
Installing a feature by using the Hardware Management Console ................58
© Copyright IBM Corp. 2010, 2011 iii