This document is a user manual for the ICECO VL45/60 ProS portable refrigerator/freezer. It covers operation, maintenance, troubleshooting, and safety instructions for the device.
Function Description
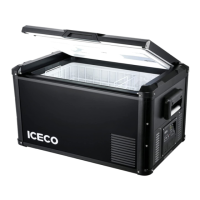
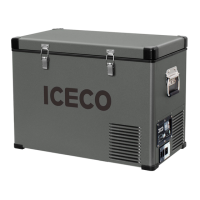
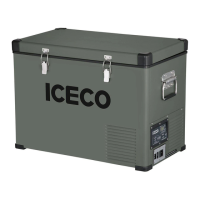
The ICECO VL45/60 ProS is a portable refrigerator/freezer designed for cooling and freezing items. It features a compressor-based cooling system and offers various operational modes and settings to suit different needs. The device is suitable for both home and outdoor use, including camping, and can be powered by both AC and DC sources.
Important Technical Specifications
The manual provides electrical power specifications for various ICECO models in max/fast cooling mode:
- GO12: 50W
- GO20: 50W
- JP Series: 60W
- VL45 ProS: 45W
- VL75 ProD: 57W
- JP42: 55W
- VL35 Series: 85W
- VL Series: 85W
- VL60 ProS: 47W
- VL90 ProD: 61W
These power ratings are for laboratory testing, and actual power consumption may vary based on real-world conditions.
The device incorporates a triple battery protection system to prevent over-discharge and battery depletion. This system automatically shuts off the compressor when the DC voltage drops below a preset value and restarts it when the voltage recovers. The cut-out and cut-in voltages for 12V and 24V systems are:
- LOW Mode:
- 12V: Cut-out 9.6V, Cut-in 10.9V
- 24V: Cut-out 21.3V, Cut-in 22.7V
- MED Mode:
- 12V: Cut-out 10.1V, Cut-in 11.4V
- 24V: Cut-out 22.3V, Cut-in 23.7V
- HIGH Mode:
- 12V: Cut-out 11.1V, Cut-in 12.4V
- 24V: Cut-out 24.3V, Cut-in 25.7V
The power line is protected by a 15A fuse located in the refrigerator.
The refrigerator is designed to operate in ambient temperatures up to 55 °C (131 °F) and can function under light rain conditions, making it heat and weather resistant. However, exposure to moderate or heavy rain is not recommended to prolong the appliance's life.
Usage Features
The ICECO VL45/60 ProS offers several user-friendly features:
Lid Opening:
The lid can be opened from either the left or right side.
- To open the lid to the left, keep fingers together and grip the right latch, then push the latch inwards and lift the lid.
- To open the lid to the right, repeat the same steps, gripping the left latch.
The lid can also be completely disassembled by gripping both latches and pushing them inwards.
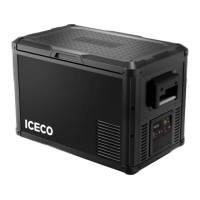
Control Panel:
The control panel includes:
- A (Battery Protection Settings): Adjusts the low battery protection level.
- B (Power ON/OFF Button): Turns the unit on or off.
- C (Compressor Speed - Eco/Max Mode): Toggles between MAX (fast cooling) and ECO (energy-saving) modes.
- D (Temp DOWN Button): Decreases the set temperature.
- E (Temp UP Button): Increases the set temperature.
Operational Modes:
- MAX & ECO Mode: With the unit on, press button C to switch between MAX and ECO modes. MAX mode provides faster cooling, while ECO mode conserves energy.
- Temperature Unit Switch (°C/°F): With the unit on, press and hold buttons C and D simultaneously for 3 seconds to toggle between Celsius and Fahrenheit.
- Setting Temperature: When the unit is on, the display shows the current interior temperature as a solid, non-flashing number. To change the set temperature, use button E (Temp UP) or button D (Temp DOWN). The set temperature will flash, and once set, the display will revert to showing the current interior temperature. The compressor will shut off when the set temperature is reached.
USB Connector:
The device includes a USB connector for charging external devices. This feature is active only when the refrigerator is powered via the DC power cord.
Power Cables:
Both AC (110V wall outlet) and DC (12/24V cigarette lighter plug) cables are included, allowing for versatile power options at home or in a vehicle.
Maintenance Features
Proper cleaning and maintenance are crucial for the longevity and performance of the ICECO VL45/60 ProS:
Cleaning:
- Always disconnect the power source before cleaning.
- Clean the interior and exterior with warm water mixed with a gentle, non-abrasive detergent.
- Use a soft sponge or micro fiber cloth.
- When not in use, leave the lids open to reduce odors.
- If odors persist, clean thoroughly or use baking soda in a bowl to absorb them.
What NOT to do during cleaning:
- Do not use pointed objects to scrape or defrost ice.
- Do not use abrasive detergents.
- Do not use heavy-duty sponges (to prevent scratching).
- Do not clean with running water or a pressure washer.
- Do not clean without power input covers secured.
General Maintenance:
- Ensure the lid is always latched securely to reduce the time it is left open.
- The power cable must only be replaced by a qualified technician or an authorized assistant.
- Disconnect the power cable from the plug before any maintenance operations.
Troubleshooting and Error Codes:
The manual lists several error codes and their solutions:
- E1: DC voltage is below protection settings; battery protection mode activated.
- Solution: Confirm stable voltage if powered by 12V. Lower battery protection setting. Take a voltage reading of the battery. If the error persists, connect to 110V source and contact customer service with videos/pictures.
- E2: Cooling fan is overloaded (more than 1A current).
- E3: Motor start error; compressor blocked or high pressure difference in refrigeration system.
- E4: Minimum motor speed error; compressor overloaded, motor cannot maintain 1850 rpms.
- E5: Thermal cut-out of electronic unit; refrigeration system overloads, or ambient temperature is too high, thermal sensor overheated.
- LL: NTC failure (open circuit).
- HH: NTC failure (short circuit).
Delivery and Initial Setup:
If the refrigerator is delivered upside down, leave it upright for 24 hours before powering it on to allow the compressor lubricant to resettle. Contact customer service immediately if there are any visible oil or fluid leaks.
Warranty & Return Policy:
- 30-day money-back guarantee upon receiving goods.
- 5-year warranty on the compressor.
- 1-year warranty for other parts or accessories.
- For returns/exchanges, contact customer service or fill out the registration form. All materials must be returned in original condition and packaging.
- If the product is damaged or defective during transportation, contact customer service within 2 business days with photos/videos, order ID, and name. A free return label will be provided if needed.