15
4
CONNECTION AND MAINTENANCE
■ Mounting the transceiver
The universal mounting bracket supplied with your transceiv-
er allows overhead mounting.
• Mount the transceiver securely with the 4 supplied screws
to a thick surface which can support more than 1.5 kg.
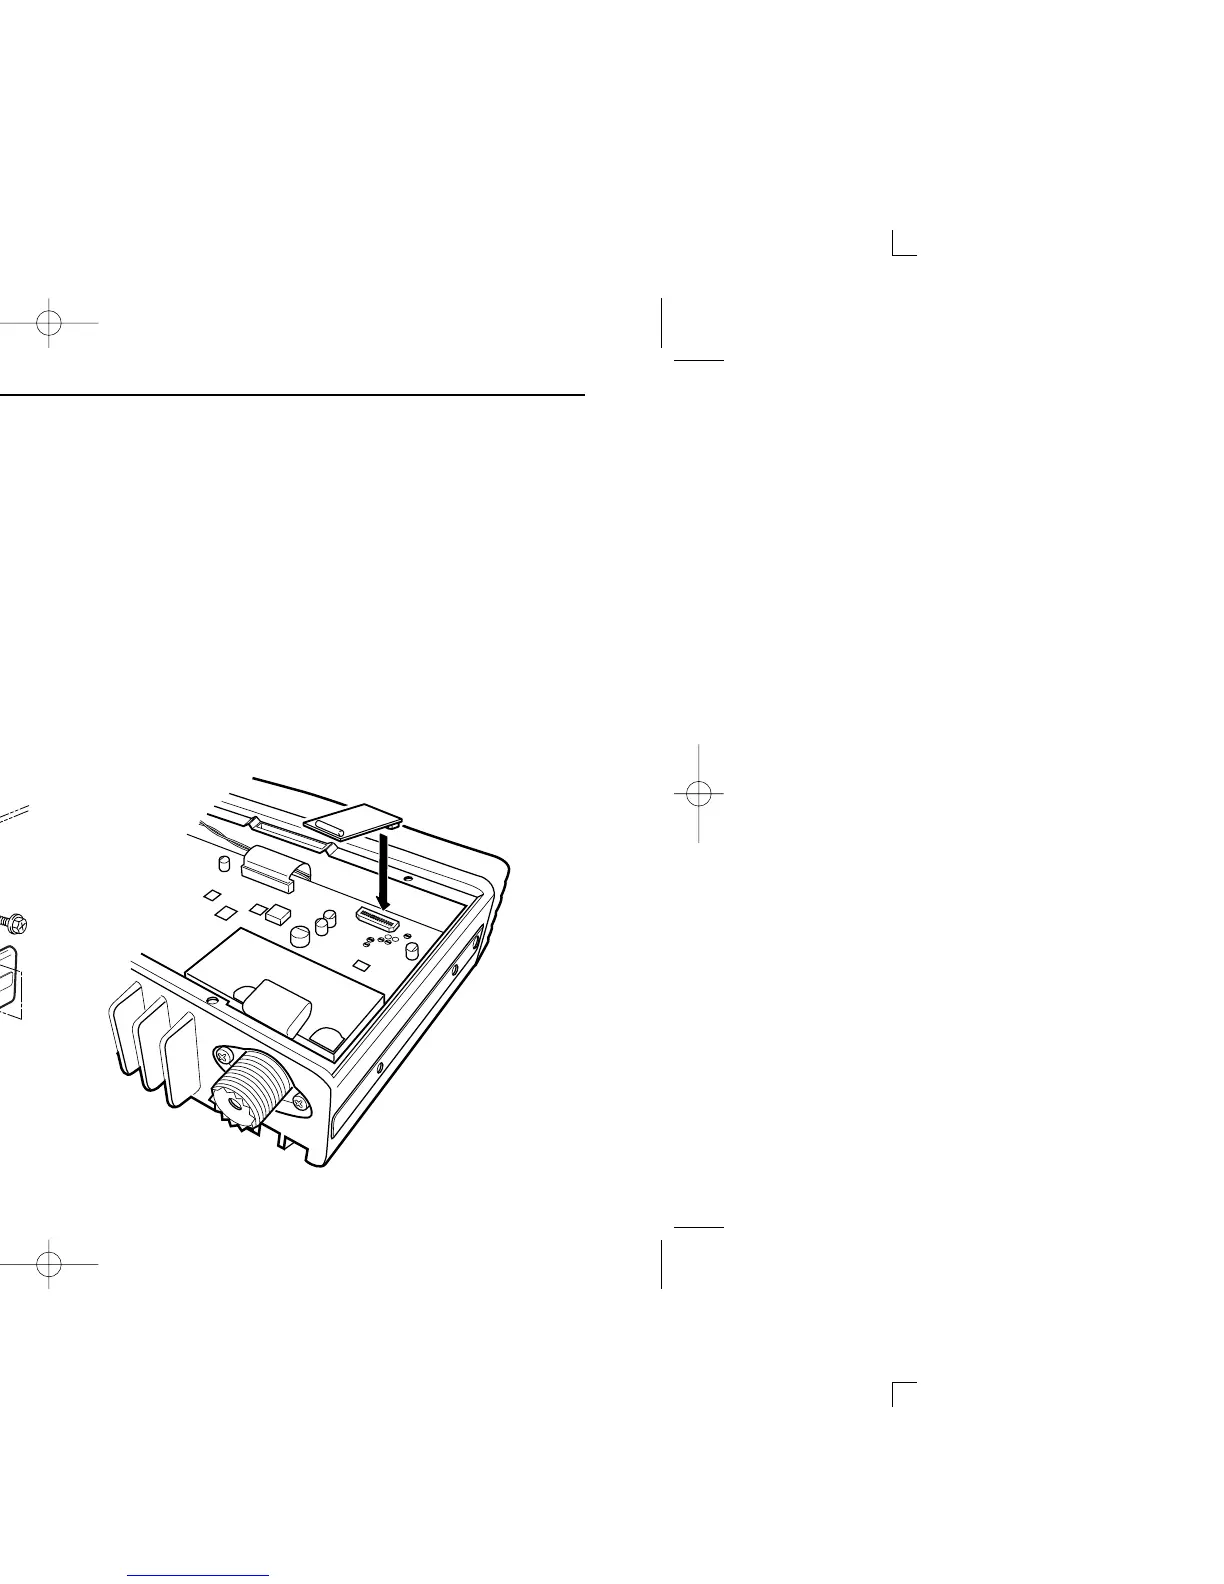
■ Optional UT-105, UT-108 or
UT-111 installation
Install the optional UT-105, UT-108 or UT-111 unit as follows:
q Turn the power OFF, then disconnect the DC power cable.
w Unscrew the 4 cover screws, then remove the bottom
cover.
e Install the unit as shown in the diagram below.
r Replace the bottom cover and screws, then re-connect the
DC power cable.

 Loading...