9
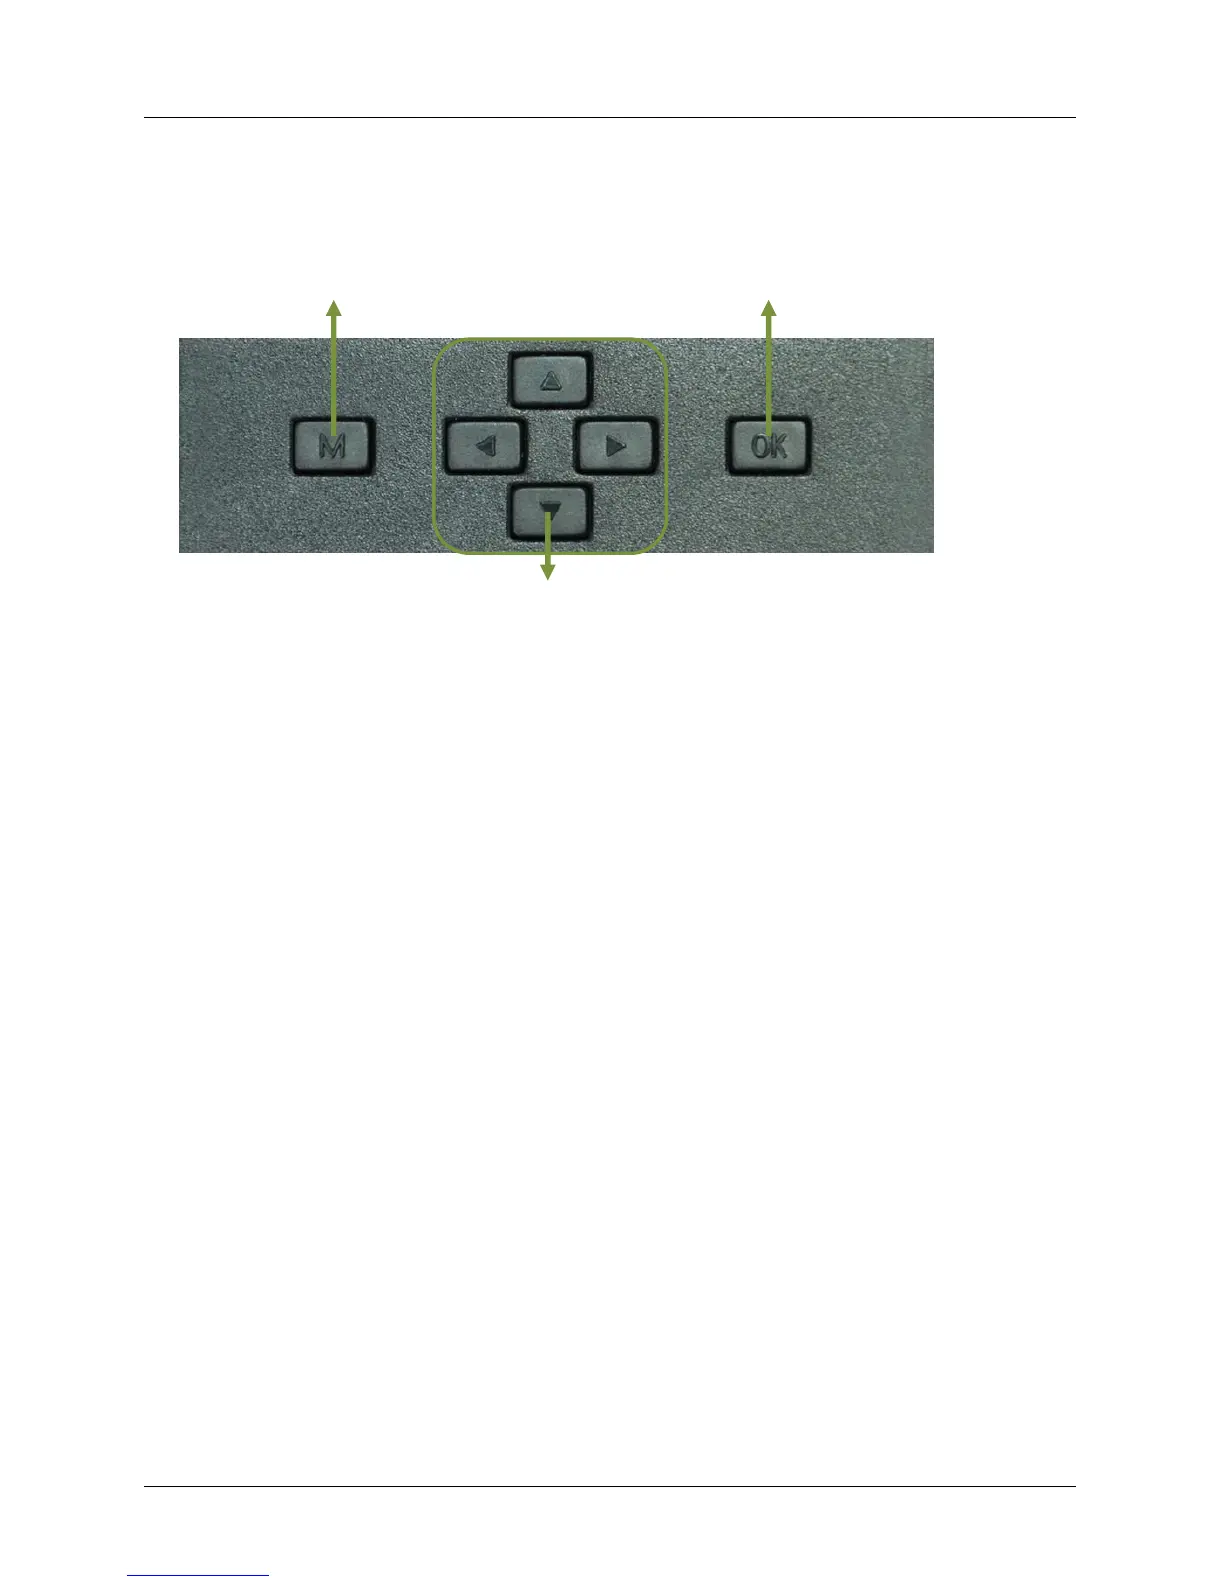
Menu OK / Foto & Video Record / TEST Mode
Navigation , , ,
1. Quick Start
2.1. How to Start the Camera?
Switch ON „Power Switch“
2.2. How to Set the Functions?
Switch ON “Power Switch”, Press “OK” once to enter Test mode; then press button “M” once
to enter camera setting menu;;
A. Use the navigation buttons „”, „”, „”, and „” to obtain favored settings, press „OK”
for confirmation and save the preferred change. After that press „M” to exit the current
page;
B. Exit main menu, then press button “OK” for 3 secs to enable camera to work on PIR.
C. Camera LED indicator (front side) flashes 5 times before it gets into PIR auto working mode.
Note: For some settings, user needs to press “Menu” to save & exit the configuration after
pressing “OK” to confirm; (Cam ID, Delay, Time Lapse, Timer, Password).