Do you have a question about the iHome HDL99 and is the answer not in the manual?
Procedure to set the clock time, date, and year manually.
Instructions on how to call up pre-programmed FM stations.
Guide to selecting and saving FM stations to presets.
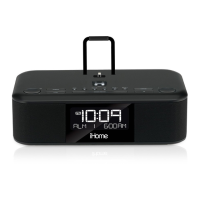
The HDL99 is a staff quick start guide for a system that includes the HDL99 unit and a 100V-240V universal AC adaptor. This guide outlines the setup, clock setting, and FM radio functions, along with maintenance instructions.
The HDL99 system is designed to provide time display and FM radio capabilities, with features tailored for staff setup and guest use. It includes a dual-docking system for Apple devices, allowing for time synchronization and potentially audio playback, although the latter is not explicitly detailed in the provided excerpts. The unit features staff controls that are accessible by removing a back cover, ensuring that settings can be managed and secured by staff.
To begin setup, staff must remove a thumbscrew and the back cover to access the staff controls. The unit is powered by connecting the 100V-240V universal AC adaptor to the DC jack/wall outlet.
A crucial step in the setup is to remove the pull tab from the Backup Battery Compartment, located on the bottom of the unit. The HDL99 uses a CR2450 battery for backup. When a Low Battery Icon appears on the display, staff should replace the backup battery with a fresh CR2450 battery. It is important to keep the unit connected to AC power during battery replacement to avoid losing settings.
The volume level can be set by staff to either "high" for large rooms or "low" for smaller rooms, providing flexibility based on the environment.
For security, the unit includes an attached security tether that should be secured to a wall or other permanent surface. A caution is provided against attaching it to an AC outlet or allowing it to become entangled, as this could create a hazardous situation.
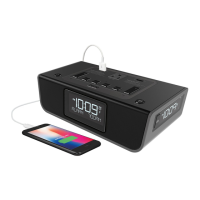
The HDL99 offers a convenient way to set the clock using time synchronization with Apple devices. Staff can connect a Lightning-compatible iPhone to Dock 2 or a 30-pin-compatible iPhone to Dock 1. After connecting, pressing the "time sync/set" button on the back of the unit will instantly set the time on the HDL99. The display will show "SYNC" followed by "SYNCOK" to confirm successful synchronization. If time sync fails, staff are advised to try a different docking device. If it still doesn't work, manual clock setting is required.
For the fastest and most accurate time setting, using a docked iPhone is recommended because iPhone time is always current, pinging off cell towers. iPad or iPod devices are only accurate to the last time they were synced to a computer.
The unit ships with the Daylight Saving Time (DST) switch in the "Auto" position. In this mode, the clock will automatically adjust for time changes in March and November. If Daylight Saving Time is not observed in the unit's location, staff should move the DST switch from "Auto" to "-1" or "+1" before setting the time manually. It is also important to ensure the DST switch is in the "Auto" position if using time sync.
If time sync is not possible or fails, the clock can be set manually.
To use the FM radio:
The unit supports three FM presets, numbered 1-3.
For best FM reception, the FM antenna should be extended.
Once staff has completed all setup procedures, the security cover should be replaced on the back of the unit, and the thumbscrew tightened to secure it.
The HDL99 unit should be placed on a level surface, away from sources of direct sunlight or excessive heat.
To protect furniture, especially those with natural wood and lacquered finishes, a cloth or other protective material should be placed between the unit and the furniture surface.
The unit should be cleaned with a soft cloth moistened only with mild soap and water. Stronger cleaning agents, such as thinner or similar materials, can damage the surface of the unit and should be avoided.
A critical warning is provided regarding lithium batteries (CR2450 backup battery). Lithium batteries can explode or cause burns if disassembled, shorted, recharged, exposed to water, fire, or high temperatures. Users are warned not to place loose batteries in pockets, purses, or other containers with metal objects, mix them with used or other battery types, or store them with hazardous or combustible materials. Batteries should be stored in a cool, dry, ventilated area. Applicable laws and regulations for transport and disposal must be followed.
| Brand | iHome |
|---|---|
| Model | HDL99 |
| Category | Clock Radio |
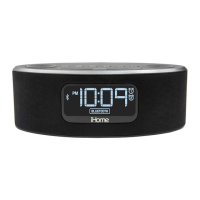
| Display Type | LED |
| Bluetooth | Yes |
| Alarm | Dual Alarm |
| USB Charging Port | Yes |
| Radio | Yes |
| Radio Band | AM/FM |
| Presets | 20 |
| Auxiliary Input | Yes |
| Audio Input | 3.5mm |
| Power Source | AC Adapter |
| Battery Backup | Yes |
| Snooze Function | Yes |
| Sleep Timer | Yes |
| Weight | 1.5 pounds |