FRONT
9
» Connect the built-in Aux-in cable on the back of the iAV2v2 to the Aux jack of your
Echo device.
» You can now ask Alexa to access all the functions of your Echo device and hear the
audio through the iAV2v2.
VOLUME CONTROL
» For Echo Dot: Adjust the volume on the Dot to your desired level.
» For Echo Input: Ask Alexa to adjust the volume to your desired level.
“Alexa, stop” “Alexa, set volume to 5”
“Alexa, mute” or “Alexa, unmute” “Alexa, turn up/down the volume”
» TIP: You can also use the Alexa app to adjust the volume on your Amazon Echo devices.
Troubleshooting for Low Audio:
» Make sure that the 3.5mm audio cable is fully inserted into the Echo Dot.
» Make sure that you raise the volume on your Echo Dot.
» Make sure that you raise the volume on your phone.
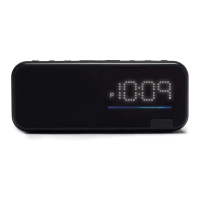
Low Battery
Indicator
When lit, backup
battery needs
replacing
PM
Indicator
When lit,
time is PM
Contact Us: 1•800•288•2792
For full warranty and full instructions
visit: www.ihome.com/support
THE DISPLAY
Amazon, Alexa, Echo Dot and all
related logos are trademarks of
Amazon.com, Inc. or its aliates.
Playing Audio On Your Echo Device
» NOTE: Backup battery only maintains clock settings
during a power interruption. Unit does NOT operate on battery.
DC 12V, 1.5A
OR
9
DC 12V, 1.5A
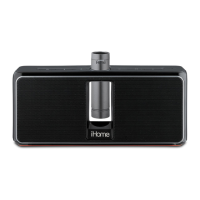
Bedside Speaker System
Model: iAV2v2
for Amazon Echo Devices
QUICK START GUIDE
» iAV2v2 » USB cable » Universal voltage adapter
» TIP: Press the + and – Buttons on iAV2v2 together during clock setting to switch
display from standard 12 hour to 24 hour display.
1 Clock Setting Button
Press and hold for 2 seconds
until clock starts flashing
to start clock setting. Adjust
with +/– Buttons. Press again
to complete clock setting.
NOTE: Alexa cannot set clock
2/3 +/– Setting Buttons
Press and release to adjust
clock during setting
(hold for rapid adjust)
4 Dimmer Button
Press and release to adjust
display brightness from high
to o.
5 Backup Battery Compartment
Unscrew door with Phillips
screwdriver. Insert 1 CR2450
battery as shown to maintain
clock setting during power
interruption.
6/7 AC adapter/DC Jack
Connect the included
AC adapter to the DC jack
located on the back of the
unit and connect the other
end to a working wall outlet.
8/10 USB Charging Ports
Connect a standard USB
cable (not included) to
charge mobile devices.
9 Hardwired AUX cable
BOTTOM
TOP
Amazon Echo Device Dock
»
Docking adapter
www.ihome.com Toll Free: 1-800-288-2792
Made in China Patents: www.ihome.com/patents
iAV2v2
MODEL
iAV2v2-A-A
Service Number:
DC 3V, CR2450 x 1Clock Backup:
DC 12V, 1.5AAC Adaptor:
Designed and Engineered in the USA
Made for the Amazon Dot (2nd Gen)
Manufactured & Serviced by SDI Technologies Inc.
RESET
RESET
TEST
TEST
Printed in ChinaiAV2v2-180719-A
FCC Information
This device complies with Part 15 of the FCC Rules, operation is subject to the following two conditions: (1) This
device may not cause harmful interference, and (2) this device must accept any interference received, including
interference that may cause undesired operation.
FCC Radiation Exposure Statement
The device has been evaluated to meet general RF exposure requirement.
The device can be used in portable exposure condition without restriction.
• Warning: Changes or modifications to this unit not expressly approved by the party responsible for compliance could void
the user’s authority to operate the equipment.
• NOTE: This equipment has been tested and found to comply with the limits for a Class B digital device, pursuant to Part 15
of the FCC Rules.
These limits are designed to provide reasonable protection against harmful interference in a residential installation. This
equipment generates, uses and can radiate radio frequency energy and, if not installed and used in accordance with the
instructions, may cause harmful interference to radio communications.
However, there is no guarantee that interference will not occur in a particular installation. If this equipment does cause harmful
interference to radio or television reception, which can be determined by turning the equipment o and on, the user is
encouraged to try to correct the interference by one or more of the following measures:
• Reorient or relocate the receiving antenna.
• Increase the separation between the equipment and receiver.
• Connect the equipment into an outlet on a circuit dierent from that to which the receiver is connected.
• Consult the dealer or an experienced radio/TV technician for help.
CAN ICES-3 (B)/NMB-3(B)
Canada Statement
This device complies with Industry Canada’s licence-exempt RSS standard(s). Operation is subject to the following two
conditions:
(1) This device may not cause interference; and
(2) This device must accept any interference, including interference that may cause undesired operation of the device.
Le présent appareil est conforme aux CNR d’Industrie Canada applicables aux appareils radio exempts de licence. L’exploitation
est autorisée aux deux conditions suivantes :
(1) l’appareil ne doit pas produire de brouillage;
(2) l’utilisateur de l’appareil doit accepter tout brouillage radioélectrique subi, même si le brouillage est susceptible d’en
compromettre le fonctionnement.
The device has been evaluated to meet general RF exposure requirement.
The device can be used in portable exposure condition without restriction.
le dispositif a été évalué à satisfaire l'exigence générale de l'exposition aux rf.
l'appareil peut être utilisé dans des conditions d'exposition portatif sans restriction.
WARNING/DISPOSAL OF UNIT
To dispose of the unit, follow the instructions below:
• Never dispose of used batteries/electronics with ordinary solid wastes, since they contain toxic substances.
• Always dispose of used batteries/electronics in accordance with the prevailing community regulations.
• Many electronics retailers now recycle batteries and other electronic components at no charge.
GENERAL BATTERY PRECAUTIONS
• Never use or charge a battery if it appears to be leaking, discolored, deformed, or in any way abnormal.
• Never disassemble the unit or attempt to remove battery as that could cause leakage of alkaline solution or other
electrolytic substances.
• Never expose a battery to any liquid.
• Never expose a battery to excessive heat such as direct sunlight or fire. Never use a battery pack in an unventilated vehicle
where excessive internal temperatures may be encountered.
• Always keep batteries out of the reach of infants and small children.
Model: iAV2v2
DC 12V, 1.5A
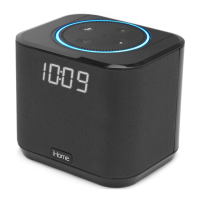
WHICH AMAZON ECHO DEVICE DO YOU HAVE?
Docking Your Amazon Echo Dot
» Remove the included Echo Input adapter. Align the rear of the Echo Dot (the side with
the USB port and Aux Jack) with the opening in the iAV2v2 dock well and place with
the ports facing the back.
Powering Your Amazon Echo Device
Docking Your Amazon Echo Input
» Separate the two-piece Echo Input adapter, then place the Echo Input between the top
and bottom adapters, leaving the connector ports accessible on the back. Close the
adapter by lining up the printed arrows. Insert into the iAV2v2 dock as shown above, and
gently push into place.
8
10
108
BACK
FRONT
DC 12V, 1.5A
RESET
RESET
TEST
TEST
OR
6
7
6
1
2
3
4
5
10
9
8
7
» For Echo Dot: Connect the included USB cable to USB Charge Port on the iAV2v2.
» For Echo Input: Connect the USB cable to USB Charge Port on the iAV2v2.
» Connect the other end of the cable to the USB port on your Echo device.
» Connect the AC power adapter to the DC jack.
 Loading...