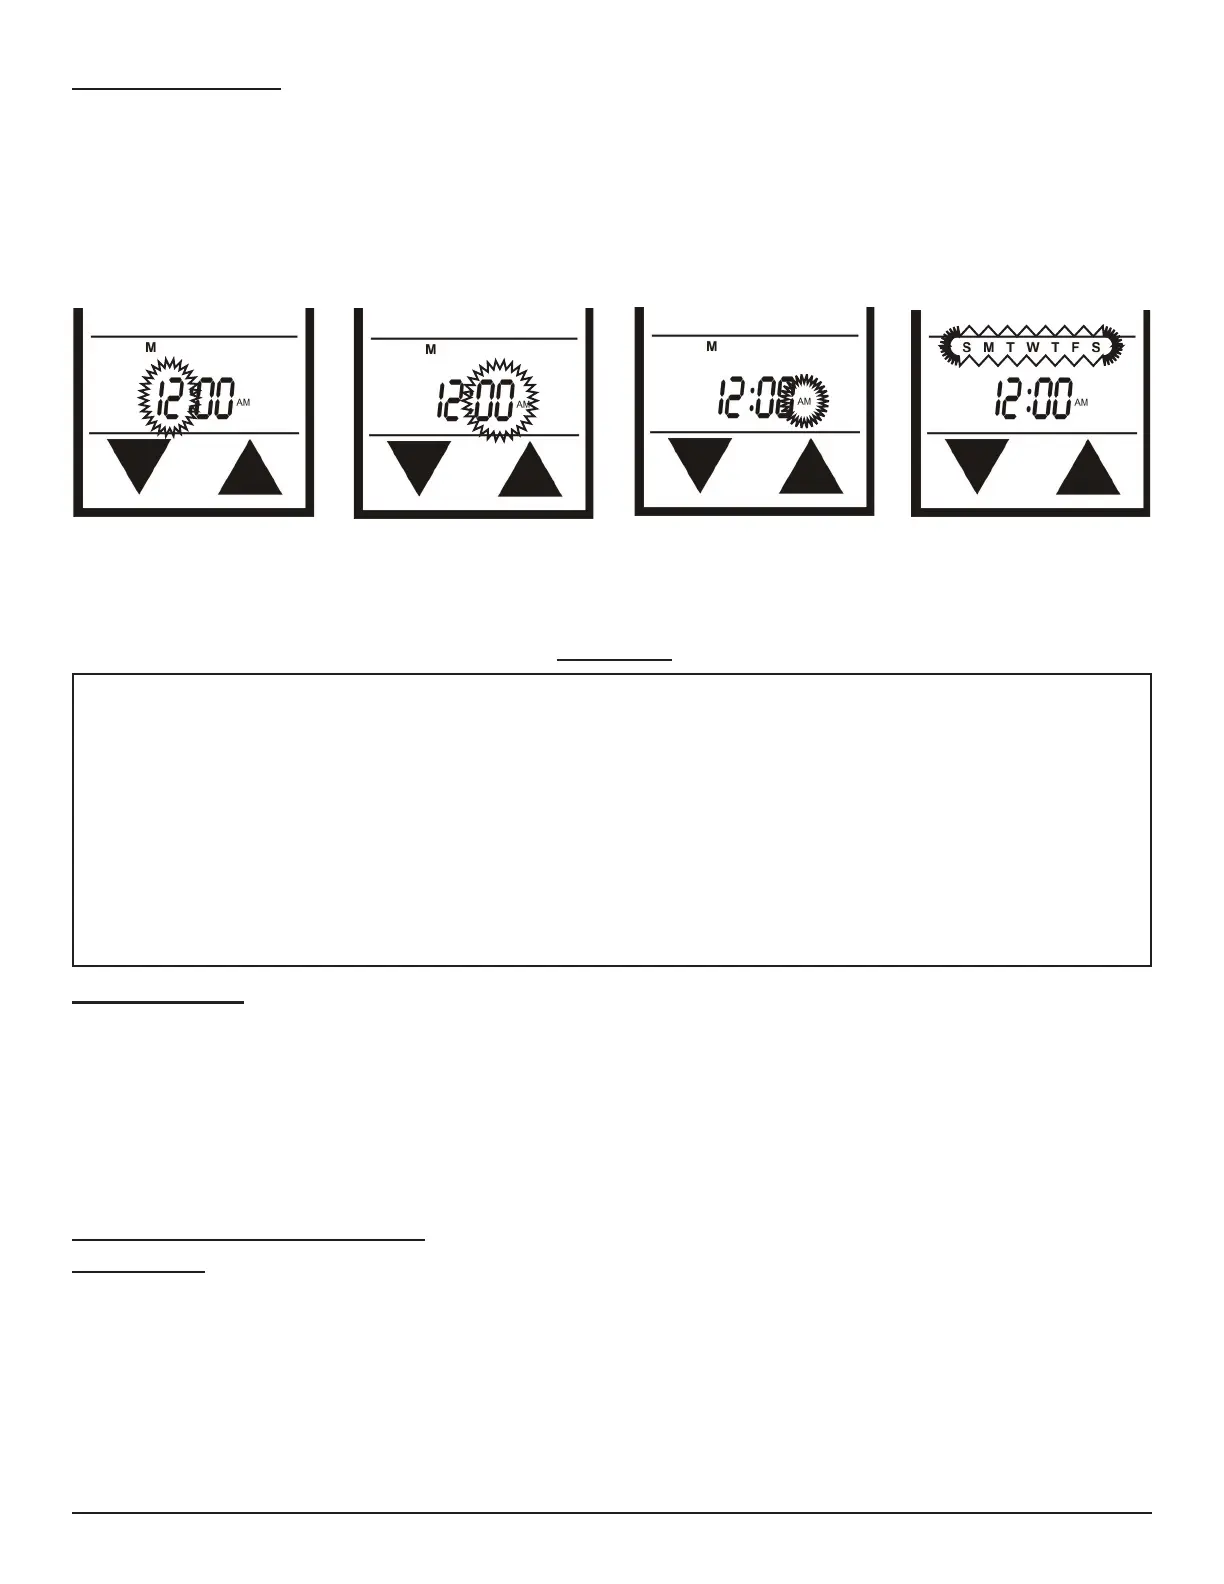
Press and hold the • SET button, or touch the SET section on the touch screen, for 5 seconds. The hour section should
begin to ash. (Fig. #5)
Use the • UP and DOWN touch buttons to select the hour, then press SET.
The minutes will be ashing. Use the • UP and DOWN touch buttons to select the minute, the press SET. (Fig. #6)
The AM PM will be ashing. Use the • UP and DOWN touch buttons to select one of them, then press SET. (Fig. #7)
One of the days of the week will be ashing (above the clock). Select the correct day by pressing the • UP and DOWN
touch buttons, then press SET. Your time will automatically be accepted. (Fig. #8)
SETTING THE CLOCK
Fig. 5
Fig. 6
Fig. 7
Fig. 8
IHP: RC-S-TOUCH
REV. 3-18-14 Page 3
WARNING
This remote control system must be installed exactly as outlined in these instructions. Read all instructions completely
before attempting installation. Follow instructions carefully during installation. Any modications of this remote control
or any of its components will void the warranty and may pose a re hazard.
Do not connect any gas valve or electronic module directly to 110-120VAC power. Consult gas appliance manufac-
turer’s instructions and wiring schematics for proper placement of all wires. All electronic modules are to be wired to
manufacturer’s specications.
The following wiring diagrams are for illustration purpose only. Follow instructions from manufacturer of gas valve and/
or electronic module for correct wiring procedures. Improper installation of electric components can cause damage to
electronic module, gas valve and remote receiver.
INSTALLATION
The remote receiver can be either wall-mounted in a standard plastic switch box (not metal) or placed on or near the
replace hearth. Preferably, the remote receiver should be wall-mounted in a plastic switch box, as this will protect its
electronic components from the heat produced by the gas appliance. The remote receiver should be kept away from
temperatures exceeding 130º F. Battery life is also signicantly shortened if batteries are exposed to temperatures 130º F
or higher.
Before installation make sure the remote receiver slide switch is in the OFF position. After installation be sure that the
slide switch is moved to the REMOTE position.
MOUNTING THE REMOTE RECEIVER
WALL MOUNT
When wall mounting the remote receiver, longer wires (not included) are required to connect to the gas valve or electronic
module. These wires must:
Be at least 18-gage (AWG)•
Be no longer than 20-feet•
Have no splices•
P/N 900259-00 Rev. A
 Loading...