20
67387
Nick Servo
67392
Roll Servo
67387
cut off
67365
67387
RC installation
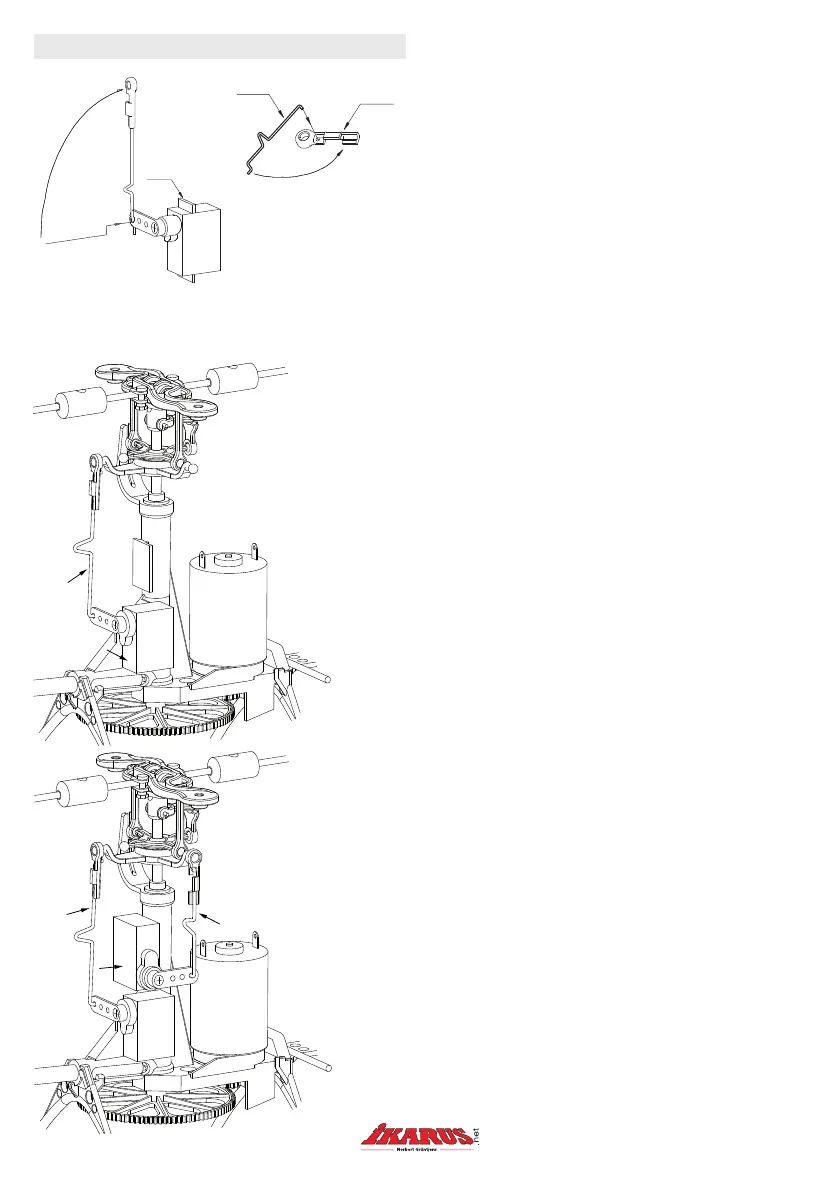
First cut off the xing lugs off both servos with a
sharp knife or an edge cutter. Fit the rod by rst put-
ting the L-shaped end of the steel wire in the ball link
# 67365 and swivel it through 90° so it snaps in.
Connect the servos (not the motors, yet!) to the
receiver and connect the ight battery. Centre the
Transmitter trims. Now push the servo arms hori-
zontally onto the servos and screw them on. Now Z-
shaped ends of the rods are put in the outer hole of
the servo arm and turned upwards. Use the longer
rod to connect fore and after cyclic servo. Start with
the nick servo. Now snap the clip onto the ball of the
swashplate as shown. Now pre position the servo
against its mount and adjust it until the swashplate
is perpendicular to the rotor shaft when seen from
the side. When in this position, pull the servo away a
little and put CA glue on the surface. Press the servo
back into the previous position.
Next t the roll servo in the same way. The swash-
plate must be perpendicular to the rotor shaft about
the roll axis.Glue the servo on as described above.
So as to provide additional adjustment apart from
transmitter adjustment, push-rods # 67387 and #
67392 have been tted with adjusters. The lengths
of the rods can be easily adjusted by bending these
adjusters out or pressing them together. This way,
with the transmitter trim in the centre you can adjust
the swashplate exactly.
The swashplate should be perpendicular to the rotor
shaft in all planes. Now t the Piccoboard. NOTE:
Do not yet connect the board to the batteries! Now
continue with the assembly instructions. In particu-
lar the transmitter must be turned on rst, then the
receiver!
Join all the connections apart from the ight battery,
and then place the board on the front end so that the
connectors face the rear and the LEDs forwards. All
wires must be laid so that they cannot possibly come
into contact with moving parts of the helicopter.
Now the Piccoboard is afxed with the double sided
adhesive tape.

 Loading...