Do you have a question about the IKEA ASPELUND CHEST/2DRAWERS 34X31" and is the answer not in the manual?
| Product Name | IKEA ASPELUND CHEST/2DRAWERS 34X31" |
|---|---|
| Category | Indoor Furnishing |
| Number of Drawers | 2 |
| Color | White |
| Material | Particleboard, Fiberboard, Acrylic paint |
| Depth of drawer (inside) | 13 3/8 " (34 cm) |
| Width | 34 1/4 " (87 cm) |
Illustrates the assembly of drawer slides and their attachment to the furniture frame.
Shows how to insert the assembled drawers into the main unit.
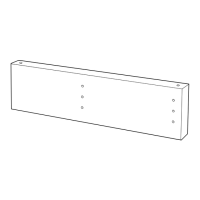
Details attaching a reinforcing element to the furniture frame using screws.
Demonstrates the process of attaching drawer handles with screws.
Shows the attachment of base panels using various fasteners.
Illustrates the installation of the back panel into the main structure.
Shows connecting base panels using dowels and screws.
Illustrates attaching side panels to the base using screws.
Depicts the assembly of a drawer box structure.
Shows connecting panels for a drawer unit.
Illustrates extending a frame component using a securing mechanism.
Shows the assembly of a drawer unit.
Details assembling the main frame components with fasteners.
Shows attaching vertical supports to the base structure.
Illustrates assembling support structures with fasteners.
Shows attaching rails to the side panels.
Depicts inserting the base panel into a drawer.
Shows detailed assembly steps for a drawer.
Shows securing the assembled unit to a wall or corner.
Illustrates attaching drawer side panels.
Shows joining frame elements together.
Illustrates securing the main frame with fasteners.
Shows adding reinforcement to the furniture frame.
Illustrates attaching the top panel of the unit.
Shows final assembly steps for the unit.
Provides a close-up view of drawer slide installation.
Shows attaching the top surface of the unit.
Illustrates connecting side panels to the frame.
Shows adding reinforcement to the frame structure.
Illustrates assembling the base structure of the unit.
Shows the assembly of a drawer box.
Depicts attaching the front panel to a drawer.
Illustrates assembling drawer slides.