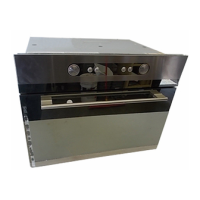
MICROWAVE HOOD COMBINATION
INSTALLATION INSTRUCTIONS
This product is suitable for use above electric or gas cooking products up to and including 36" (91.4 cm) wide.
The installation instructions cover different models, so the appearance of your particular model may be different from
the illustration version.
COMBINACIÓN MICROONDAS CAMPANA -
INSTRUCCIONES DE INSTALACIÓN
Esta unidad puede usarse encima de productos para cocción eléctricos o a gas de hasta 36" (91,4 cm) de ancho.
Les instructions d'installation couvrent différents modèles; par conséquent, l'aspect de votre modèle peut être différent de celui
de la version illustrée.
INSTRUCTIONS D’INSTALLATION
DE L’ENSEMBLE FOUR À MICRO-ONDES/HOTTE
Ce produit est conçu pour l’utilisation au-dessus d’appareils de cuisson électriques ou à gaz de 36" (91,4 cm) de largeur ou moins.
Las instrucciones de instalación abarcan varios modelos, por lo que el aspecto de su modelo específico puede diferir del que aparece
en la ilustración.
MICROWAVE HOOD
COMBINATION SAFETY .........................2
INSTALLATION REQUIREMENTS ..........2
Tools and Parts ...................................... 2
Remove Cardboard Template ...............3
Location Requirements .........................3
Product Dimensions ..............................3
Electrical Requirements ........................4
INSTALLATION INSTRUCTIONS ............4
Remove Mounting Plate ........................4
Rotate Blower Motor .............................4
Locate Wall Stud(s) ...............................6
Mark Rear Wall ......................................7
Drill Holes in Rear Wall ..........................7
Attach Mounting Plate to Wall ..............8
Prepare Upper Cabinet .........................8
Install Damper Assembly ......................9
Install the Microwave Oven ...................9
Complete Installation ............................10
VENTING DESIGN SPECIFICATIONS .... 11
ASSISTANCE ...........................................12
Replacement Parts ................................ 12
Accessories ...........................................12
SEGURIDAD DE LA COMBINACIÓN
MICROONDAS CAMPANA .....................13
REQUISITOS DE INSTALACIÓN ............13
Piezas y herramientas ...........................13
Quite la plantilla de cartón ....................14
Requisitos de ubicación ........................ 14
Dimensiones del producto ....................14
Requisitos eléctricos .............................15
INSTRUCCIONES DE INSTALACIÓN ....15
Retire la placa de montaje ....................15
Rote el motor del soplador ...................15
Ubique el(los) pie(s) derecho(s)
de pared ................................................17
Marque la pared posterior .....................18
Taladre orificios en la pared posterior ... 19
Ajuste la placa de montaje a la pared ...19
Preparación del armario superior .........20
Instale el ensamblaje de la compuerta
de tiro ....................................................20
Instalación del horno de microondas ...21
Complete la instalación ......................... 22
ESPECIFICACIONES PARA
EL DISEÑO DE LA VENTILACIÓN .........23
ASISTENCIA.............................................24
Refacciones ........................................... 24
Accesorios ............................................. 24
SÉCURITÉ DE L’ENSEMBLE FOUR
À MICRO-ONDES/HOTTE ......................25
EXIGENCES D’INSTALLATION ..............25
Outillage et pièces ................................. 25
Dépose du gabarit de carton ................26
Exigences d’emplacement ....................26
Dimensions du produit ..........................26
Spécifications électriques .....................27
INSTRUCTIONS D’INSTALLATION ........27
Dépose de la plaque de montage .........27
Réorientation du moteur
du ventilateur ......................................... 27
Identifier la position du/des poteau(x)
du colombage mural .............................29
Tracé sur le mur arrière .........................30
Perçage de trous dans le mur arrière ...31
Fixation de la plaque de montage
sur lemur ................................................31
Préparation du placard supérieur .........32
Installation du module du clapet
anti-reflux
.............................................. 32
Installation du four à micro-ondes ........33
Achever l’installation .............................34
SPÉCIFICATIONS / CONCEPTION
DU CIRCUIT D’ÉVACUATION.................35
ASSISTANCE ...........................................36
Pièces de rechange ...............................36
Accessoires ...........................................36
Table of Contents / Índice / Table des matières
W10823833A