Do you have a question about the IKEA NUTID MWC6 and is the answer not in the manual?
Checks and preparations before electrical connection.
Read and keep safety information for future reference.
Avoid drying combustible items to prevent fire hazards.
Specific safety advice regarding cooking or reheating eggs.
General guidelines for safe and proper operation of the oven.
Prohibition of deep-frying due to uncontrolled oil temperature.
Safety advice for heating liquids to prevent boil-overs.
Explanation of the automatic safety function and child lock.
Table detailing microwave power levels and their suggested uses.
How to use the Jet Start function for rapid reheating.
Guidelines for using Jet Defrost based on food weight.
How to use Auto Reheat for frozen or chilled ready-made food.
How to use Auto Cook for designated food categories.
How to use Auto Forced Air Combi for raw or frozen items.
Overview of cleaning, what to avoid, and importance of cleanliness.
Essential checks to perform before calling for service.
Details to provide when contacting service.
Warning about only allowing trained technicians to service the oven.
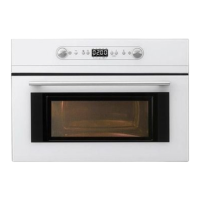
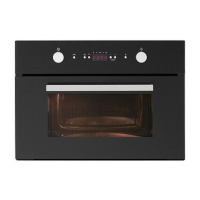
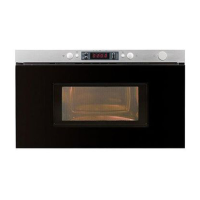
This document provides a comprehensive guide for the IKEA NUTID MWC 6 microwave oven, covering its installation, various cooking functions, safety precautions, and maintenance.
The installation process requires following the separate mounting instructions provided with the appliance. Before connecting, it's crucial to verify that the voltage indicated on the rating plate matches your home's voltage supply. The oven cavity must be empty before mounting. A thorough check for any damage to the appliance, including the mains cord and plug, is necessary. The oven door should close firmly against its support. After ensuring no damage, empty and clean the interior with a soft, damp cloth. The appliance should not be operated if the mains cord or plug is damaged, if it's not working properly, or if it has been dropped. The mains cord or plug should not be immersed in water and must be kept away from hot surfaces to prevent electrical shock, fire, or other hazards. Earthing of the appliance is compulsory, and the manufacturer disclaims responsibility for injuries or damages resulting from non-observance of this requirement. The oven will only operate if the door is firmly closed.
The manual emphasizes several safety precautions. It warns against using or storing flammable materials near the oven, as fumes can create a fire hazard or explosion. The microwave oven should not be used for drying textiles, paper, spices, herbs, wood, flowers, fruit, or other combustible materials, as this could lead to fire. If a fire occurs inside the oven, the door should be kept closed, the oven turned off, and the power cord disconnected or the circuit breaker shut off. Overcooking food can also lead to fire. The oven should not be left unattended, especially when using paper, plastic, or other combustible materials in the cooking process, as these can char or burn and some plastics may melt if used when heating food. Corrosive chemicals or vapors should not be used in the appliance, which is designed for industrial or laboratory use.
For households with children, the appliance should only be used under adult supervision and after adequate instruction to ensure safe use. This appliance is not intended for use by persons with reduced physical, sensory, or mental capabilities unless supervised or instructed by a responsible person. Accessible parts may become hot during use, so young children should be kept away. The door seals and door seal areas must be regularly inspected for damage. If damaged, the appliance should not be operated and must be repaired by a trained service technician.
The manual provides specific precautions for certain foods. For liquids, such as beverages or water, overheating beyond the boiling point without visible bubbling can occur, leading to a sudden boil-over. To prevent this, avoid straight-sided containers with narrow necks, stir the liquid before placing it in the oven, and leave a teaspoon in the container. After heating, allow the liquid to stand for a short time, stirring again before carefully removing the container. When heating baby food or liquids in a baby bottle or jar, always stir and check the temperature before serving to ensure even heat distribution and prevent scalding or burns. The lid and teat must be removed before heating.
The appliance is designed for domestic use only and should not be operated without food in the oven when using microwaves, as this can damage the appliance. If practicing operation, a glass of water should be placed inside to absorb microwave energy. The cavity should not be used for storage. Wire twist-ties must be removed from paper or plastic bags before placing them in the oven. Deep-frying is not recommended as the oil temperature cannot be controlled. Hot pads or oven mitts should be used when touching containers, oven parts, and pans after cooking.
The oven features push-push knobs that are aligned with the panel buttons at delivery. These knobs slide out when pushed, allowing access to their various functions. They do not need to protrude during operation and can be pushed back into the panel once settings are complete.
The oven is compatible with various accessories available on the market. Users should ensure accessories are suitable for microwave use and are oven-proof. When placing food and accessories in the oven, ensure they do not come into contact with the interior, especially metal or metal parts, as this can cause sparking and damage the oven. The turntable must always turn freely.
The Turntable Support should be used under the Glass turntable, and no other utensils should be placed on it. The Glass Turntable is suitable for all cooking methods, collecting drips and food particles to prevent staining. The Baking Plate is for forced air cooking or grilling only and should never be used with microwaves. The Wire Rack is used for forced air, grill, and combi cooking, elevating food closer to the grill element when grilling without microwaves. The Baby Bottle Holder is for heating baby food in tall bottles.
An automatic safety function activates one minute after the oven returns to "stand by mode" (when the 24-hour clock is displayed or the display is blank if the clock is not set). To release this lock, the door must be opened and closed. Otherwise, the display will show "DOOR".
Cooking can be paused by opening the door to check, turn, or stir food; the settings will be maintained for 10 minutes. To continue, close the door and press the Start button once. Pressing the Start button twice will add 30 seconds to the cooking time. To stop cooking, remove the food, close the door, and press the STOP button. A beep will sound once a minute for 10 minutes when cooking is finished. Pressing STOP or opening the door cancels the signal. The oven retains settings for 60 seconds after cooking if the door is opened and closed.
The "Doneness" feature is available for Auto Reheat, Auto Cook, and Auto Forced Air Combi functions, allowing users to adjust the end result. While the oven chooses a default setting for optimal results, users can select a higher or lower doneness level using the adjust knob immediately after pressing the Start button. This adjustment can only be made within the first 20 seconds of operation.
After a function finishes, the oven performs a normal cooling procedure before automatically switching off. This procedure can be interrupted by opening the door without harming the oven.
The kitchen timer measures exact time for various purposes, such as cooking eggs or dough rising. To set it, turn the multifunction knob to the zero position, then use the adjust knob to set the desired time. The timer starts counting down after one second, and an acoustic signal sounds when it finishes.
When the appliance is first plugged in or after a power failure, the display is blank. If the clock is not set, the display remains blank until a cooking time is set. To set the clock, turn the multifunction knob to the zero position, press the Select button for 3 seconds until the left-hand digit (hours) flickers, use the adjust knob to set the hours, press Select again for the minutes to flicker, use the adjust knob to set the minutes, and press Select again. The clock is then set. To remove the clock from the display, press the Select button for 3 seconds, then the Stop button. To reinstate it, follow the same procedure. Keep the door open while setting the clock for 10 minutes to complete the setting; otherwise, each step must be completed within 60 seconds.
This function is for normal cooking and reheating of foods like vegetables, fish, potatoes, and meat. To use, turn the multifunction knob to the microwave position, set the cooking time with the adjust knob, press Select to choose the power level, set the preferred power level with the adjust knob, and press Start. Once cooking starts, the time can be increased in 30-second steps by pressing Start, or altered by turning the adjust knob. The power level can also be changed during cooking by pressing Select and then turning the adjust knob.
For manual defrosting, follow the "cook & reheat with microwaves" procedure and choose a power level of 160 W. Regularly check and inspect the food. Experience will help determine the necessary times for various amounts. Frozen food in plastic bags, films, or cardboard can be placed directly in the oven if they contain no metal parts. Shallow packets defrost faster than deep blocks. Separate pieces as they begin to defrost. Shield areas of food that warm quickly (e.g., chicken legs) with small pieces of aluminum foil. Turn large joints halfway through the defrosting process. Boiled food, stews, and meat sauces defrost better if stirred. It's best to under-thaw food slightly and allow it to finish defrosting during standing time, which improves the result by evenly distributing temperature.
This function is used for automatic defrosting based on food type and weight, only for net weights between 100g and 3kg. Always place food on the glass turntable. To use, turn the multifunction knob to the Auto position, press the Auto button to select the desired auto function, turn the adjust knob to choose the food class, press Select (default weight is displayed), turn the adjust knob to set the weight, and press Start. Midway through the process, the oven stops and prompts to "TURN FOOD." Open the door, turn the food, close the door, and press Start to restart. If the food isn't turned, the oven continues automatically after 2 minutes, but the defrosting time will be longer.
For food with weight outside the recommended range or not listed in the table, follow the "Cook & Reheat with microwaves" procedure and choose 160 W. If the food is warmer than deep-freeze temperature (-18°C), choose a lower weight; if colder, choose a higher weight.
The grill function quickly gives food a pleasant brown surface. For foods like cheese, toast, steaks, and sausages, place the wire grid on top of the baking plate. To use, turn the multifunction knob to the grill position, set the cooking time with the adjust knob, and press Start. Do not leave the oven door open for long periods during grilling, as this causes a temperature drop. Ensure utensils are heat resistant and oven-proof. Do not use plastic, wood, or paper utensils, as they will melt or are unsuitable.
This function combines grilling with microwaves to give food a brown surface while cooking it. To use, turn the multifunction knob to the Grill Combi position, set the power level with the adjust knob, press Select to choose cooking time, set the cooking time with the adjust knob, and press Start. Ensure utensils are heat resistant and oven-proof. Do not use plastic, wood, or paper utensils. The maximum microwave power level is factory-preset. Use the wire rack to allow air circulation around the food.
This function is used to cook gratins, lasagne, poultry, and baked potatoes. Place food on the wire rack or glass turntable. To use, turn the multifunction knob to the Turbo Grill position, set the power level with the adjust knob, press Select to choose cooking time, set the cooking time with the adjust knob, and press Start. The maximum microwave power level is factory-preset.
This function preheats the empty oven. Do not place food before or during preheating, as it will burn. To use, turn the multifunction knob to the Quick heat position, set the temperature with the adjust knob, and press Start. During heating, digits flicker and "PRE- HEAT" is displayed until the set temperature is reached. Once heating starts, the temperature can be adjusted by turning the multifunction knob. The oven maintains the set temperature for 10 minutes, waiting for food insertion and a Forced Air function to begin cooking. Preheating is always done with an empty oven.
This function cooks meringues, pastry, sponge cakes, soufflés, poultry, and roast meats. To use, turn the multifunction knob to the Forced Air position, set the temperature with the adjust knob, press Select to choose cooking time, set the cooking time with the adjust knob, and press Start. The default setting is 175°C. Use the wire rack for air circulation and the baking plate for small items like cookies or rolls. During heating, digits flicker until the set temperature is reached. Once heating starts, the temperature can be adjusted by turning the adjust knob.
This function cooks from raw or frozen, such as gratins, lasagne, poultry, and jacket potatoes. Place food on the wire rack or glass turntable. To use, turn the multifunction knob to the Auto position, press the Auto button to select the desired auto function, turn the adjust knob to choose the food class, press Select (default weight is displayed), turn the adjust knob to set the weight, and press Start. For chicken and lasagne, ensure the dish is oven-proof and allows microwaves to pass through. Always use the baking plate for cookies and canned or frozen rolls, greasing it lightly or covering it with baking paper. For cookies and rolls, the oven preheats; when the correct temperature is reached, it prompts to "Add Food." Open the door, place the baking plate with food on the guides, close the door, and press Start to restart.
This function reheats ready-made food, either frozen or chilled. Place food on a microwave-safe heat-proof dinner plate or dish. To use, turn the multifunction knob to the Auto position, press the Auto button to select the desired auto function, and press Start. Midway through cooking, the oven stops and prompts to "Stir Food." Open the door, stir or turn the food, close the door, and press Start to restart. If the food isn't turned or stirred, the oven continues automatically after 2 minutes.
When saving or plating a meal for reheating, arrange thicker, denser food to the outside of the plate and thinner, less dense food in the middle. 1-2 minutes of standing time improves results, especially for frozen food. Plastic foil should be scored or pricked with a fork to relieve pressure and prevent bursting as steam builds up. Place thin slices of meat on top of each other or interlace them. Thicker slices like meatloaf and sausages should be placed close to each other.
For food not listed in the table or with weight outside the recommended range, follow the "Cook & Reheat with microwaves" procedure.
This function is for cooking only, using the categories listed in the table. Place food onto a microwave-safe heat-proof dinner plate or dish. To use, turn the multifunction knob to the Auto position, press the Auto button to select the desired auto function, turn the adjust knob to choose the food class, press Select (default weight is displayed), turn the adjust knob to set the weight, and press Start. Midway through cooking, the oven stops and prompts to "STIR FOOD." Open the door, stir the food, close the door, and press Start to restart. If the food isn't turned or stirred, the oven continues automatically after 2 minutes.
For baked potatoes, prick them and place in a microwave-safe and oven-proof dish. Turn potatoes when the oven beeps. Be aware that the oven, dish, and food are hot. For fresh vegetables, cut into even pieces, add 2-4 tablespoons of water, and cover. Stir when the oven beeps. For frozen vegetables, cook under cover and stir when the oven beeps. For canned vegetables, pour away most liquid and cook in a microwave-safe dish with cover. For popcorn, cook only one bag at a time; if more is needed, cook bags one after another.
For food not listed in the table or with weight outside the recommended range, follow the "Cook & Reheat with microwaves" procedure.
Cleaning is the only maintenance normally required. Failure to maintain a clean oven can lead to deterioration of the surface, affecting the appliance's life and potentially creating a hazardous situation. Do not use metal scouring pads, abrasive cleansers, steel-wool pads, or gritty washcloths, as these can damage the control panel and oven surfaces. Instead, use a sponge with a mild detergent or a paper towel with spray glass cleaner, applying the cleaner to the paper towel, not directly on the oven.
Regularly remove the turntable and support to wipe the oven base clean, especially after spills. The oven is designed to operate with the turntable in place. Do not operate the microwave oven when the turntable is removed. Use a mild detergent, water, and a soft cloth to clean interior surfaces, the front and rear of the door, and the door opening. Do not allow grease or food particles to build up around the door. For stubborn stains, boil a cup of water in the oven for 2 or 3 minutes; steam will soften the marks. Adding lemon juice to a cup of water and boiling it for a few minutes can eliminate odors. Do not use steam cleaning appliances.
The grill element does not require cleaning as intense heat burns off splashes, but the ceiling above it may need regular cleaning with warm water, detergent, and a sponge. If the grill is not used regularly, run it for 10 minutes monthly to burn off splashes and reduce fire risk. To clean the ceiling, gently push the fastening thread towards the back of the ceiling, then lower it to release the grill element. Return the fastening thread to its original position after cleaning.
Dishwasher-safe items include the turntable support, glass turntable, wire rack, baking plate, and baby bottle holder.
If the oven does not work, perform the following checks before calling for service:
These checks help avoid unnecessary service calls. When calling for service, provide the serial and type number from the service label and consult your warranty booklet.
If the mains cord needs replacing, it must be replaced by the original mains cord available from the service organization, and only by a trained service technician. Service should only be carried out by a trained service technician, as it is hazardous for untrained individuals to perform repairs involving the removal of covers that protect against microwave energy. Do not remove any cover.
| Installation | Built-in |
|---|---|
| Grill power | 800 W |
| Number of power levels | 5 |
| Turntable | Yes |
| Control type | Electronic |
| Timer | Yes |
| Child lock | Yes |
| Width | 59.5 cm |
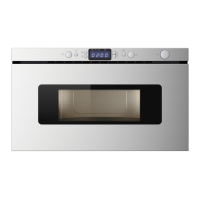
| Color | Stainless steel |
| Material | Stainless steel |
| Turntable diameter | 255 mm |