EasyManua.ls Logo

IKEA NUTID MWC 6 - User Manual

IKEA NUTID MWC 6
26 pages
Print Icon
To Next Page IconTo Next Page
Loading...
1
NUTID
MWC 6
GB
CZ
DE
DK
ES
FI
FR
GR
HU
IT
NL
NO
PL
PT
RU
SE
SK

Other manuals for IKEA NUTID MWC 6

Question and Answer IconNeed help?

Do you have a question about the IKEA NUTID MWC 6 and is the answer not in the manual?

Summary

Installation and Setup

Mounting the Appliance

Instructions for physically attaching the appliance.

Prior to Electrical Connection

Checks and preparations before electrical connection.

After Connecting the Appliance

Actions and conditions after the appliance is connected.

Important Safety Instructions

General Safety Guidelines

Key safety rules for operating the microwave oven.

Specific Safety Warnings

Detailed warnings about misuse, materials, and components.

Egg Safety Precautions

Specific warning regarding cooking or reheating eggs.

General Precautions and Usage

General Usage Precautions

General advice and warnings for using the appliance.

Liquid Heating Safety

Precautions for heating liquids to prevent boil-overs.

Deep-Frying Prohibition

Prohibition of deep-frying due to temperature control issues.

Knob Operation Guide

Explanation of how the oven knobs operate.

Appliance Accessories

Turntable Support and Glass Turntable

Instructions for using the turntable support and glass turntable.

Baking Plate and Wire Rack

Usage guidelines for the baking plate and wire rack.

Baby Bottle Holder and Child Lock

Guidance on using the baby bottle holder and child lock safety feature.

Pause and Stop Cooking

Pausing and Resuming Cooking

Steps to pause, resume, or stop the cooking process.

Doneness Adjustment

Customizing Food Doneness

How to adjust the doneness level for different cooking functions.

Cooling Down Procedure

Managing the Cooling Process

Information on the oven's cooling procedure and interruption.

Kitchen Timer and Clock Functions

Using the Kitchen Timer

How to set and use the kitchen timer function.

Setting and Managing the Clock

Steps to set, remove, and reinstate the clock display.

Cook & Reheat with Microwaves

Basic Microwave Operation

Steps for using the microwave function for cooking and reheating.

Choosing Microwave Power Level

Guide to selecting appropriate power levels for microwave cooking.

Jet Start and Manual Defrost

Quick Reheating Function (Jet Start)

How to use the Jet Start for quick reheating of liquids.

Manual Defrosting Procedure

Guidelines for defrosting food using manual settings.

Jet Defrost Operation

Using the Jet Defrost Function

Steps for using the automatic defrost function based on weight.

Turning Food During Defrost

Instruction to turn food midway through the defrost process.

Jet Defrost Weight Guidelines

Recommended Weights and Hints

Table and advice for defrosting various food types by weight.

Grill Function

Using the Grill Function

How to use the grill for browning food surfaces.

Grilling Safety and Utensils

Warnings about using the grill and suitable utensils.

Grill Combi Cooking

Combined Grill and Microwave Cooking

How to cook food with both grilling and microwave functions.

Grill Combi Power Levels

Suggested power levels for various foods in Grill Combi mode.

Turbo Grill Combi Function

Cooking with Turbo Grill Combi

How to use the Turbo Grill Combi function for specific dishes.

Turbo Grill Combi Power Levels

Suggested power levels for Turbo Grill Combi cooking.

Quick Heat Preheating

Preheating the Oven

How to use the Quick Heat function to preheat the oven.

Preheating Safety Precautions

Warnings about placing food during preheating.

Forced Air Cooking

Cooking with Forced Air

How to use the Forced Air function for baking and roasting.

Forced Air Temperature and Utensils

Default temperature and recommended utensils for Forced Air.

Forced Air Combi Cooking

Combined Forced Air and Microwave Cooking

How to cook using both Forced Air and microwave functions.

Forced Air Combi Power Levels

Suggested power levels for Forced Air Combi cooking.

Auto Reheat Function

Reheating Ready-Made Food

Steps for reheating pre-prepared food using Auto Reheat.

Reheating Techniques and Tips

Advice on arranging food and using covers for reheating.

Auto Reheat Food Guide

Specific Foods for Auto Reheat

Guidance on reheating specific food items like soup, milk, and casseroles.

Auto Cook Function

Cooking Specific Foods with Auto Cook

How to use Auto Cook for designated food categories.

Auto Cook Techniques and Tips

Advice on stirring, covering, and arranging food for Auto Cook.

Auto Cook Food Guide

Specific Foods for Auto Cook

Guidance for cooking baked potatoes, vegetables, and popcorn.

Auto Forced Air Combi Operation

Cooking from Raw or Frozen

How to use Auto Forced Air Combi for raw or frozen food.

Preheating for Cookies and Rolls

Steps for preheating the oven for specific baked goods.

Auto Forced Air Combi Weights

Recommended Weights for Auto Forced Air

Recommended weights for chicken, lasagne, cookies, and rolls.

Maintenance and Cleaning

General Cleaning Procedures

Instructions for regular cleaning and maintenance of the oven interior and surfaces.

Cleaning Specific Components

How to clean the turntable, wire rack, baking plate, and grill element.

Troubleshooting Guide

Common Oven Issues and Checks

Steps to check if the oven is not working before calling service.

Service and Repair Safety

Guidance on who should perform service and safety precautions.

Environmental Hints and Technical Specifications

Product Disposal and Recycling

Information on proper disposal and recycling of the appliance.

Appliance Technical Specifications

Key technical details like voltage, power, and dimensions.

Overview

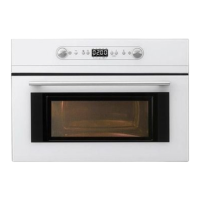
This document describes the IKEA NUTID MWC 6 microwave oven, a domestic appliance designed for various cooking and reheating tasks.

Function Description

The NUTID MWC 6 offers a range of cooking functions, including:

  • Cook & Reheat with Microwaves: This function is for normal cooking and reheating of foods like vegetables, fish, potatoes, and meat. It allows for setting cooking time and power level (JET (900 W), 750 W, 650 W, 500 W, 350 W, 160 W, 90 W, 0 W). The time can be increased in 30-second steps, and both time and power level can be adjusted during cooking.
  • Jet Start: Used for quick reheating of foods with high water content, such as clear soups, coffee, or tea. It automatically starts with maximum microwave power and a 30-second cooking time, which can be increased in 30-second increments or adjusted with the knob.
  • Manual Defrost: This function allows for manual defrosting of various foods using a 160 W power level. Users are advised to check and inspect food regularly, turn large joints halfway through the process, and allow standing time for even temperature distribution.
  • Jet Defrost: Specifically for defrosting food with a net weight between 100 g and 3 kg. It requires selecting a food class (Meat, Poultry, Fish, Vegetables, Bread) and setting the weight. The oven prompts the user to turn the food midway through the process. If the food is warmer than -18°C, a lower weight should be chosen; if colder, a higher weight.
  • Grill: Designed to quickly give a pleasant brown surface to foods like cheese, toast, steaks, and sausages. Food should be placed on a wire grid on top of the baking plate.
  • Grill Combi: Combines grilling with microwave cooking to brown food while it cooks. Suitable for vegetables, gratins, poultry, lasagne, fish, and frozen gratins. Power levels range from 90 W to 650 W.
  • Turbo Grill Combi: Similar to Grill Combi, but specifically for cooking gratins, lasagne, poultry, and baked potatoes. Food should be placed on a wire rack or glass turntable. Power levels range from 0 W (browning only) to 650 W.
  • Quick Heat: Preheats the empty oven to a set temperature. Food should not be placed in the oven during preheating. The oven maintains the set temperature for 10 minutes, allowing time to insert food and select a Forced Air function for cooking.
  • Forced Air: Used for cooking meringues, pastry, sponge cakes, soufflés, poultry, and roast meats. It allows setting temperature and cooking time. The default setting is 175°C.
  • Forced Air Combi: Combines forced air cooking with microwaves. Suitable for roast meats, poultry, jacket potatoes, frozen convenience foods, sponge cakes, pastry, fish, and puddings. It allows setting temperature, microwave power level, and cooking time.
  • Auto Reheat: Reheats ready-made food, either frozen or chilled. Food should be placed on a microwave-safe, heat-proof dinner plate or dish. Food categories include Dinner Plate, Soup, Frozen Portion, Milk, and Casserole. The oven may prompt to stir food midway.
  • Auto Cook: For cooking specific food categories only, including Baked Potatoes, Fresh Vegetables, Frozen Vegetables, Canned Vegetables, and Popcorn. The oven may prompt to stir or turn food midway.

Important Technical Specifications

  • Supply Voltage: 230 V/50 Hz
  • Rated Power Input: 2800 W
  • Fuse: 16 A (UK 13 A)
  • MW Output Power: 900 W
  • Outer Dimensions (HxWxD): 455 x 595 x 560 mm
  • Inner Dimensions (HxWxD): 210 x 450 x 420 mm

Usage Features

  • Mounting: Follow the supplied separate mounting instructions for installation.
  • Prior to Connecting: Verify voltage, ensure the oven cavity is empty, and check for damage.
  • Earthing: Compulsory for safe operation.
  • Door Safety: The oven operates only when the door is firmly closed.
  • Push-Push Knobs: Knobs are aligned with the panel at delivery and slide out when pushed to access functions. They can be pushed back into the panel during operation.
  • Pause/Stop Cooking: Cooking can be paused by opening the door (settings maintained for 10 minutes) and resumed by closing the door and pressing Start. To stop, remove food, close the door, and press Stop.
  • Doneness Feature: Available in Auto Reheat, Auto Cook, and Auto Forced Air Combi functions, allowing users to adjust the end temperature (higher or lower) compared to the default standard setting. This can be set within the first 20 seconds of operation.
  • Cooling Down: After a function finishes, the oven performs a cooling procedure, then switches off automatically. This can be interrupted by opening the door.
  • Kitchen Timer: A separate timer function for various purposes, with an acoustic signal when finished.
  • Clock: A 24-hour clock that can be set and displayed. If not set, the display remains blank until cooking time is set.
  • Start Protection / Child Lock: Activated one minute after the oven returns to "stand by mode." The door must be opened and closed to release the lock.
  • Accessories: Includes a turntable support, glass turntable, baking plate, wire rack, and baby bottle holder. Ensure all utensils are microwave-safe and oven-proof. Metal accessories should not come into contact with the oven interior during operation to prevent sparking.
  • Food Preparation:
    • Avoid overheating liquids beyond boiling point by stirring, using wide-necked containers, and allowing standing time.
    • Always stir and check the temperature of baby food/liquids before serving.
    • Do not heat anything in airtight sealed containers.
    • Do not cook or reheat whole eggs with or without shells.
    • Arrange thicker, denser food to the outside of the plate and thinner food in the middle for even heating.
    • Score or prick plastic foil with a fork to relieve pressure and prevent bursting.
    • Use covers for most functions, especially Auto Cook, unless reheating chilled soups.
    • Standing time (1-2 minutes) always improves results, especially for frozen food.

Maintenance Features

  • Cleaning:
    • Regular cleaning is required to prevent deterioration of surfaces.
    • Do not use metal scouring pads, abrasive cleansers, or steel-wool pads. Use a sponge with mild detergent or a paper towel with spray glass cleaner.
    • Do not spray directly on the oven.
    • Regularly remove and clean the turntable, turntable support, and oven base.
    • Do not operate the microwave oven when the turntable has been removed for cleaning.
    • Clean interior surfaces, front and rear of the door, and door opening with mild detergent, water, and a soft cloth.
    • Do not allow grease or food particles to build up around the door.
    • For stubborn stains, boil a cup of water in the oven for 2-3 minutes to soften marks.
    • Adding lemon juice to water and boiling can eliminate odors.
    • Do not use steam cleaning appliances.
  • Grill Element Cleaning: The grill element does not require cleaning as intense heat burns off splashes. However, the ceiling above it may need regular cleaning with warm water, detergent, and a sponge. Run the grill for 10 minutes monthly to burn off splashes and reduce fire risk. The grill element can be lowered for cleaning by gently pushing the fastening thread towards the back of the ceiling.
  • Dishwasher Safe Components: Turntable support, glass turntable, wire rack, baking plate, and baby bottle holder are dishwasher safe.

Safety Information

  • Flammable Materials: Do not heat or use flammable materials in or near the oven.
  • Combustible Materials: Do not use the oven for drying textiles, paper, spices, herbs, wood, flowers, fruit, or other combustible materials.
  • Ignition/Smoke: If material inside/outside the oven ignites or smokes, keep the door closed, turn off the oven, and disconnect power.
  • Over-cooking: Avoid over-cooking food.
  • Unattended Operation: Do not leave the oven unattended, especially when using paper, plastic, or other combustible materials.
  • Corrosive Chemicals: Do not use corrosive chemicals or vapors.
  • Children: Only allow children to use the appliance under adult supervision and after adequate instructions.
  • Damaged Appliance: Do not operate if the mains cord or plug is damaged, if it's not working properly, or if it has been damaged/dropped.
  • Mains Cord: Do not immerse the mains cord or plug in water. Keep the cord away from hot surfaces.
  • Door Seals: Regularly inspect door seals for damage. Do not operate if damaged.
  • Empty Operation: Do not operate without food in the oven when using microwaves, as this can damage the appliance.
  • Wire Twist-Ties: Remove wire twist-ties from bags before placing them in the oven.
  • Deep-Frying: Do not use for deep-frying as oil temperature cannot be controlled.
  • Hot Surfaces: Use hot pads or oven mitts when touching containers, oven parts, and pans after cooking.
  • Service: Only trained service technicians should carry out service or repair operations. Do not remove any cover.
  • Disposal: Dispose of the appliance according to local environmental regulations for WEEE. Cut off the mains cord before scrapping.

IKEA NUTID MWC 6 Specifications

General IconGeneral
BrandIKEA
ModelNUTID MWC 6
CategoryMicrowave Oven
LanguageEnglish

Related product manuals