Touch: Display Shows:
1.
2. Power Level x 3
3. START + 30 Sec
NOTE
NOTE
If you do not select a power level, the oven will
automaticall y coo k a t HIGH (100% ) power.
You can program a "0" power second stage for
standing time inside the oven.
Setting Two-Stage Cooking
For best results , some recipes call for different power
levels during a cook cycle. You can program your oven
for two power level stages during the cooking cycle.
•
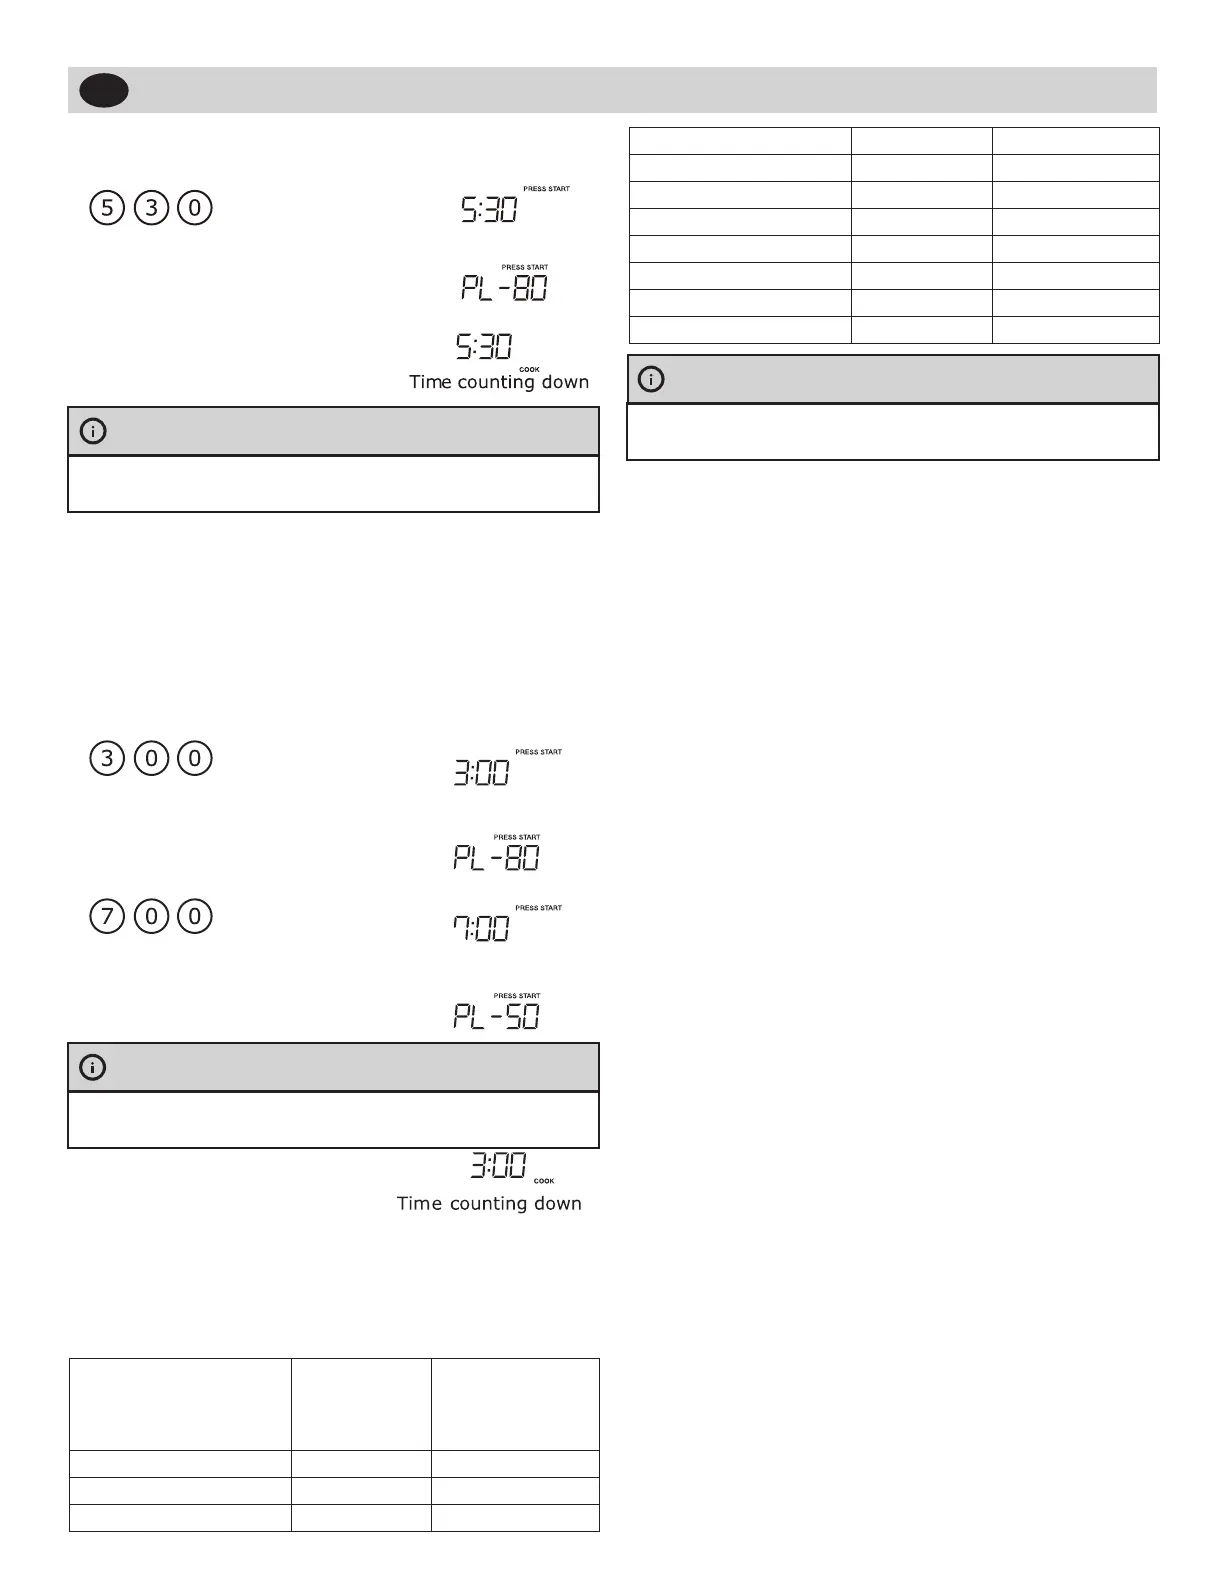
Suppose you want to set a 2-stage cook cycle.
The rst stage is a 3 minute cook time at 80% cook
power then a 7 minute cook time at 50% cook power.
Touch:
Display Shows:
1.
To set a 3 minute cook time
for rst stage.
2. Power Level x 3
3.
To set a 7 minute cook power
for the second stage.
4. Power Level x 6
To Set Power Level
There are eleven preset power levels.
Using lower power levels increases the cooking time
which is recommended for foods such as cheese, milk
and long slow cooking of meats. Consult cookbook or
recipes for specic recommendations.
PRESS POWER LEVEL
PAD NUMBER OF
TIMES FOR DESIRED
POWER
APPROXI-
MATE PER-
CENTAGE OF
POWER
COMMON
WORDS FOR
POWER LEVELS
POWER LEVEL x 1 100% High
POWER LEVEL x 2 90%
POWER LEVEL x 3 80%
5.
START + 30 Sec
POWER LEVEL x 4 70% Medium High
POWER LEVEL x 5 60%
POWER LEVEL x 6 50% Medium
POWER LEVEL x 7 40%
POWER LEVEL x 8 30% Med Low/Defrost
POWER LEVEL x 9 20%
POWER LEVEL x 10 10% Low
POWER LEVEL x 11 0%
Using the Rack
The rack allows several foods to be cooked or reheated
at one time. However, for the best cooking and
reheating, use Turntable ON function and cook with
SENSOR COOKING or AUTO COOKING without the
rack. When the rack is used, set time and power level
manually. Allow plenty of space around and between the
dishes. Pay close attention to the cooking and reheating
progress. Reposition the foods and reverse them from
the rack to turntable and/or stir them at least once
during any cooking or reheating time. After cooking or
reheating, stir if possible. Using a lower power level will
assist in better cooking and reheating uniformity.
Avoid:
•
Storing the rack in the microwave oven when not in
use.
• Popping popcorn with the rack in the microwave oven.
• Using any browning dish on the rack.
• Using SENSOR COOKING and AUTO COOKING with
the rack.
• Cooking directly on the rack—use microwave-safe
cookware.
Manual Defrost
If the food that you wish to defrost is not listed on
the Defrost chart or is above or below the limits in the
you need to defrost manually.
You can defrost any frozen food, either raw or
previously cooked, by using power level for 30%.
For either raw or previously cooked frozen food the
rule of thumb is approximately 4 minutes per pound.
For example, defrost 4 minutes for 1 pound of frozen
spaghetti sauce.
Always stop the oven periodically to remove or separate
the portions that are defrosted. If food is not defrosted
at the end of the estimated defrosting time, program
the oven in 1 minute increments on power level 30%
until totally defrosted.
When using plastic containers from the freezer, defrost
only long enough to remove from the plastic in order to
place in a microwave-safe dish.
NOTE
DO NOT STORE THE RACK IN THE MICROWAVE
NOT IN USE.
BEFORE OPERATING
EN
Amount column on the Defrost chart (see page 18-19),