8
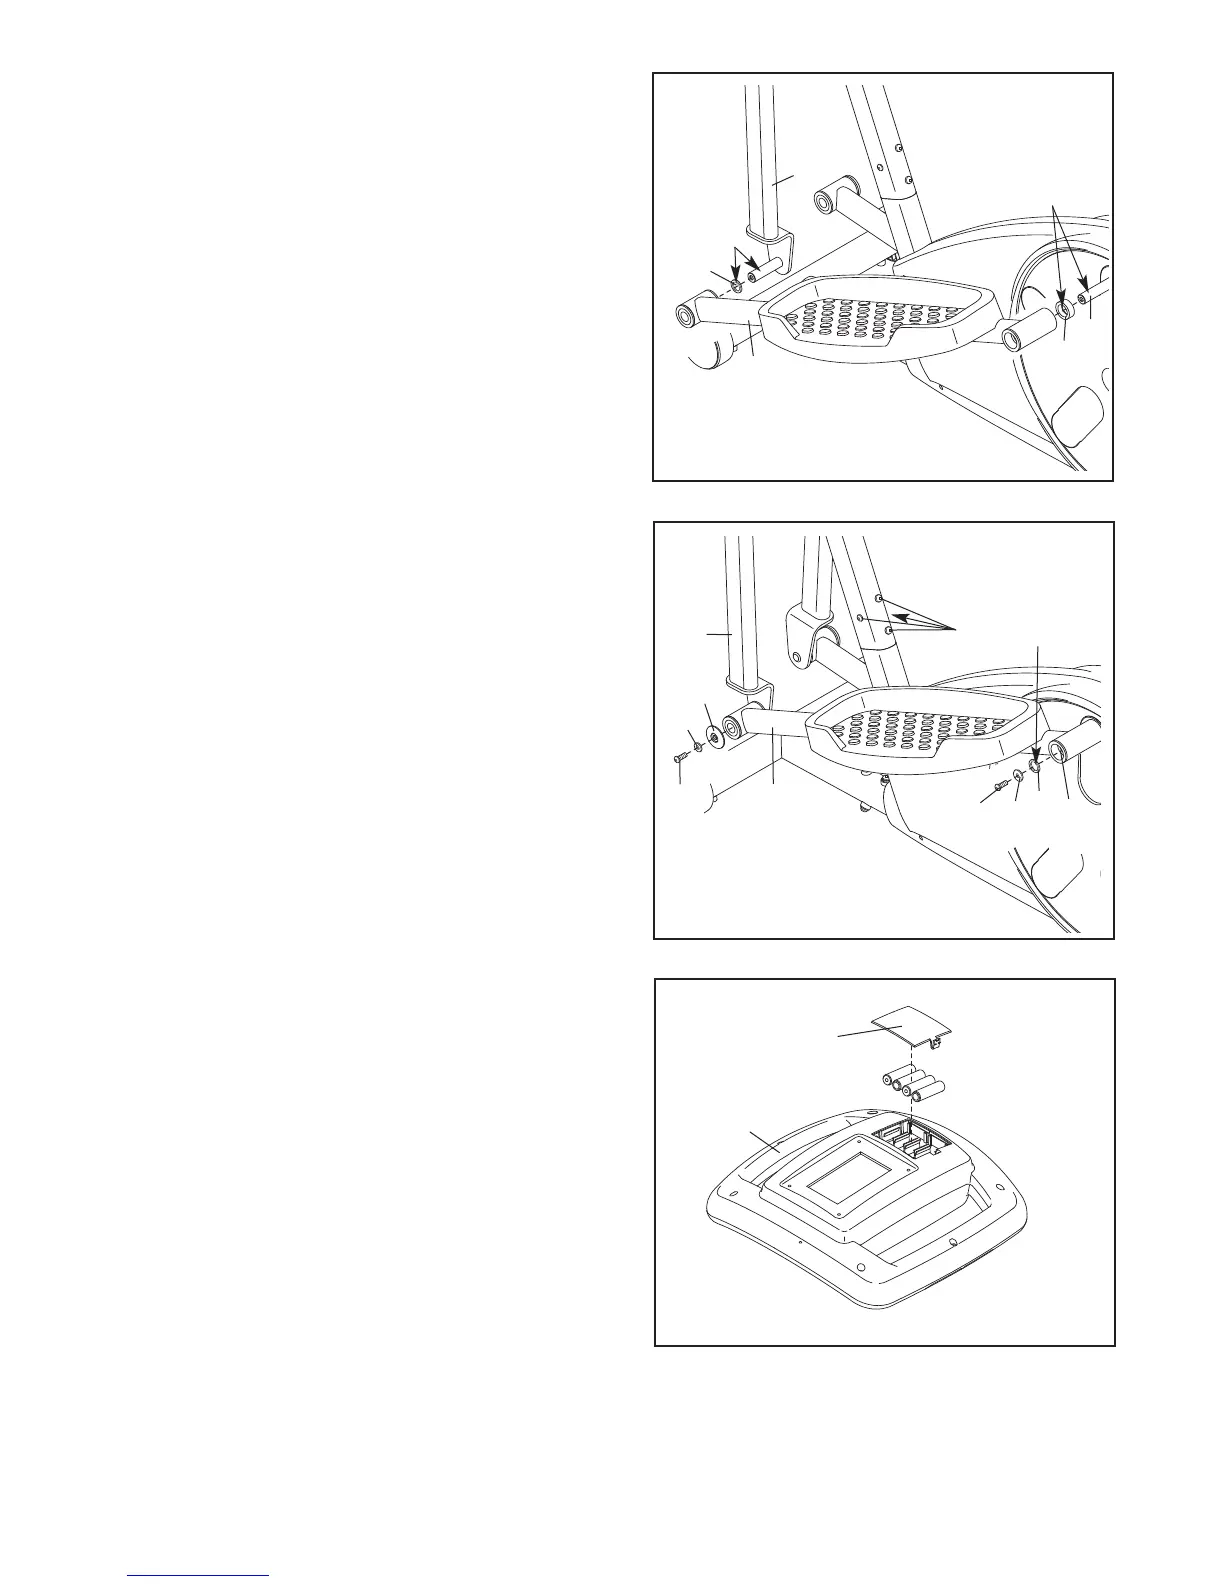
7. Attach the Left Pedal Arm (21) to the left Upper Body
Arm (6) with an M8 x 25mm Patch Screw (70), an M8
Washer (64), and a Pedal Leg Cover (23).
Apply grease to a Large Wave Washer (20) and
slide it onto the Left Crank Arm (42). Then, attach the
Left Pedal Arm (21) to the Left Crank Arm with an
M8 x 25mm Patch Screw (70) and an M8 Large
Washer (81).
Repeat this step for the other side of the elliptical
exerciser.
See step 3. Tighten the four M8 x 19mm Patch
Screws (73).
8
8.
The Console (10) requires four “AA” batteries (not
included); alkaline batteries are recommended.
IMPORTANT: If the ellipical exerciser has been
exposed to cold temperatures, allow it to warm to
room temperature before inserting batteries into
the Console. If you do not do this, the console
displays or other electronic components may
become damaged.
Remove the battery cover from
the Console. Insert four batteries into the Console;
make sure that the batteries are oriented as
shown by the markings inside the battery com-
partment. Then, reattach the battery cover.
10
Battery
Cover
6. Apply a generous amount of grease to the axle on
t
he left Upper Body Leg (6). Then, apply grease to a
Large Wave Washer (20) and slide it onto the axle.
Apply a generous amount of grease to the Left
Crank Arm (42). Then, slide a Crank Arm Spacer
(45) onto the Left Crank Arm. Make sure that the
f
lat side of the Crank Arm Spacer is facing away
f
rom the Left Crank Arm.
Slide the Left Pedal Arm (21) onto the left Upper
Body Leg (6) and onto the Left Crank Arm (42).
Repeat this step for the other side of the elliptical
exerciser.
6
21
2
0
G
rease
G
rease
42
45
6
73
Grease
20
81
70
23
64
21
6
70
7
42