Goblin Shark - User Manual
IMENCO AS Visiting Address: Kophaug 3, 5570 Aksdal, Norway Office: +47 52 86 41 00 imenco@imenco.com
Org No: 923 005 749 MVA Postal Address: PO. Box 2143, 5504 Haugesund, Norway Fax: +47 52 86 41 01 www.imenco.com
4) Connect the network cable and start the computer.
5) Now turn on the power to the Goblin.
6) Start streaming the video and check its quality and the
camera control functions. Understand that view angles /
focus area in air are not as in water.
5.3
Mechanical Installation
Installation of this product should only be performed by qualified personnel. Do not
open the camera when carrying out the installation. Mount the camera on a secure
and vibration free surface and strap the cable for stress relief to the supporting
structure.
The camera should be electrically isolated from the mounting base to minimize any
corrosion current between the relatively noble Titanium housing of the camera and
surrounding metal structures.
5.4
Electrical installation
IMPORTANT!
• Installation of this product should only be performed by qualified personnel.
• Verify that the connector pin assignments match with the system where
the camera is being installed. Mind the connector pin numbers and wire
colours as necessary.
• Do not connect/disconnect the subsea connector when the power is ON.
5.5
Camera subsea connector
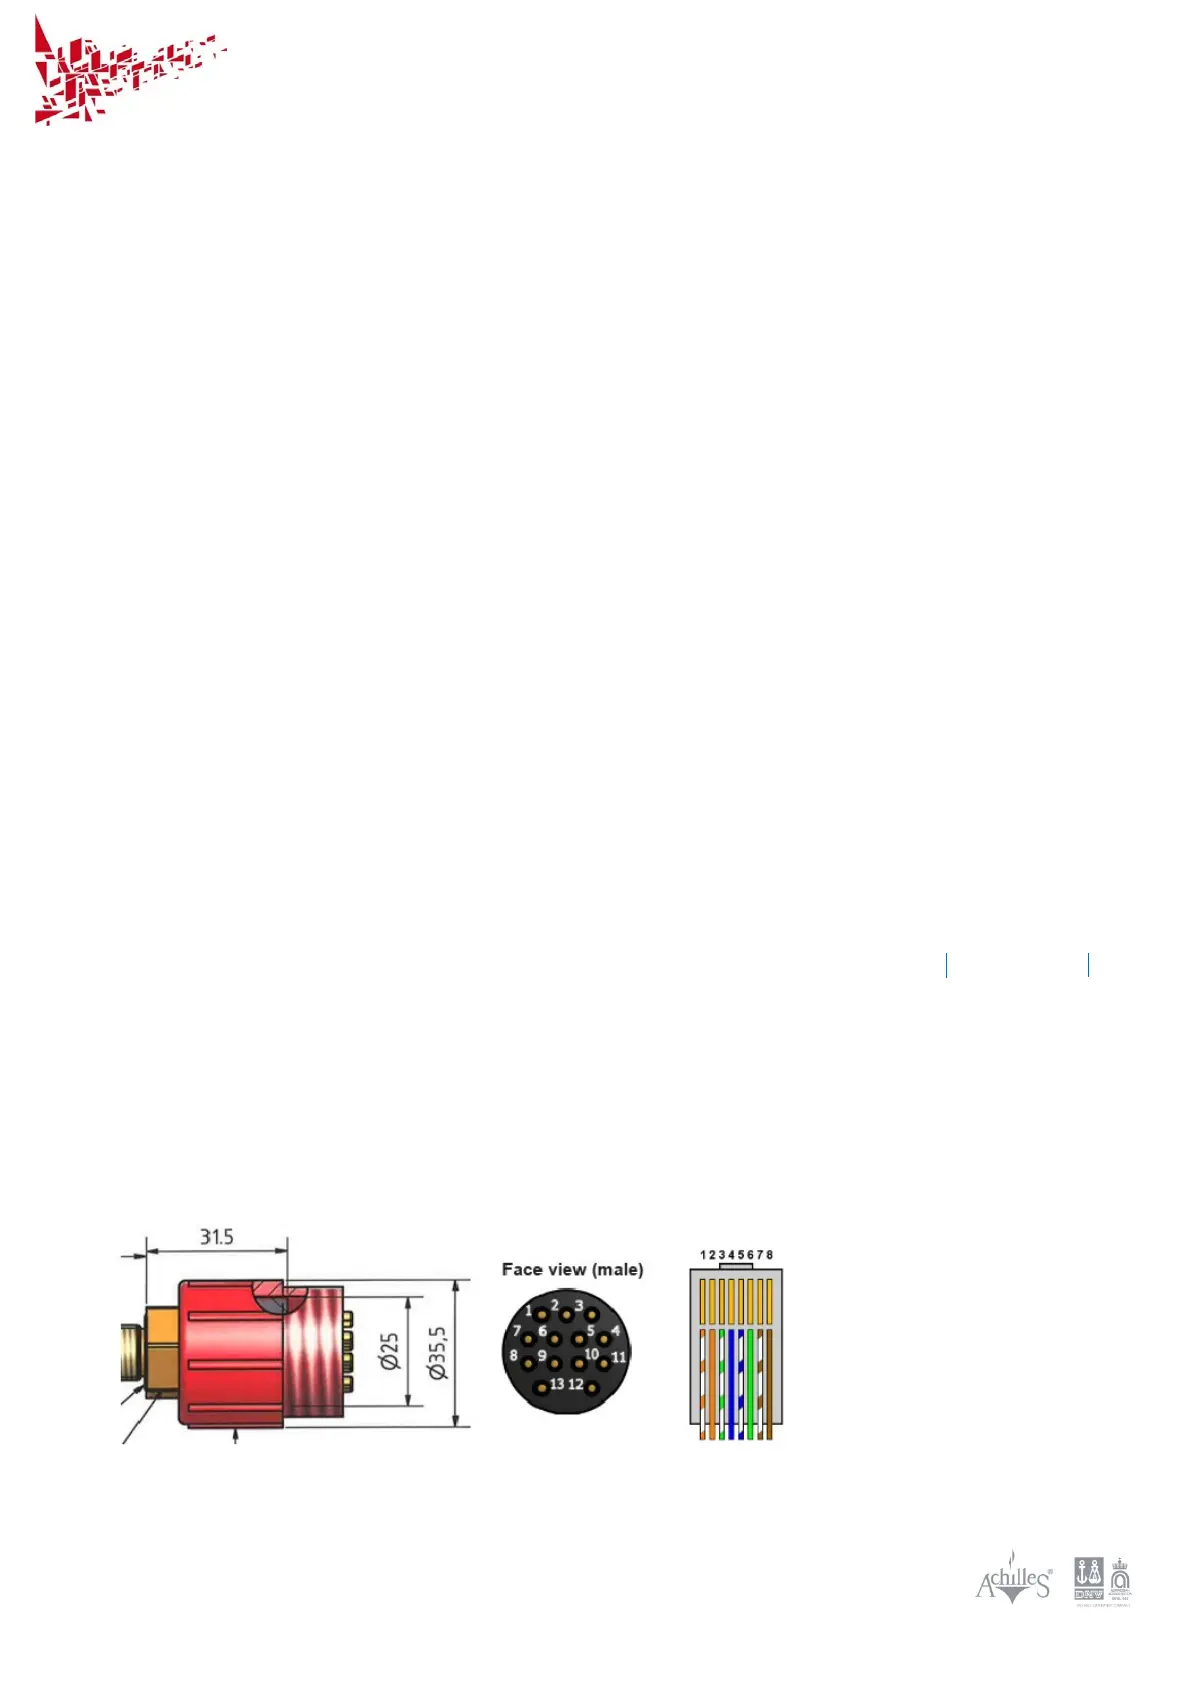
Imenco delivers the camera with a standard connector of type SubConn®
DBH13M unless the customer specifies otherwise. A connector & cable that has
not been tested before should be verified to meet all system specifications before
the camera can be used.
Standard Subsea connector type pin-out:
Figure 5, Goblin Shark camera - standard connector and RJ45 plug with T568B colours


 To Next Page