July, 2015 IMPCO Technologies Inc. PPI-4-116 REV.C
3030 South Susan St. Page 7 of 15
Santa Ana, CA 92704
www.impcotechnologies.com
3030 S Susan Street, Santa Ana, CA 92704
Ph: +1 714 656 1200 Fax: +1 714 656 1400
Reassembly
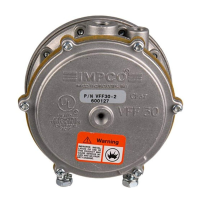
14. RK-VFF30 Kit Includes:
1 GI-89 Gasket (15)
1 F1-10 Filter (13)
1 S7-3 Screen (12)
1 BD1-26* Diaphragm Assy (3)
2 S1-59 Screw, 8-32 x 5/8" (1)
2 S1-100 Screw, 12-24 x 5/8" (17)
1 S4-18 Seat (Viton/Aluminum)(19)
1 S3-116 Seal, Lip Pin (9)
1 PI-15 Pin, Valve Operating (10)
1 W1-42 Washer, Seal Retaining (14)
1 H1-14236 Seal Holder Insertion Tool
1 P1-14235 Pin Insertion Tool
1 PPI-128 Instructions
2 S1-15265-001 Screw, 8-32 17/32” Taptite Torx (1)
2 S1-15266-001 Screw, 12-24 x 11/16” Torxfil (17)
1 S1-15265-002 Screw, 8-32 3/8” Taptite Torx (4)
*Standard diaphragm. See table on page 2 for optional
diaphragms.
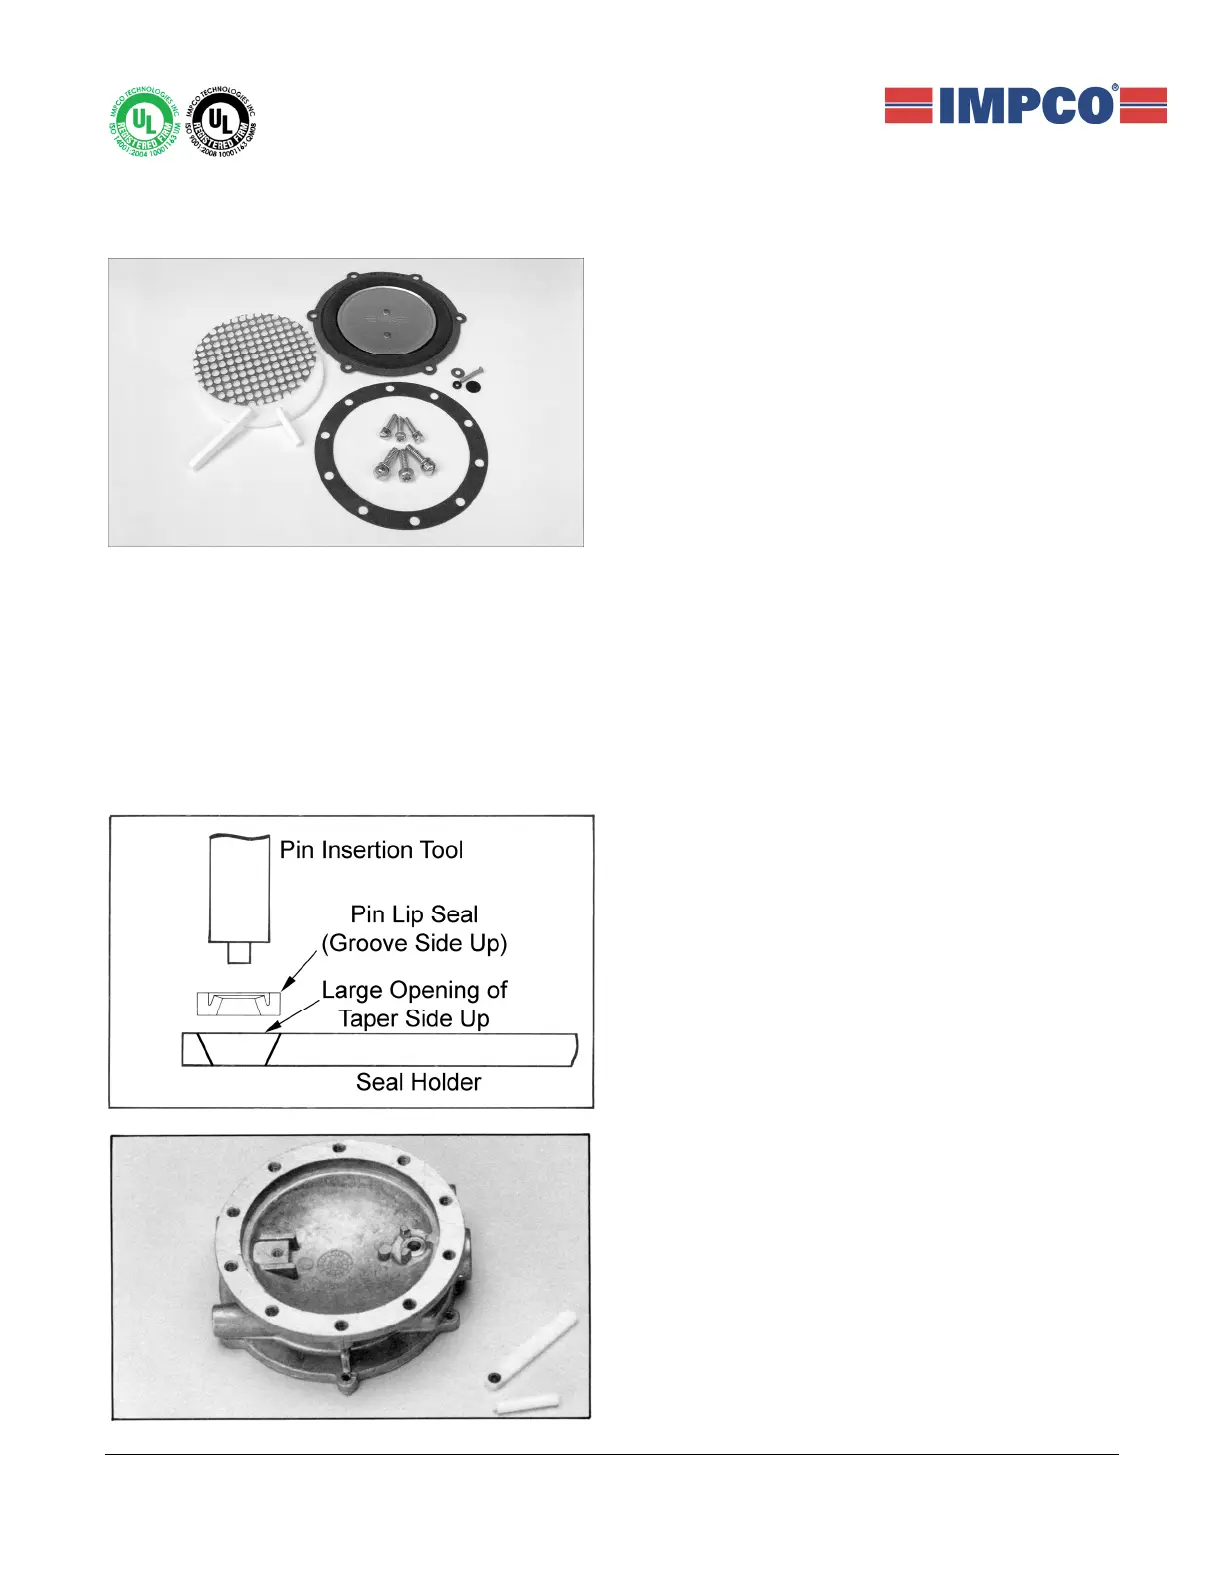
15. Lubricate the Lip Pin Seal (9) with petroleum jelly
or Vaseline and place in the Seal Holder Insertion Tool
groove side up, as shown in the illustration. Note that
the Seal Holder passage is tapered and the wide
opening of the seal holder should be facing up.
16. Place the VFF30 Body (7) with the filter side up, as
shown in the photo, on a flat surface. Ensure that the
groove in the Seal (9) is visible from the top of the taper
of the Seal Holder Insertion Tool.