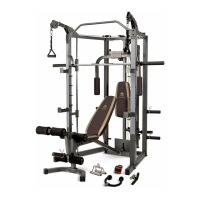
ASSEMBLY INSTRUCTION
Tools Required Assembling the Machine: Adjustable Wrench and Allen Wrench
NOTE: It is strongly recommended two or more people assembling this machine to avoid
possible injuries.
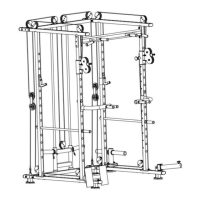
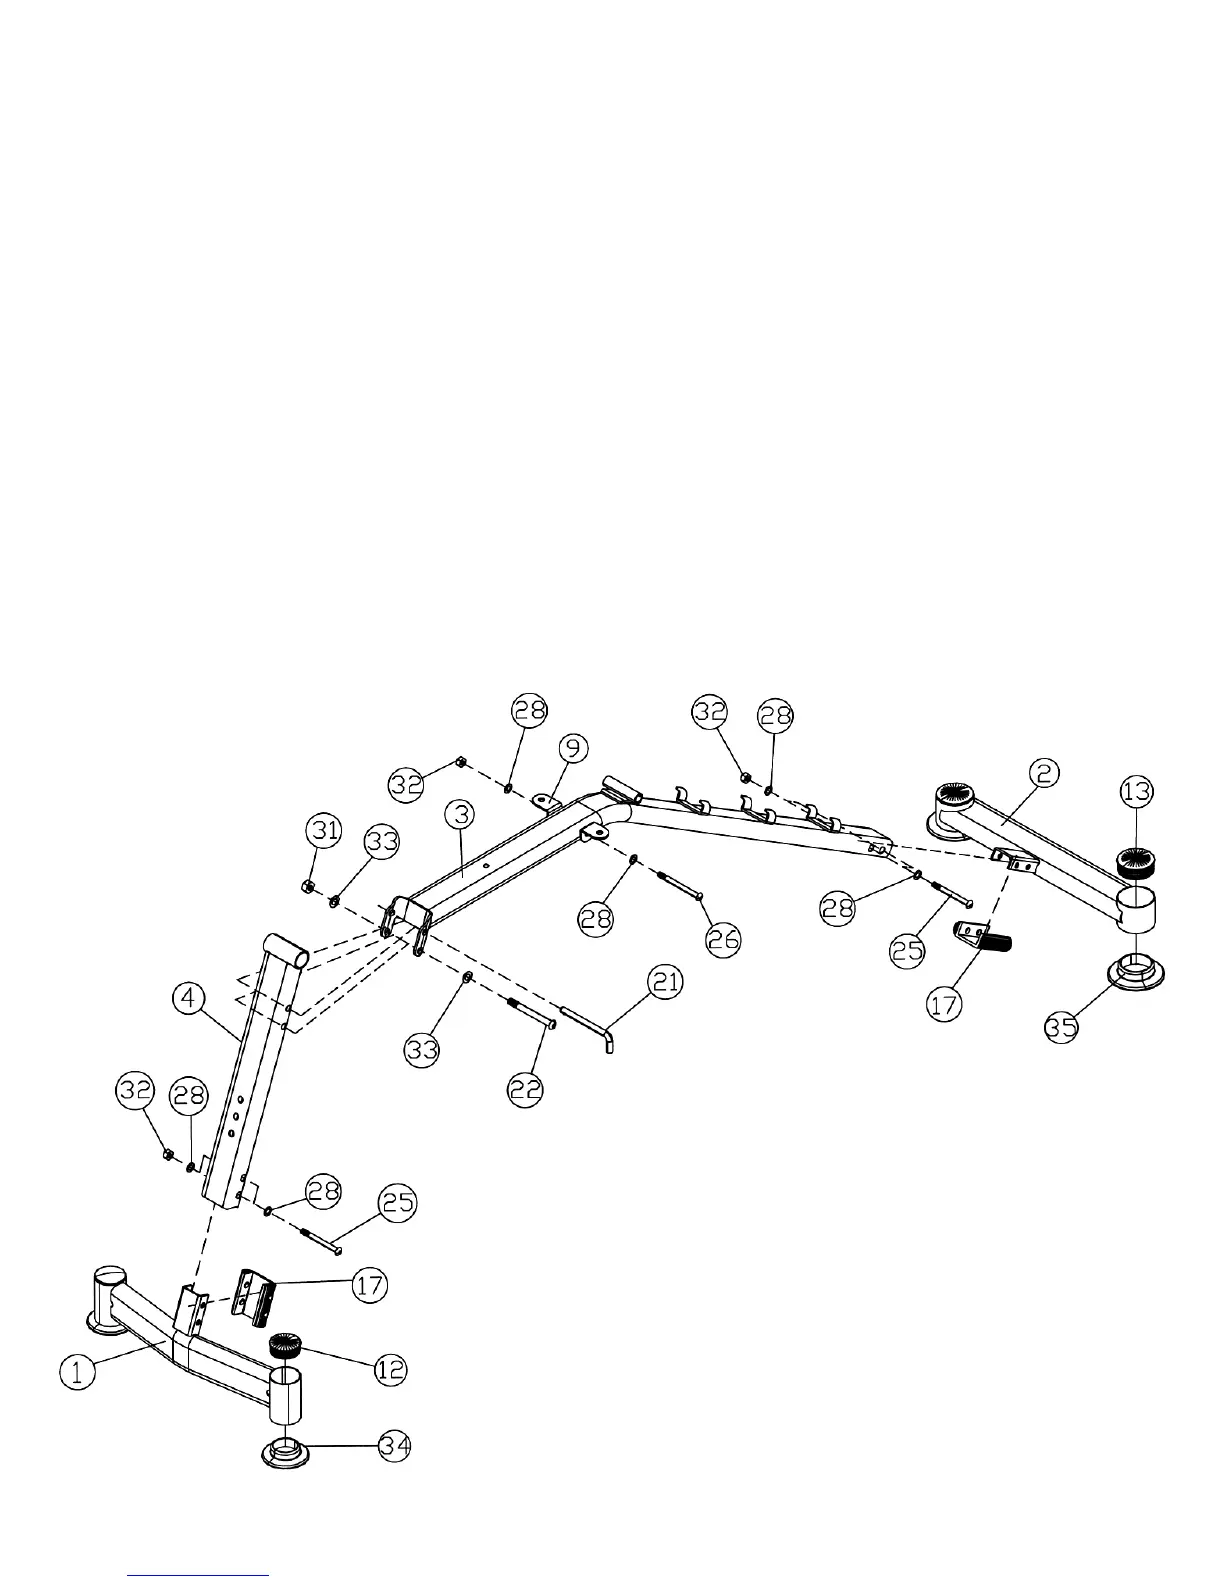
STEP 1 (See Diagram 1)
A.) Push two Front Stabilizer End Caps (#12) and Front Stabilizer Bases (#34) into the Front
Stabilizer (#1). Push two Rear Stabilizer End Caps (#13) and Rear Stabilizer Bases (#35) into
the Rear Stabilizer (#2).
B.) Attach a U-shaped Sleeve (#17) onto the bracket on the Front Stabilizer (#1). Make sure the
opening on the Sleeve is facing towards the front. Attach the Front Stabilizer to the Front
Vertical Frame (#4). Secure it with two M8 x 3 1/8” Allen Bolts (#25), four Ø 5/8” Washers
(#28), and two M8 Aircraft Nuts (#32).
C.) Attach one U-shaped Sleeve (#17) to the bracket on the Rear Stabilizer (#2). Attach the Main
Frame (#3) to the Rear Stabilizer (#2). Secure it with two M8 x 3 1/8” Allen Bolts (#25), four Ø
5/8” Washers (#28), and two M8 Aircraft Nuts (#32).
D.) Connect the Main Frame (#3) to the Front Vertical Frame (#4). Secure the lower hole with one
M10 x 3 ¾” Allen Bolt (#22), two Ø ¾” Washers (#33), and one M10 Aircraft Nut (#31). Insert a
L-shaped Lock Pin (#21) through the upper hole to lock the Front Vertical Frame in position.
Remove the Pin when folding the bench for storage.
E.) Attach two L-shaped Brackets (#9) to the Main Frame (#3). Secure them with one M8 x 3 ½”
Allen Bolt (#26), two Ø 5/8” Washers (#28), and one M8 Aircraft Nut (#32).
5