3 3
Assembly Assembly
Forks
3
28
Seat and Seat Post
3
29
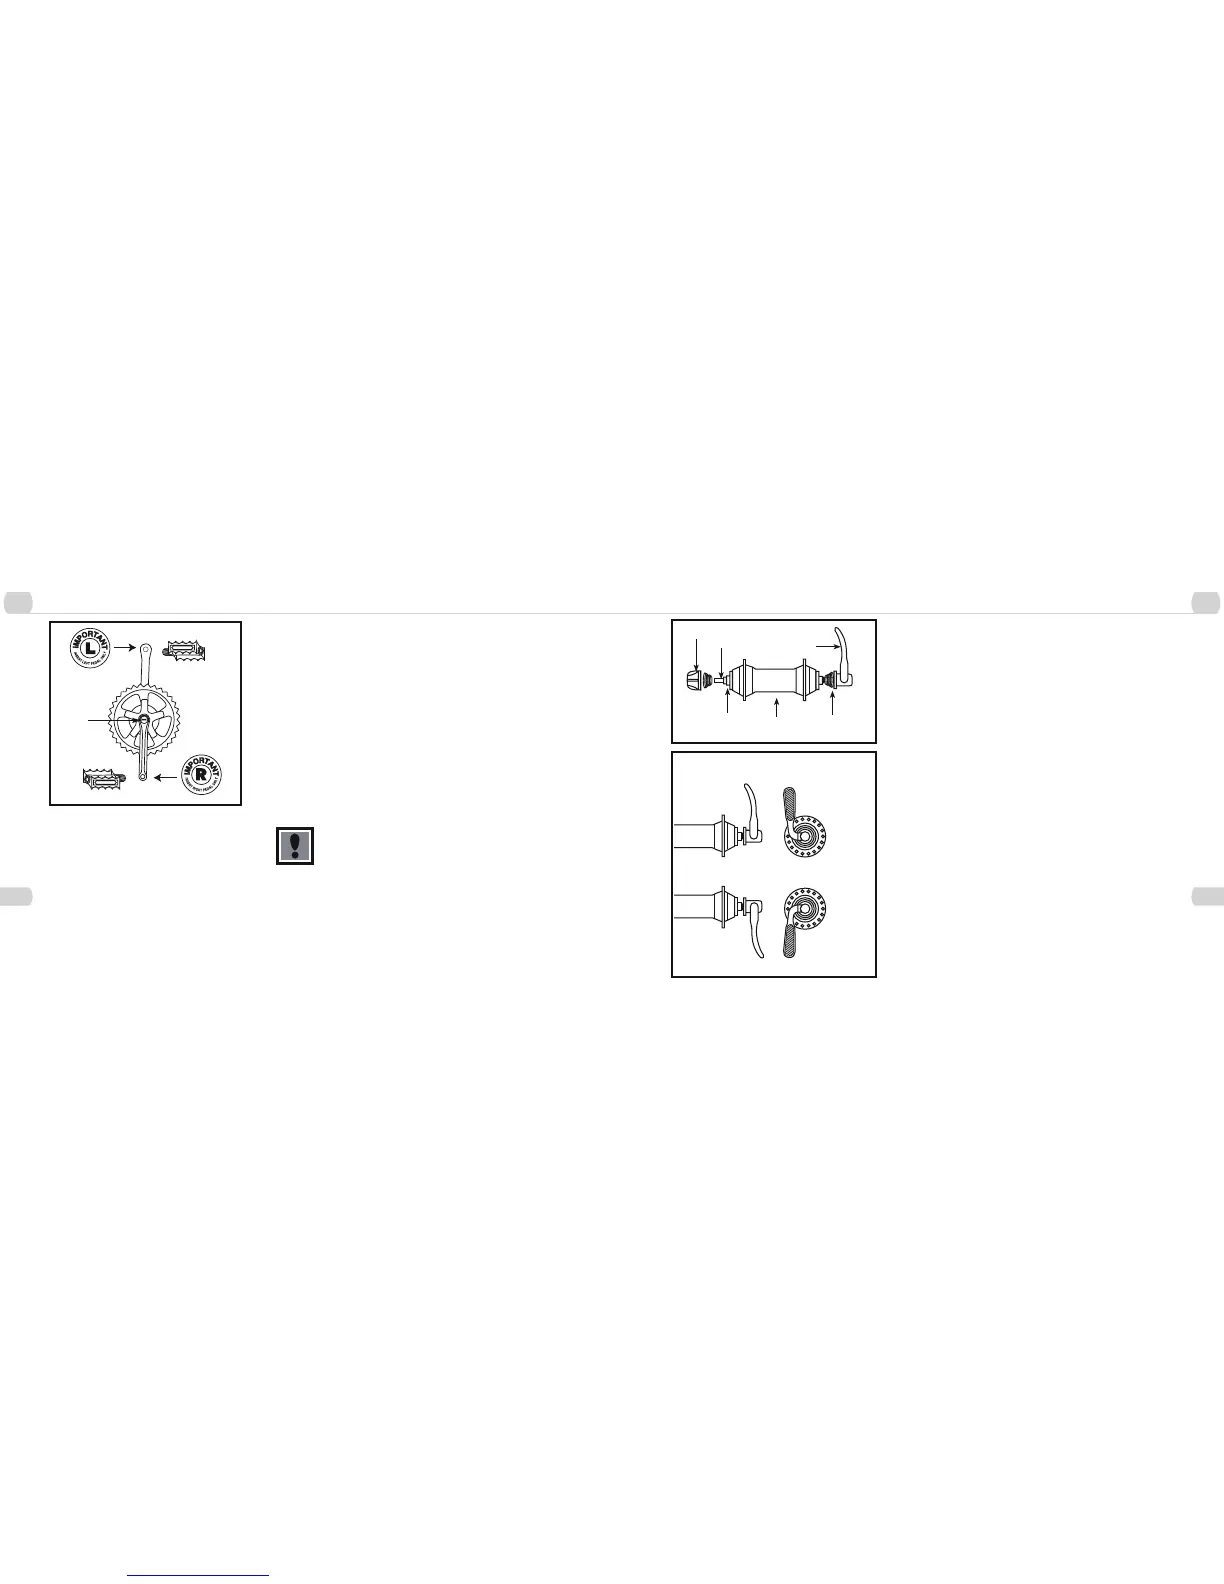
Pedals & Cranks Set
Look for the letters “R” for right, and “L” for left, stamped on each pedal
spindle. Start each pedal spindle by hand to avoid stripping the threads.
Tighten with a 15mm narrow open-ended wrench. Note that the right
hand pedal attaches to the chainwheel side crank arm with a right-hand
(clockwise) thread. The left pedal attaches to the other crank arm and
has a left-hand (counter-clockwise) thread. It is very important that you
check the crank set for correct adjustment and tightness before riding your
bicycle. New cranks may become loose with initial use; refer to p. 74-77
for proper crank set adjustment and maintenance. Once the pedals have
been installed, remove the dust caps from the center of each crank arm.
Using a 14mm socket wrench, tighten the spindle nuts securely (approx.
350 in. lbs) and replace the dust caps.
Attachment of an incorrect pedal into a crank arm will
cause irreplaceable damage.
Dust
Cap
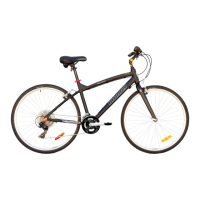
Front Wheel
Check the wheel hub before attaching in to the fork by rotating the threaded
axle. It should be smooth with no lateral movement. Insert the front wheel
into the fork dropouts. Tighten the wheel nuts using the appropriate 14mm
or 15mm wrench. Spin the wheel nuts using the appropriate 14mm or 15mm
wrench. Spin the wheel checking for trueness. Some bicycles have wheel
axles turn the adjusting nut so the locking lever is moved to the closed
position with a firm action. At the halfway closed position of the quick release
lever, you should start to feel some resistance to this motion. Do not tighten
the quick release lever is moved to the closed position with no resistance,
clamping strength is insufficient. Move the quick release lever to the open
position, tighten the quick release adjusting nut, and return the quick release
lever to the closed position.
Correct Quick Release Axle Setting
1. To set, turn the lever to the open position so that the curved part faces
away from the bicycle.
2. While holding the lever in one hand, tighten the adjusting nut until it
stops.
3. Pivot the lever towards the closed position. When the lever is halfway
closed, there must be firm resistance to turn it beyond that point. If
resistance is not firm, open the lever and tighten the adjusting nut in a
clockwise direction.
4. Continue to pivot the lever all the way to the closed position so that the
curved part of the lever faces the bicycle.
Hub
Hub
Axle
Quick Release
Axle
Adjusting
Nut
Quick
Release
Lever
Spring
Closed Position
Open Position