– Tower: To mount Speaker
Tower assembly to Wall Bracket
assembly,lift the Speaker Tower
assembly,with the help of another
person,onto the Wall Bracket assembly.
Have one person continue to hold the
Speaker Tower assembly on the Wall
Bracket assembly while the other inserts
and tightens one of the (2) provided
5/16-24 Hex Head Bolts into the top.
Make sure you insert and finger-tighten
the top one first to keep the Speaker
Tower assembly from slipping off the Wall
Bracket. After the top bolt is tightened,
insert and tighten the other 5/16-24 Hex
Head Bolt in the bottom.
Center: To mount Speaker to Wall Bracket
assembly,lift the Speaker,with the help of
another person,onto the Wall Bracket
assembly.Have one person continue to hold the Speaker on the Wall
Bracket assembly while the other inserts and tightens one of the
(2) provided 5/16-24 Hex Head Bolts into one side.After the first
bolt is tightened,insert and tighten the other 5/16-24 Hex Head Bolt.
3
PRELUDE MTS WALL BRACKETS
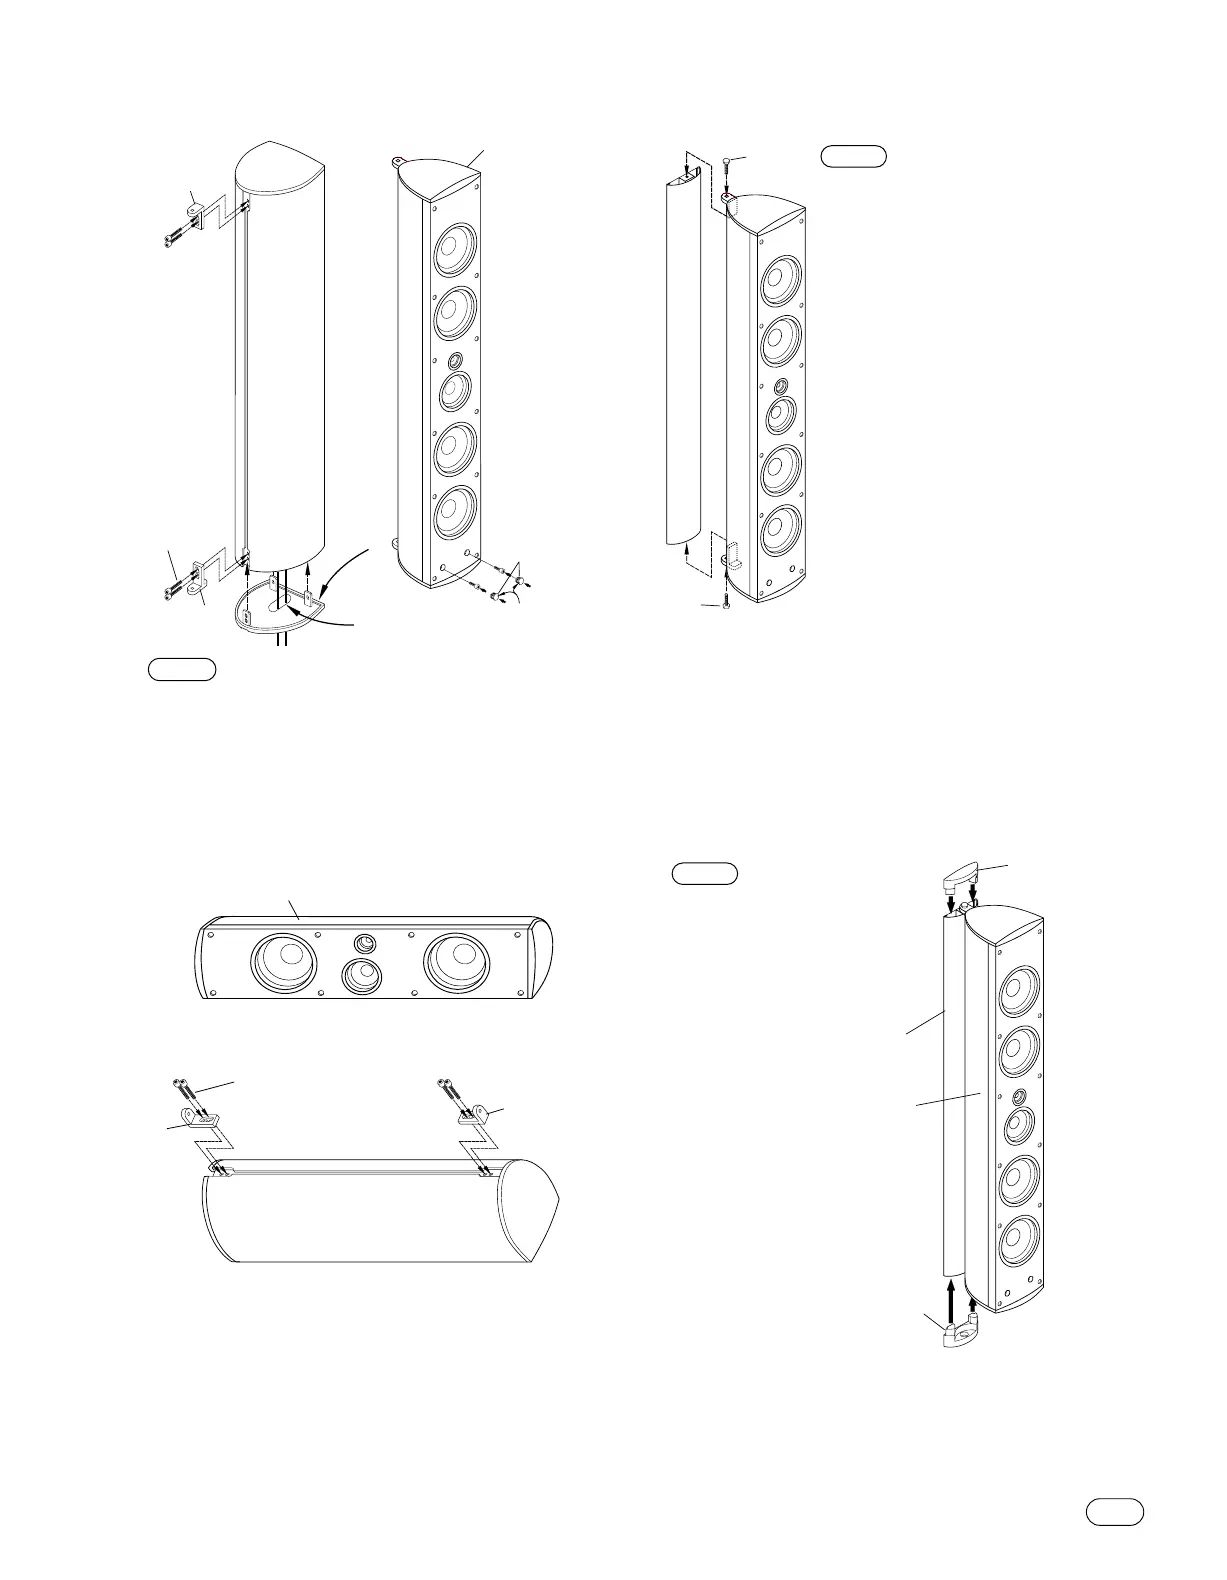
– Tower: Place Top and Bottom Speaker Brackets in
back slots of Speaker Tower top and bottom.Insert (2) longer
10-32 Socket Head Screws provided in each and tighten.Replace
the (2) screws taken out of the front baffle.Press flush into place
2 screw caps to hide holes in front-baffle base.Make sure that
the alignment slots point toward the center to ensure that the
surface curve matches that of the baffle.
STEP 5
– Note: If you
wish to angle the speaker
into a permanent position,you
will need to do so and tighten
the 5/16-24 Hex Head Bolts
before you attach the Wall
Bracket Caps.Tighten both
bolts securely and attach the
Wall Bracket Caps to the top
and bottom of the Wall
Bracket.These will snap
securely into place.
STEP 6
STEP
7