nput
N
L
230V ~ 50/60 Hz
AC Input
N
L
230V ~ 50/60 Hz
AC Input
1 2 3 4 5
1 2 3 4 5
+AUX
X
Alarm
+12V GND
Tamper
Alarm
+12V GND
Tamper
+AUX
X
Alarm
+12V GND
Tamper
Alarm
+12V GND
Tamper
Alarm
+12V GND
Tamper
+AUX
X
+AUX
X
Alarm
+12V GND
Tamper
+AUX
X
Alarm
+12V GND
Tamper
X
+AUX+12V
X
X
10 11 12
NO NC COM
+AUX
N
L
T 500mA 5x20
AC Input
keypad address
_1
Min. 01
Max. 30
1
00000000
2
00000001
3
00000010
4
00000011
5
00000100
6
00000101
7
00000110
8
00000111
9
00001000
10
00001001
11
00001010
12
00001011
13
00001100
14
00001101
15
00001110
16
00001111
17
00010000
18
00010001
19
00010010
20
00010011
21
00010100
22
00010101
23
00010110
24
00010111
25
00011000
26
00011001
27
00011010
28
00011011
29
00011100
30
00011101
31
00011110
32
00011111
33
00100000
34
00100001
35
00100010
36
00100011
37
00100100
38
00100101
39
00100110
40
00100111
+ D S -
T1
T2
+ D S -
+ D S -+ D S -
+ - D S
1
0001
1
2
0010
3
0011
2
4
0100
5
0101
3
6
0110
7
0111
4
8
1000
9
1001
5
10
1010
11
1011
6
12
1100
13
1101
7
14
1110
15
1111
8
16
000L
17
00L0
9
18
00LL
19
0L00
10
20
0L0L
21
0LL0
11
22
0LLL
23
L000
12
24
L00L
25
L0L0
13
26
L0LL
27
LL00
14
28
LL0L
29
LLL0
15
30
LLLL
0
1
L
EN 50131-1
EN 50131-3
EN 50131-6
EN 50136-1
EN 50136-2
EN 50130-4
EN 50130-5
CEI 79-2
CEB T014
+
-
14
Acquire automatically
the zone balancing
via the installer menu.
11
Connect the
backup battery.
12
Set the addresses
of the peripherals.
13
Autoacquisizione del
bilanciamento delle zone
dal Menù Installatore
17
Insert the
maintenance jumper
in “RUN” position.
16
Edit the voice and
digital dialer contact
numbers.
15
Configure “Wireless”
terminals.
9
Insert the
maintenance jumper
in “SERV” position.
10
Connect the primary
power source (Mains
230V~ ±10%, 50/60 Hz).
FLEX5
expansion
Air2-BS100
transceiver
3K9
Ω 1/4W
6K8
Ω 1/4W
6K8Ω 1/4W
6K8Ω 1/4W
6K8Ω 1/4W
3K9Ω 1/4W
6K8Ω 1/4W
3K9Ω 1/4W
3K9Ω 1/4W
230V~
230V~
230V~
230V~
Attention!
Before starting the installation procedure, read carefully
through the installation and programming manuals.
Default
telephone
numbers:
1,2,3,4,5,6
voice numbers for users
7,8 CONTACT-ID
9 voice number for the installer
15 teleservice
1
Attach to the wall the
control panel enclosure and
the open tamper (optional)
2
Connect the peripherals
to the BUS.
3
Connect the BUS
to the control panel.
7
Connect the telephone
line to the control panel.
8
Connect the
SmartLogos30M to
the motherboard (PCB).
4
Set the balancing
parameters of the
system detectors.
5
Connect the
system detectors
to the terminals.
6
Connect the outputs
to the control panel and
peripheral terminals.
3
2
12
4
5
6
7
9
8
11
12
10
15
16
QUICK GUIDE TO
FIRST POWER UP
14
The jumper in “SERV” position
initialize the auto-enrolment of
the peripherals automatically
at 10 seconds intervals
.
Before starting the auto-learning phase
of the zone balancing parameters,
ensure that all zones are
in standby status.
Double terminals are not
enrolled properly.
13
For the readers
addressing,
use keypad
“1”
During the addressing phase, DO NOT exceed
the maximum number of addresses available
for the control panel model you are installing.
13
Start the quick
programming wizard.
This procedure allows you to skip the
following steps and end with the step ,
17
Default settings
Factory data
Learn zone bal.
Auto enrolPeriph
NUMBER yyy
Number
Description
Type
Telephone
Select number
Number of rings
Max.num.attempts
Select number
NUMBER xxx
NUMBER yyy
NUMBER zzz
Terminals 12345
EXPAN. 001 IIIII
Expans. 01 T01
Terminals 12345
EXPAN. 001 IIIII
Expans. 01 T01
Wireless
otherwise continue with
the following steps.
PROGRAMMING
Panel options
Terminals
Zones
Outputs
Walk test
Telephone
...
...
Default settings
User functions
Other parameters
Wizard
Installation and programming guide
Anti-intrusion control panels and security systems
LED OFF
LED ON
LED blinking
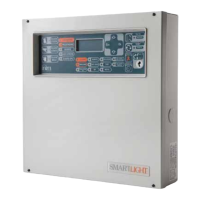
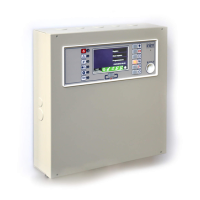
SmartLiving
SmartLiving515
SmartLiving1050 and 1050L
SmartLiving10100L
SmartLiving505
SmartLiving505 and 515
SmartLiving1050 and 1050L
SmartLiving10100L
DIP-switch
12345678
nBy/S nBy/X
I-BUS
CONNECTION
nBy/X-S
reader
SmartLiving
Control Panel
Generic
device
JOY
Keypad
BALANCING
RESISTORS
N.C. / N.O.
BALANCING
Red
Grey
Blue
Gold
Red
White
Orange
Gold
Detector
Detector
SmartLiving
control panel
DOUBLE
BALANCING
SINGLE
BALANCING
SmartLiving
control panel
SmartLiving
control panel
Detector
Rollerblind/Shock
detector
SmartLiving
control panel
N.C. BALANCING
WITH EOL
Zone1
Zone2
Zone1
Zone2
DOUBLE ZONE
BALANCING
DOUBLE ZONE
BALANCING
WITH EOL
SmartLiving
control panel
SmartLiving
control panel
OPEN-COLLECTOR OUTPUT
CONNECTION
SmartLiving
control panel
SmartLiving
control panel
Generic load
12V
Power supply
MAX 13.8V
External
device
SmartLiving
control panel
SIRENS
CONNECTION
Self-powered
sounder
Interior
sounder
SmartLiving
control panel
SmartLink
telephone
dialler
PSTN
network
PHONE LINE
CONNECTION
150Vrms
varistors
SmartLogos30M
connector
SmartLiving515
control panel PCB
Strip connector
for the
maintenance jumper
Maintenance
jumper
in “SERV”
position
MAINS
CONNECTION
SmartLiving505
SmartLiving515
terminal board
SmartLiving1050
power supply
Sm
artLiving10100
power supply
SmartLiving1050L
power supply
Battery
connector
Battery
wires
Expansion -
Transceiver
address
Reader
address
Red Blue Green
Yellow
Keypad
address
Press together
and release
For SmartLiving G3 models,
use terminals
“+ D S -” on the
LIVPWR100
board
ISO 9001 Quality Management
certified by BSI with certificate
number FM530352
via Fosso Antico - fraz. Centobuchi
63076 Monteprandone (AP) ITALY
Tel. +39 0735 705007
Fax +39 0735 704912
info@inim.biz _ www.inim.biz
DCGIINE0SLIVING-R600-20150430
For SmartLiving 10100L
and G3 models, the
battery wire must
be connected on
the power supply