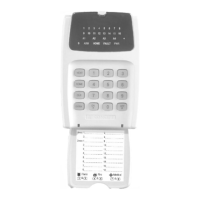
16 Zone Expansion Board. Installation Guide.
Revision 2.0 March. 2005.
MODEL 3000 / ACCESS 4000
16 Zone Expansion
Board
P/N: 993006 / 995006
INSTALLATION GUIDE
Introduction
The 16 Zone Expansion board connects to a Universal Expander Module to provide an
additional 16 Zone Inputs along with extra detector power supply connections to simplify
device wiring.
IMPORTANT NOTE:
In Model 3000 and Access 4000 Systems, Version 2 Control Module Firmware or later,
the Universal Expander must be configured as a “B” type (Big) Expander to support the
additional Zone Inputs. (See page 4 for details)
Specifications
Power Supply Input: 11V to 14V DC via host Universal Expander.
Current Consumption: 40mA. (Not including detector power)
Physical dimensions: Length: 180mm Width: 68mm Depth: 15mm
Installation environment: 0º to 40º Celsius
15% to 85% Relative humidity (non-condensing)
1
4
While every effort has been made to ensure the accuracy of this manual, Inner Range Pty.
Ltd. assumes no responsibility or liability for any errors or omissions.
Due to ongoing development, this manual is subject to change without notice.
Designed & manufactured in Australia.
© 2000 - 2005. Inner Range Pty. Ltd. Part No: 633006
Commissioning
NOTE: Control Module firmware V2 or later. The Universal Expander Module must be
configured as a “B” type (Big) Expander to support the additional Zones 17 to 32
provided by the 16 Zone Expansion board.
(Expander Modules configured as an “E” type only support the basic 16 Zones)
The Universal Expander “type” is selected with DIPSwitch 1 on SW1 as follows:
Off = “B” type Expander. (16 to 32 Zones) On = “E” type Expander. (16 Zones only)
If an existing Universal Expander has to be changed from an “E” type to a “B” type to
support the 16 Zone Expansion board, Zones 1 to 16 on that Universal Expander will have
to be re-programmed as “B” type Expander Zones.
1. When wiring is complete and checked to be OK, connect power to the Universal
Expander Module.
2. The Zones can be tested via the “Test Inputs” option. <MENU>, 4, 1.
3. Program the Zone Inputs and assign them to the appropriate Area/s.
Z18
Z17
T4
2k2
6k8
Normally Closed
Tamper contact
Norm. Closed
Alarm contact
Wired in exactly the same manner as above.
However, when programming the Zone Input,
[MENU], 7, 0., the option to “Swap Seal and
Alarm conditions” must be set to [Y]es.
E01:Z01 C X S R A N T .
Options -> n n Y n n n n n
Zone Input Wiring
NORMALLY CLOSED ALARM CONTACTS.
e.g.
NORMALLY OPEN ALARM CONTACTS.