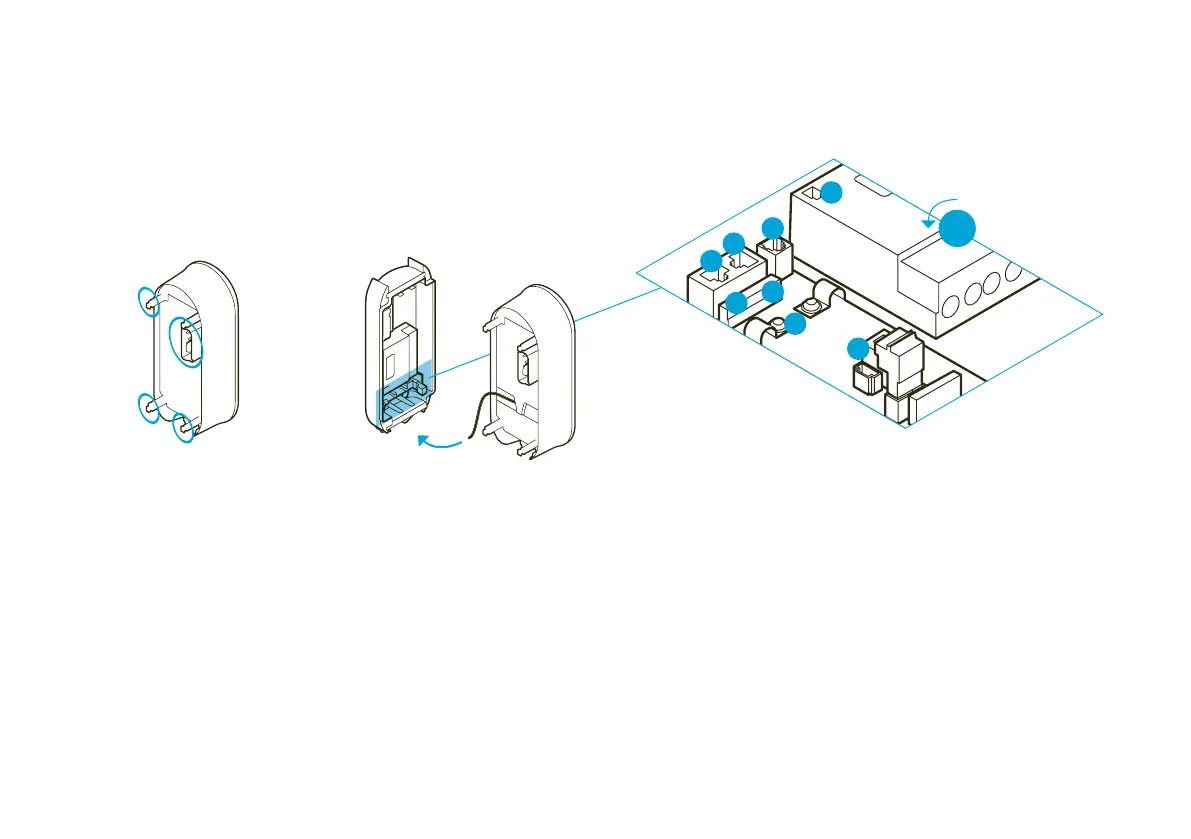
Clicking the eBox into the eClick
Clicking the eBox into the eClick
01
If an eSmartMeter is installed,
make sure the ports are connected
to the supplied data cable.
Connect port 3a (eSmartMeter)
to port 3b (eClick) using the data
cable.
Take the eBox and identify the
connecting points (blue here) on
its rear side.
02
Connect the black ribbon data
cable of the eBox to port
“5 Expansion Terminal” at the
bottom right of the eClick.
03
Connect the white ribbon data
cable of the eBox to port 1 on
the left side of the eClick.
Communication via LAN or SIM
card can only be ensured when
the black and white ribbon data
cables are connected.
90°
3a
3b
1
6
2a
4
5
2b
1 LAN 1 RJ45
(eBox communication)
2a LAN 2 RJ45 (deactivated)
2b LAN 2 LSA-Plus (deactivated)
3a eSmartMeter output
(optional)
3b eSmartMeter input (optional)
4 Cable clips
for S/FTP cable
5 Expansion terminal (eBox
communication)
6 LAN 1 LSA-Plus
to Internet router
Before mounting the eBox,
make sure there is no voltage across the eClick.