EasyManua.ls Logo

Innotek ADV-300E User Manual

Default Icon
13 pages
To Next Page IconTo Next Page
Page #1 background imageLoading...
Page #1 background image
Proper Fit: The collar fit should be
snug, yet loose enough to allow one
finger to fit between the strap and
dog’s neck. Fit is important because a
loose collar may cause inconsistent
performance. It’s okay to trim any
excess strap length.
Step 3 Adjust the Collar
Step 2 Match Components
Step 1 Power Up
Quick Start Guide ADV-300E, ADV-1000E & ADV-1002E
Charge the collar 12-14 hours. Be sure to cover the charge jack with the gray plug
when done. Insert batteries in the transmitter positive (+) side out.
Turning the Collar ON and OFF
Before putting collar on dog, briefly touch the two red paper dots together to turn
the collar on.
ON - A brief, solid green light and tone indicate that the collar is on, ready to use.
A green light will blink while the collar is on.
OFF - A brief, solid red light and tone indicate the collar has been turned off.
Remove receiver from charger. Light will flash yellow. Press button on transmit-
ter within 30 seconds. The components now work together.
1
Innotek, the Innotek logo, and Free Spirit are registered trademarks of Invisible Technologies, Inc.
All other product and service names are the property of their respective owners.
© 2003, Invisible Technologies, Inc.
All rights reserved.
2100242-2
1000 Fuller Drive, Garrett, IN, USA 46738
www.innotek.net
Euro_ADVE 9/10/04 10:27 AM Page 1
Question and Answer IconNeed help?

Do you have a question about the Innotek ADV-300E and is the answer not in the manual?

Innotek ADV-300E Specifications

General IconGeneral
BrandInnotek
ModelADV-300E
CategoryPet Care Product
TypeElectronic Dog Training Collar
WaterproofYes
Adjustable Sensitivity LevelsYes
RangeUp to 300 yards
Correction TypeStatic

Summary

Quick Start Guide

Step 1 Power Up

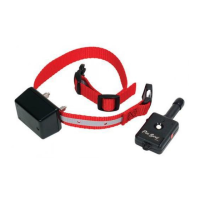
Charge the collar 12-14 hours. Insert transmitter batteries with the positive (+) side out.

Step 2 Match Components

Match receiver to transmitter by pressing button within 30 seconds after removing receiver from charger.

Step 3 Adjust the Collar

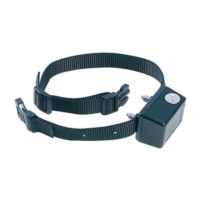
Ensure proper collar fit: snug, allowing one finger between strap and dog's neck for consistent performance.

Digital Advanced Trainers

Understanding the Transmitter

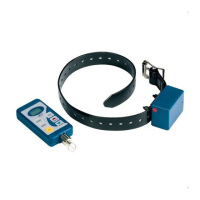
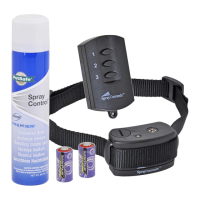
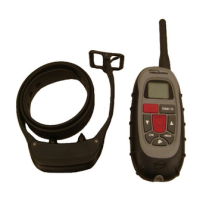
Details the handheld device's function, water-resistance, and button operations for stimulation and tone.

Transmitter Button Functions

Explains specific buttons like CONTINUOUS, MOMENTARY, TONE, LEVEL UP/DOWN for different models.

Understanding the Receiver

Explains the receiver's LED light status indicators and meanings for collar status and battery levels.

Charging and Matching the Receiver

Details charging time, operating time, and the procedure to match the receiver to the transmitter.

Training Tips

Provides advice on dog training, including session length, positive reinforcement, and proper training environment.

Related product manuals