T
Theresa SmithAug 7, 2025
How to fix Inovance H3U-1616MT-XP System Error Code D8065?
- VVictor BarrettAug 8, 2025
To resolve the Inovance Controller System Error Code D8065, you should correct the user program grammar.
How to fix Inovance H3U-1616MT-XP System Error Code D8065?
To resolve the Inovance Controller System Error Code D8065, you should correct the user program grammar.
How to resolve Inovance H3U-1616MT-XP System Error Code D8064?
To resolve the Inovance Controller System Error Code D8064, review the system parameter settings.
What to do if Inovance H3U-1616MT-XP shows System Error Code D8066?
To resolve the Inovance Controller System Error Code D8066, check for user program logic loop errors.
What to do if Inovance H3U-1616MT-XP displays System Error Code D8060?
To resolve the Inovance Controller System Error Code D8060, check the I/O range or settings.
How to troubleshoot Inovance Controller System Error Code D8067?
To resolve the Inovance Controller System Error Code D8067, inspect the instruction and running parameters.
How to troubleshoot Inovance H3U-1616MT-XP System Error Code D8062?
To resolve the Inovance Controller System Error Code D8062, inspect the communication settings for the control panel or program connection.
Explains PLC model naming conventions and nameplate details.
Provides overall technical specifications for the PLC.
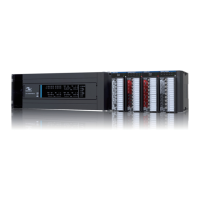
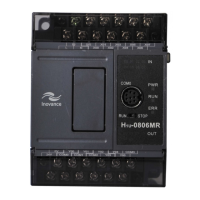
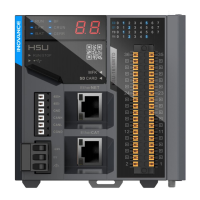
Details physical components and layout for specific H3U PLC models.
Details physical components and layout for other H3U PLC models.
Specifies environmental conditions for safe and effective PLC installation.
Guides on selecting the correct mounting position and required space.
Step-by-step instructions for mounting the PLC on a DIN rail.
Step-by-step instructions for mounting the PLC on a wall.
Instructions on how to attach expansion modules to the PLC.
Instructions for connecting COMO and Ethernet communication cables.
Details the layout and functions of input/output terminals on the PLC.
Explains the purpose and specifications of different I/O terminal types.
Illustrates how to wire normal digital inputs to the PLC.
Illustrates wiring for high-speed digital inputs.
| Model | H3U-1616MT-XP |
|---|---|
| Series | H3U |
| Category | Controller |
| Input Points | 16 |
| Output Points | 16 |
| Output Type | Transistor |
| Power Supply | 24V DC |
| Program Memory | 64 kB |
| Data Memory | 32 kB |
| Pulse Outputs | 2 |
| Storage Temperature | -20°C to 70°C |
| Weight | 0.5 kg |
| Type | PLC |
| Communication Ports | RS485 |
| Humidity | 5% to 95% RH, non-condensing |