G SERIES PILOT’S GUIDE .
INSIGHT INSTRUMENT CORPORATION BOX 122, FORT ERIE, ONTARIO, L2A 5M6
36
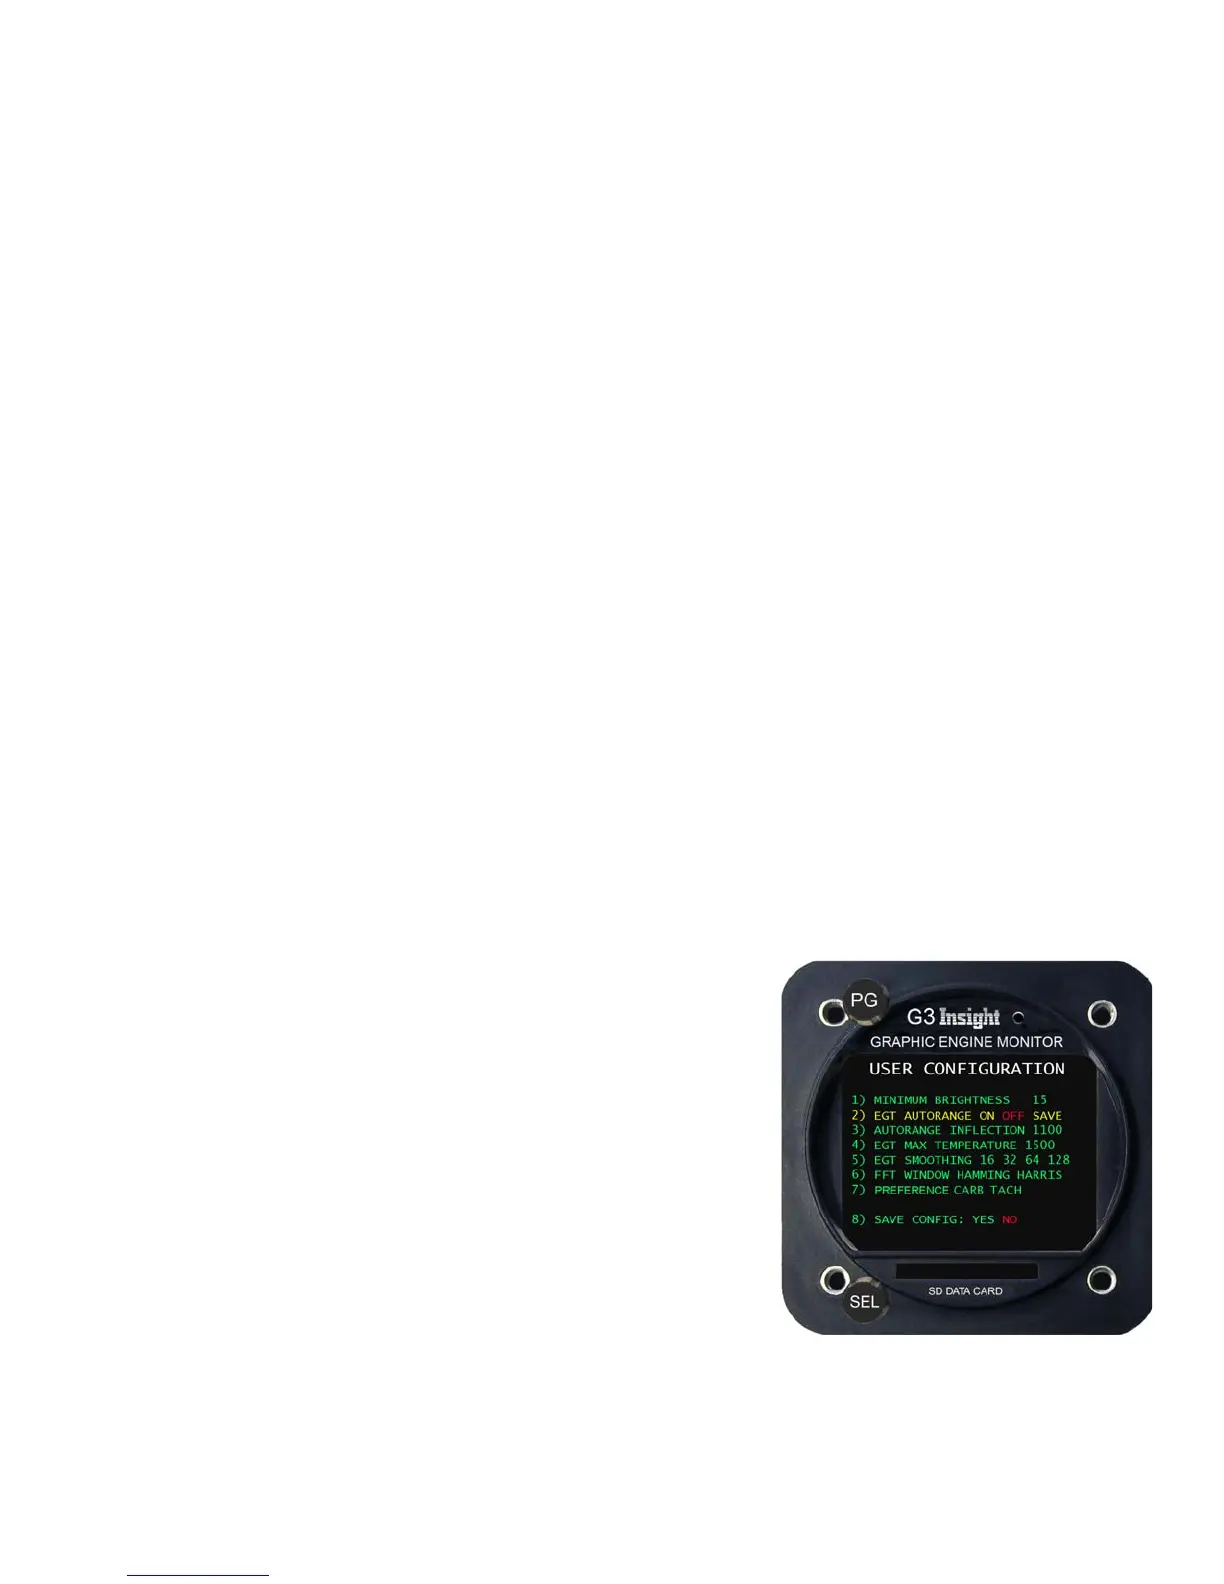
Auto Range Capability On The User Configuration Screen
Using the knobs to navigate the G3-4:
The G3-4 has two knobs: PD select page and SEL work within page. There are two functions built into each knob; the
push button switch activated by pressing the knob in, and the selection is activated by turning the knob either clockwise or
counter clockwise.
The PG knob is used to select the various screens. From the main temperature bargraph screen turn the PG knob coun-
ter clockwise 2 clicks to get to the User Configuration screen. Once you are there you do not use the PG knob any more
because turning it takes you away from the User Configuration screen.
The SEL button is pressed to select a line for adjustment. When you first enter a screen by default no line is selected.
Pressing the SEL button once selects line 1. The selected line is shown in yellow. Pressing it a second time selects line 2.
On any line with multiple selections the selected item will be shown in red.
Setting up the G3 Temperature Bargraph Display:
On the User Configuration screen there are some options for setting up the temperature bargraph display. There are three
different ways to accomplish this. One method is to use the Auto range function to configure the display for you.
Another method is to adjust the MAX EGT TEMPERATURE and AUTORANGE INFLECTION parameters manually, and a
third method is to set the bar heights visually on the main screen.
On line 2 (EGT AUTORANGE) there are 3 possibilities ON OFF and SAVE. After pushing the SEL button until this line is
highlighted in yellow, the SEL knob may then be turned to make a selection on this line. When on line 2 turning the SEL
knob fully counter clockwise selects nothing. From there turning the SEL knob one click clockwise selects ON. The current
selection is shown in red. Turning the SEL knob another click clockwise selects OFF. And one more turn clockwise selects
SAVE.
Using the Auto Range function (Method 1):
To turn OFF the auto range capability on the User configuration screen:
Press the SEL button twice to select line 2 (EGT AUTORANGE).
Turn the SEL knob to select OFF on line 2.
Press the SEL button to select line 7 “SAVE CONFIG”
Turn the SEL knob to select YES on line 7.
Press the SEL knob to save the choice.
We have now turned off auto ranging.
To turn ON the auto range capability on the User configuration screen:
Press the SEL button to select line 2. (EGT AUTORANGE).
Turn the SEL knob to select ON on line 2.
Press the SEL button to select line 7 “SAVE CONFIG”
Turn the SEL knob to select YES on line 7.
Press the SEL knob to save the choice.
We have now turned on auto ranging.
 Loading...