Do you have a question about the Insignia NS-32D220MX18 and is the answer not in the manual?
Guidelines for safely placing televisions to prevent tip-over injuries and damage.
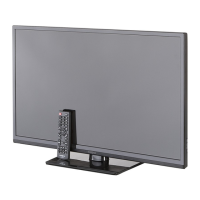
Step-by-step instructions for attaching the TV's stands securely.
Instructions for securely attaching a wall-mount bracket to the TV.
Lists all items included in the TV packaging.
Step-by-step instructions for inserting batteries into the remote.
Properly orienting the remote control towards the TV's sensor.
How to power the TV on, off, and into standby mode.
How to choose which connected device's signal to display.
Explains the structure and navigation of the TV's on-screen menus.
Methods for tuning to different TV channels.
How to control the TV's sound level.
How to display details about the current program and channel.
Steps to enable or disable the HDMI CEC control feature.
Control automatic power off for connected HDMI CEC devices.
Control automatic TV power on when a CEC device is turned on.
Control TV remote volume for connected audio receivers.
View a list of connected HDMI CEC devices.
Choose a specific HDMI CEC device to control.
Access the main menu of a connected HDMI CEC device.
How to access the USB drive and initiate photo viewing.
Navigate and view photo files stored on a USB drive.
Display photos from a USB drive as an automated slideshow.
How to modify picture settings like mode, backlight, brightness, contrast.
Options to change how the picture fills the screen.
How to modify sound modes, balance, bass, and treble.
Choose how audio is outputted when headphones/speakers are connected.
How to scan for available TV channels and update the channel list.
Skip unwanted channels in the channel list.
Create and manage a list of preferred TV channels.
Access and browse channels saved in the favorite list.
Assign custom names to channels for easier identification.
Measure the strength of the digital TV signal for picture quality.
Instructions to set or modify the parental control password.
Prevent access to programs without ratings.
Configure ratings for US and Canadian TV and movie content.
Obtain rating data for parental control settings.
Disable the physical buttons on the TV, requiring remote use.
Enable or disable the display of text captions for audio.
Choose caption display format for analog channels.
Adjust digital caption appearance (style, size, color).
Set the TV's current date and time.
Schedule the TV to turn off automatically after a set time.
Change the language displayed in the TV's menus.
Enable/disable automatic detection of connected video devices.
Assign custom names to input sources for easier selection.
Access device status and firmware details for troubleshooting.
Find information on remote codes and soundbar connections.
Steps to install the latest firmware for improved performance.
Rerun the initial setup wizard to customize settings.
Check if the TV's built-in speakers are functioning correctly.
Reset all customized settings to factory defaults.
Solutions for issues with HDMI CEC connected devices.
Regulatory compliance information for the device.
Regulatory compliance information for Canada.
Industry Canada compliance information.
Explains terms used in the limited warranty statement.
Specifies the length of the warranty period.
Details what defects and issues are covered by the warranty.
Instructions on how to get service for warranty claims.
Specifies the geographical areas where the warranty is valid.
Lists exclusions from the warranty coverage.
| Screen Size | 32 inches |
|---|---|
| Display Type | LED |
| Refresh Rate | 60Hz |
| HDMI Ports | 2 |
| USB Ports | 1 |
| Smart TV | No |
| Built-in Wi-Fi | No |
| Audio Output | 10W |
| Resolution | 720p (1366 x 768) |