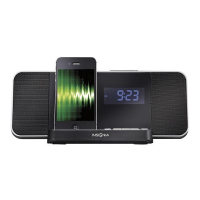
Congratulations on your purchase of a
high-quality Insignia product. Your
NS-CLIP02 represents the state of the art in
Clock Radios with an iPod/iPhone Dock
and is designed for reliable and trouble-
free performance.
Package contents
• Clock Radio with iPod/iPhone Dock
• AC power adapter
• Quick Setup Guide
Works with all docking iPods and iPhones.
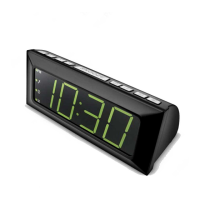
Installing the batteries
1 Open the battery compartment on the back of
your radio.
2 Place two AAA size batteries (not included) in the
battery compartment.
Make sure to match the + and - on the battery to
the + and - signs in the battery compartment.
3 Close the battery compartment until it clicks into
place.
Connecting the AC adapter
1 Plug the small connector at the end of the power
cord into the DC IN jack on the back of your radio.
2 Plug the AC adapter into a 100-240V, 50/60Hz
power outlet.
Setting the time
1 Press and hold Clock/Sync until the hour blinks
on the display.
2 Press Volume Up/Volume Down or
Previous/Next to set the hour.
3 Press the Clock/Sync button again. The minutes
blink on the display.
4 Press Volume Up/Volume Down or
Previous/Next to set the minutes.
5 To finish setting the clock, press the Clock/Sync
button again, or just wait for ten seconds until the
display returns to normal.
Turning on your clock radio
• Press the Standby/Source button for more
than two seconds to turn on the clock radio.
Quick Setup Guide
Clock Radio with iPod/iPhone Dock I NS-CLIP02
Important notes
• The two AAA batteries are only for the clock memory. When battery power is low, or if they
are installed incorrectly, the logo will flash on the display. Change or reinstall the
batteries.
• Please remove the batteries if your clock radio is not used for a long time.
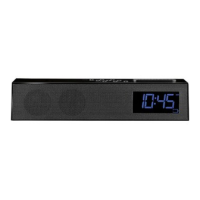
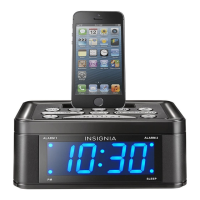
Features
Front view
Top view
Back view
# Component
1 Dock
2 Sleep
3 Standby /Source
4 Previous/Fast back
5 Play/Pause/Preset
6 Next/Fast forward
7 Volume up/volume down (+/-)
8 Alarm 1/Alarm 2
9 Clock /Sync
10 Snooze/Dimmer
11 AUX jack
12 DC jack
Description
Insert your iPod/iPhone into this dock to play selections through your clock radio.
The clock radio will charge the iPhone/iPod when docked. Use the adapter that came with
your iPod/iPhone, if needed.
Press to turn on the Sleep timer (15, 30, 45, 60, 90). To turn off, press until “00” appears on
the display.
Press and hold to turn on your clock radio. Press and hold to turn off your clock radio.
When your clock radio is on, press to cycle through the sound sources (Dock > AUX > FM).
• In Dock mode, press to go to the previous track, or press and hold to use fast back.
• In FM mode, press to go to the next lower radio frequency, or press more than one
second and release to search for a lower radio station.
• In Dock mode, press to begin playback. Press again to pause playback. Press again to
resume playback. Press and hold to turn off your iPod/iPhone screen.
• In FM mode, press to select a preset station. Continue pressing to cycle through the
available preset stations. You can store up to 20 preset stations.
• In Dock mode, press to go to the next track, or press and hold to use fast forward.
• In FM mode, press to go to the next higher radio frequency, or press more than one
second and release to search for a higher radio station.
Press to increase or decrease the clock radio volume.
Press to set the alarm. See Setting the alarm on page 2.
Press to set the time or synch the time with an iPhone. See Setting the time and Synching
the time with an iPhone on page 2.
Press while the alarm is sounding to turn the alarm off for 10 minutes. You can do this as
many times as you want.
To turn the alarm off until the next day, press any other button.
To turn the alarm off, press the Alarm button repeatedly until there is no source displayed
next to the alarm icon on the display.
When the alarm is not sounding, press to cycle through the display brightness levels
(high>middle>low).
Plug the connector from an external sound source, such as an MP3 player, into this jack.
Plug the small connector from the AC adapter into this jack.
Sleep
Source
PresetTune- Tune+
Sync
2
+
-
1
Insert two AAA
batteries in this
compartment.
SNOOZE / DIMMER
NS-CLIP02_12-0134_QSG_V3_EN_Final Press.pdf 1 2/24/2012 11:37:06 AM