EasyManua.ls Logo

InSinkErator Evolution Pro Cover Control Plus - User Manual

InSinkErator Evolution Pro Cover Control Plus
16 pages
Print Icon
To Next Page IconTo Next Page
Loading...
PRO CoverControl
Plus
Covered Activation Food Waste Disposer/Triturador de Desperdicios de Alimentos Activado por Tapón/Broyeur de Déchets À Activation Couverte
1
PRO COVER CONTROL
PLUS
Evolution Series
®
COVERED ACTIVATI ON FOOD WASTE DISPOSER
TRI TURADOR DE DESPER DICIOS DE ALI MENTOS
ACTIVADO POR TAPÓN
BROYEUR DE DÉC HETS À ACTIVATIO N COUVERTE
www.insinkerator.com
®
Exclusively for professional plumbing contractors.
Exclusivamente para contratistas profesionales de plomería.
Exclusivement pour les entrepreneurs en plomberie professionnels.
77188 Rev B
indicates a hazardous
s
ituation which, if not avoided, will result in
d
eath or serious injury.
i
ndicates a hazardous
situation which, if not avoided, could result
i
n death or serious injury.
i
ndicates a hazardous
s
ituation which, if not avoided, could result
in minor or moderate injury.
is used to address practices
n
ot related to personal injury.
(
or equivalent) signs
indicate specific safety-
related instructions or procedures.
indica una situación
p
eligrosa que, si no se evita, provocará
l
esiones graves o incluso la muerte.
indica una situación
r
iesgosa, la cual, si no se evita, puede
ocasionar lesiones graves o incluso
l
a muerte.
i
ndica una situación
riesgosa, la cual, si no se evita, puede
provocar heridas leves o moderadas.
hace referencia a
prácticas que no presentan riesgos de
generar lesiones personales.
(o equivalentes) son
señales que designan
instrucciones o
procedimientos específicos de seguridad.
indique une situation
dangereuse qui, si elle n’est pas évitée,
entraînera la mort ou une blessure grave.
indique une
situation dangereuse qui, si elle n’est pas
évitée, pourrait entraîner la mort ou une
blessure grave.
indique une
situation dangereuse qui, si elle n’est pas
évitée, pourrait entraîner une blessure
mineure ou modérée.
est utilisé pour décrire
des pratiques qui ne sont pas liées à des
blessures.
(ou l'équivalent) ces
panneaux indiquent des
directives ou des procédures concernant
spécifiquement la sécurité.
D
A N G E R
W
A R N I N G
C
AU T IO N
N OT I C E
SAFETY
INSTRUCTIONS
DANGER
PELIGRO
ADVERTENCIA
AVERTISSEMENT
P
RECAUCIÓN
MISE EN GARDE
AV I S O
AV I S
INSTRUCCIONES
PARA SU
SEGURIDAD
DIRECTIVES DE
SÉCURITÉ
PRO Series
®
Food Waste Disposers
Question and Answer IconNeed help?

Do you have a question about the InSinkErator Evolution Pro Cover Control Plus and is the answer not in the manual?

Summary

PRO Series Food Waste Disposers

Safety and Hazard Information

Explains hazard levels like DANGER, WARNING, CAUTION, and their meanings in multiple languages.

Evolution Series Features

SoundSeal and MultiGrind Technologies

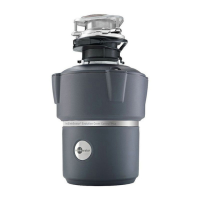
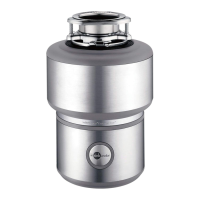
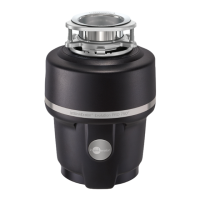
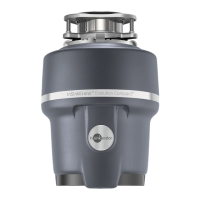
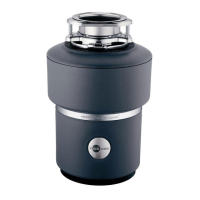
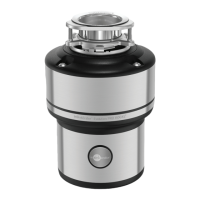
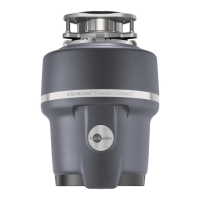
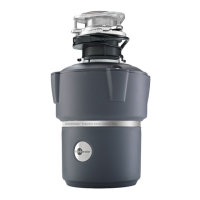
Details InSinkErator's patented sound and grind technologies for quiet and efficient performance.

Disposer Component Identification

Identifies key components of the disposer through numbered diagrams and descriptions in three languages.

Disposer Dimensions

Provides key measurements and dimensions for installation and clearance.

Package Contents and Tools

Included Components

Lists and illustrates all parts included with the disposer, labeled A through L.

Required Tools and Materials

Lists tools and materials not included but necessary for installation.

Removal of Old Disposer

Electrical Safety Precautions

Emphasizes turning off power at the fuse box or circuit breaker to prevent electrical shock.

Step 1: Initial Disconnect

Guides on disconnecting the sink drain and dishwasher if applicable, based on whether it's a replacement.

Step 2: Drain Trap Disconnection

Instructions for disconnecting the drain trap from the waste discharge tube and dishwasher connection.

Removal of Old Disposer (Continued)

Step 6: Loosen Mounting Assembly Screws

Instructs to loosen the three screws on the mounting assembly using a flathead screwdriver.

Step 7: Remove Snap Ring

Details how to pry off the snap ring using a flathead screwdriver.

Step 8: Remove Sink Flange

Guides on removing the sink flange and cleaning off old plumber's putty.

Installation Instructions

Step 9: Apply Plumbers Putty

Instructions on applying plumber's putty around the sink flange before insertion.

Step 10: Insert Sink Flange

Guides on pressing the flange into the sink drain and removing excess putty.

Step 11: Assemble Mounting Rings

Details inserting gaskets, backup flange, and mounting ring, securing with snap ring.

Step 12: Secure Flange with Weight

Advises placing weight on the flange to hold it while securing the snap ring.

Step 13: Tighten Mounting Screws

Explains tightening screws based on backup flange type (G1/G2) for proper fit.

Step 14: Dishwasher Connection Notice

A notice regarding dishwasher connection only and skipping to Step 16 if not needed.

Installation Instructions (Electrical)

Step 15: Prepare Dishwasher Drain

Instructs to knock out and remove the drain plug for dishwasher connection.

Step 16: Connect Electrical Cable

Guides on turning the disposer over, removing the cover plate, and inserting the electrical cable connector.

Step 17: Run and Secure Electrical Cable

Details running the electrical cable through the access hole and securing the connector.

Step 18: Wiring Requirements

Specifies the disposer's requirement for a 15-amp switch and proper wiring for safety.

Step 19: Grounding and Wiring Warnings

Crucial warnings about improper grounding, connecting wires, and using wire nuts for safe electrical installation.

Step 20: Secure Electrical Cover Plate

Instructs to push wires into the disposer and replace the electrical cover plate.

Installation Instructions (Plumbing & Final)

Step 21: Connect Discharge Tube

Guides on placing the discharge tube into the mount and securing it with the hose clamp.

Step 22: Align Mounting Tabs

Instructions on aligning the disposer's mounting tabs with the ramps on the mounting ring.

Step 23: Secure Disposer to Mounting Ring

Details turning the lower mounting ring to lock the tabs onto the ramps.

Step 24: Trim Discharge Tube

Advises trimming the discharge tube if necessary for a proper fit and reconnecting plumbing.

Step 25: Attach Spec Label

Instructions to detach and place the removable specification label in a visible location.

Step 26: Test for Leaks

Guides on inserting the stopper, filling the sink with water, and checking for leaks.

Operating Instructions

Disposer Stopper Operation Modes

Explains how to use the stopper to switch between SEALED, PARK, and RUN modes for the disposer.

Safety Instructions and Precautions

Risk of Fire, Electric Shock, or Injury

Details safety warnings related to fire, electric shock, and personal injury during use.

Grounding Instructions

Provides essential instructions for proper grounding of the disposer to prevent electrical hazards.

General Precautions for Use

Lists basic precautions when using the appliance, including handling jams and avoiding certain materials.

Safe Operation Practices (DOs and DONTs)

Offers guidance on proper usage, such as running cold water and avoiding pouring grease.

Maintenance and Warranty

Cleaning the Disposer

Provides steps for cleaning the grind chamber and baffle to remove odors and buildup.

Releasing a Jammed Disposer

Explains how to use the Jam-Buster™ wrench and reset button to clear jams.

9-Year In-Home Full Service Warranty

Outlines the terms, coverage, exclusions, and claim process for the 9-year warranty.

Limitation of Liability

Defines the extent of the manufacturer's liability and disclaims consequential damages.

InSinkErator Evolution Pro Cover Control Plus Specifications

General IconGeneral
BrandInSinkErator
ModelEvolution Pro Cover Control Plus
CategoryGarbage Disposal
LanguageEnglish

Related product manuals