STEP 10
Step 10 Upper Cable
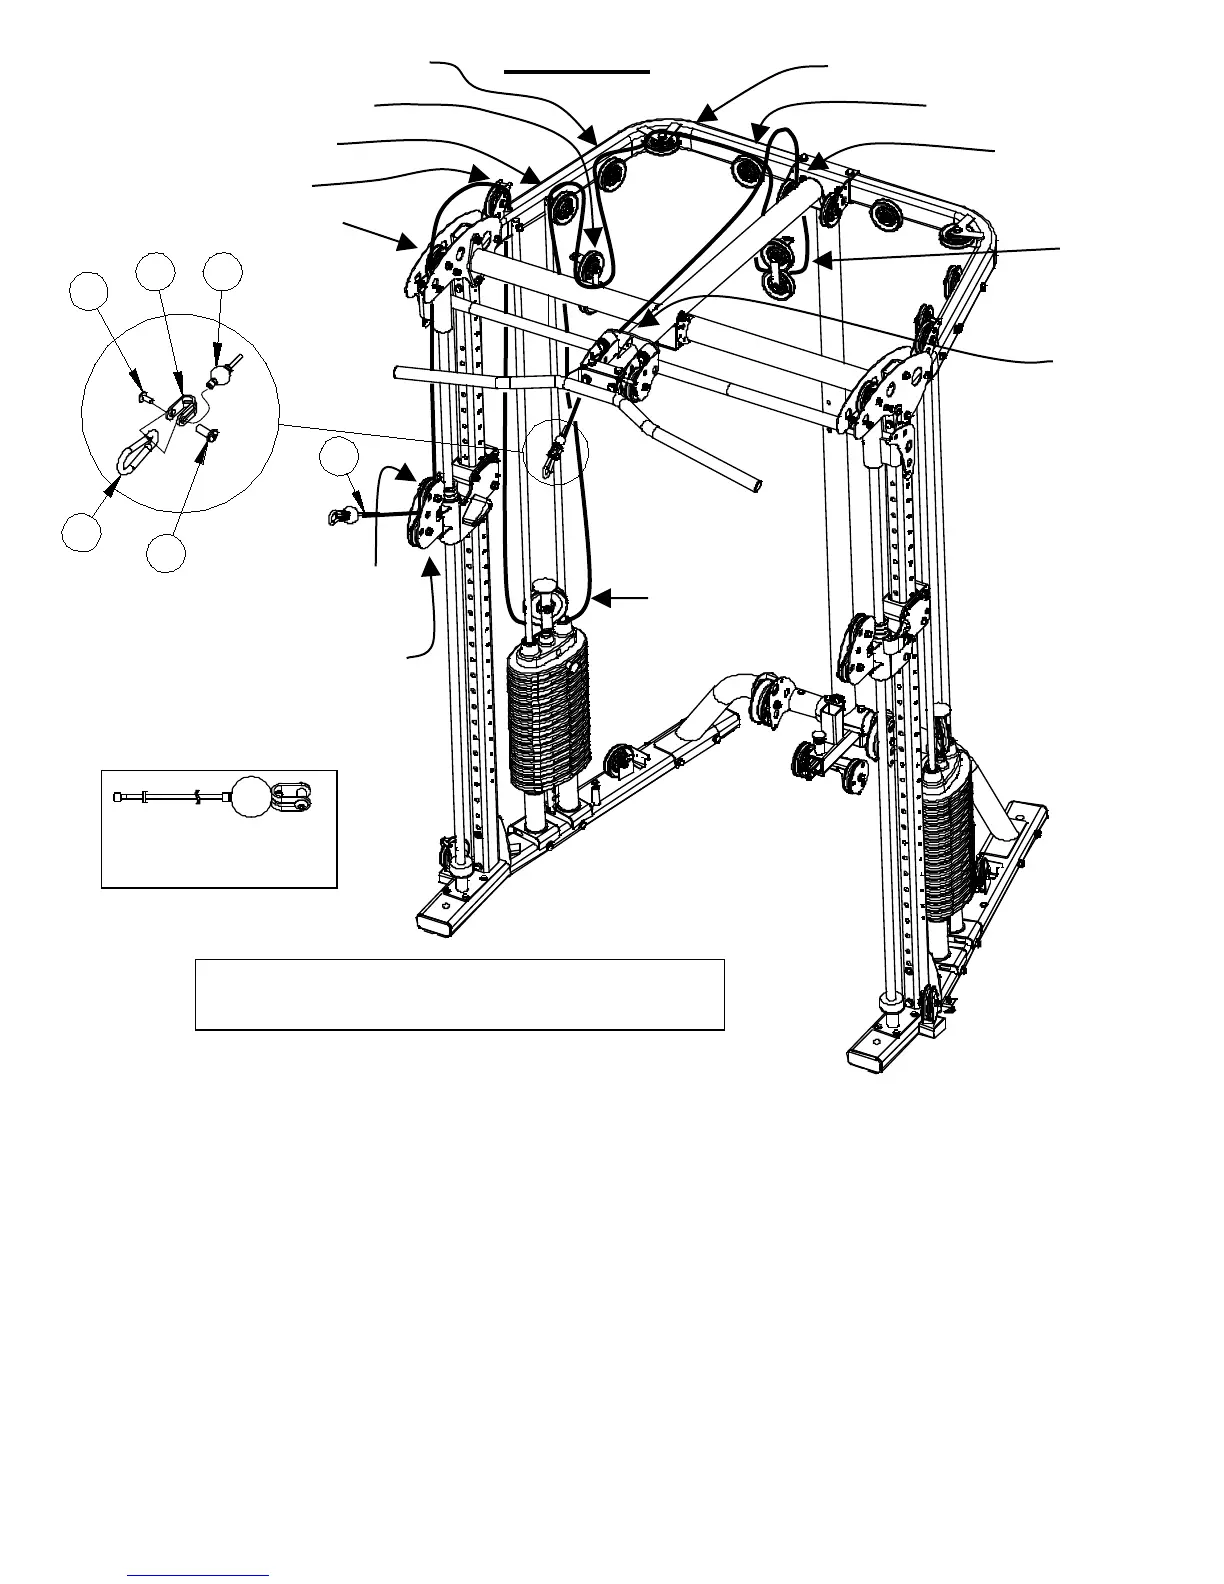
A) Route the Upper Cable (33) starting with the small swage end without the ball. Insert
between Pulleys 1&2, go up over Pulley 3, over to Pulley 4 and down under Pulley 5, now
back up and over Pulley 6, then under floating Pulley 7 (next to the tab sticking out from the
Floating Pulley Bracket) of the Floating Pulley Assembly (22), (Make sure the tab on the
Floating Pulley Bracket is sticking towards the outside of the machine), now up over
Pulley 8 and back around Pulley 9 and over Pulley 10, next under floating Pulley 11(next to
the tab sticking out from the Floating Pulley Bracket) of the Floating Pulley Assembly, (Make
sure the tab on the Floating Pulley Bracket is sticking towards the back of the
machine), now up over Pulley 12 and out over the lat Pulley 13.
B) Next slide the Cable Ball (43) over the swage of the cable end at Pulley 13 and insert the
swage into the “U” Bracket Cable End (42). Now place a Spring Clip (77) between the “U”
Bracket and insert the Button Head Bolt (40) through the “U” Bracket and Spring Clip into the
Flat Head Nut (41) as shown. Tighten now.
C) Attach a Spring Clip (77) to the other end of this cable at Pulleys 1&2.
D) Repeat this step on the other side of the machine.
PAGE 16
Upper Cable #
Note: Make sure all cables are run between the
retainer pin and the pulley.