2.2.1
[
Beginner
]
Shooting mode screen and settings
Standalone Use
1.
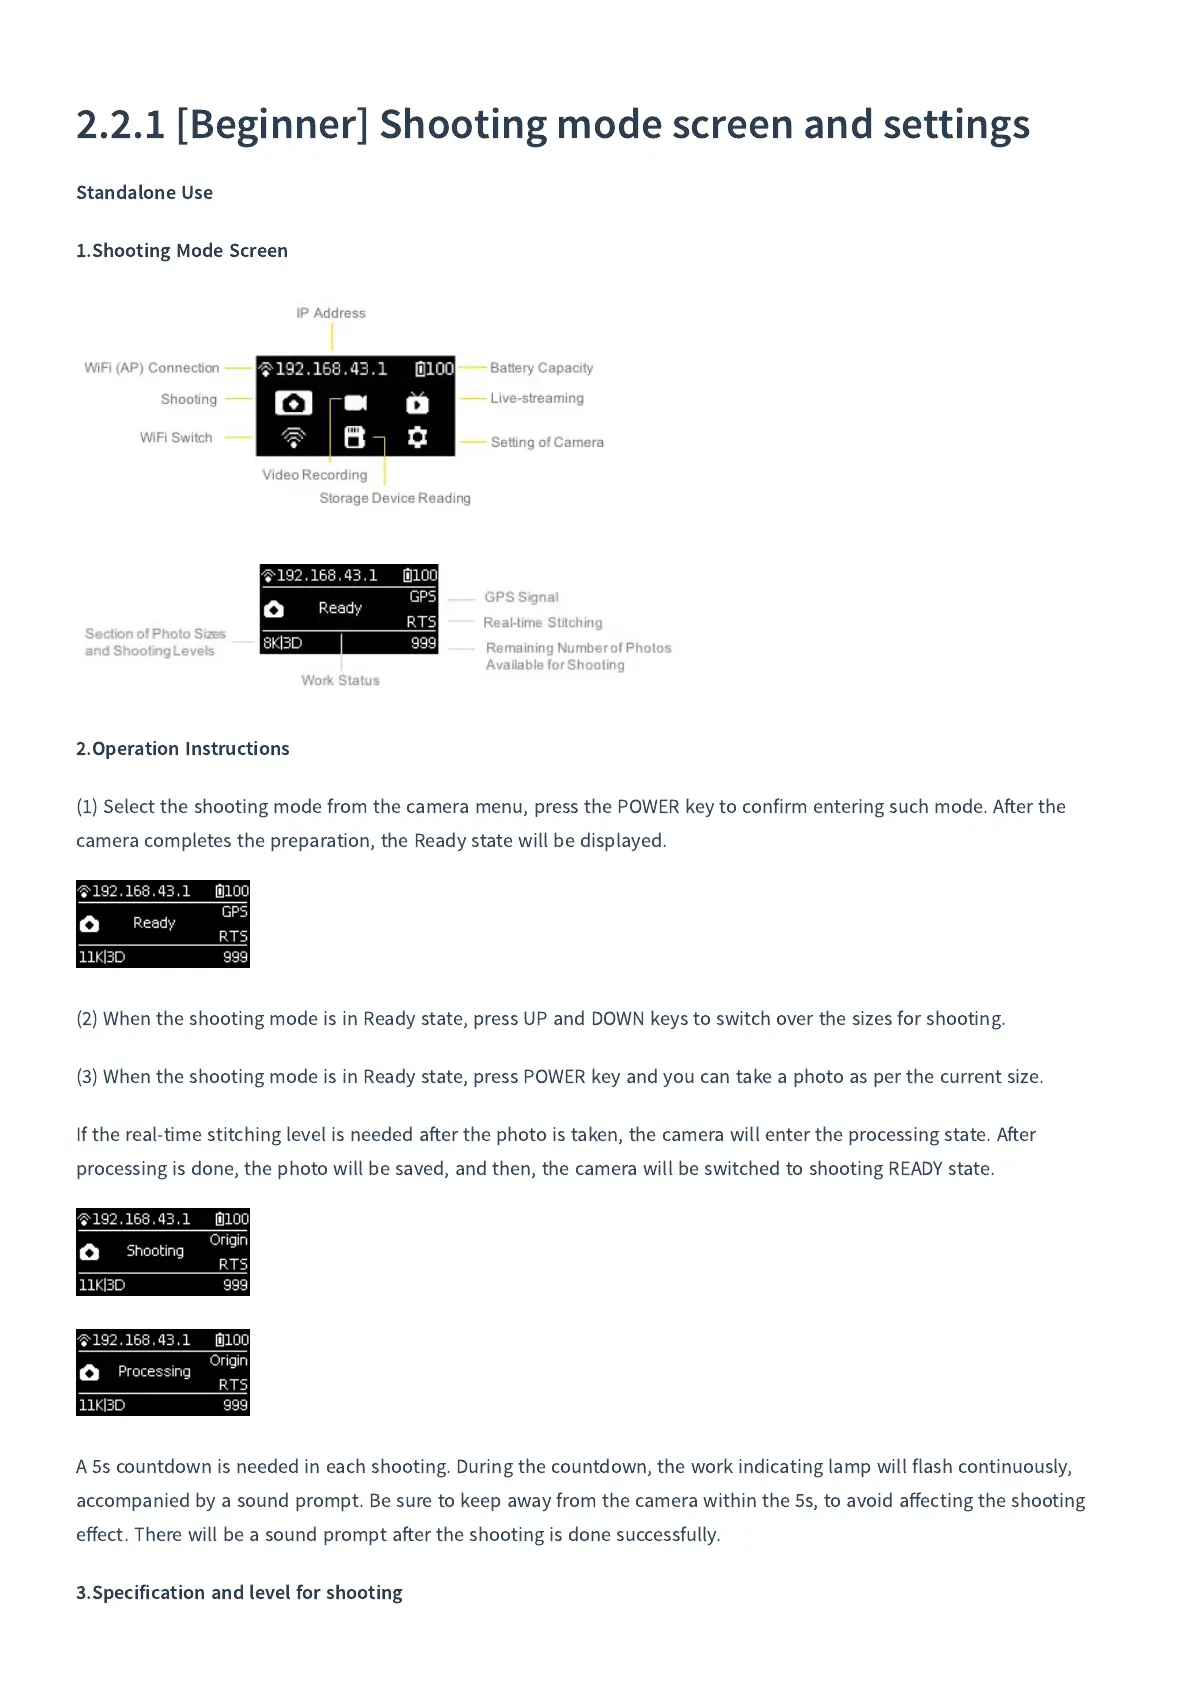
Shooting Mode Screen
2.
Operation Instructions
(
1
)
Select the shooting mode from the camera menu
,
press the POWER key to confirm entering such mode
.
A
er the
camera completes the preparation
,
the Ready state will be displayed
.
(
2
)
When the shooting mode is in Ready state
,
press UP and DOWN keys to switch over the sizes for shooting
.
(
3
)
When the shooting mode is in Ready state
,
press POWER key and you can take a photo as per the current size
.
If the real
-
time stitching level is needed a
er the photo is taken
,
the camera will enter the processing state
.
A
er
processing is done
,
the photo will be saved
,
and then
,
the camera will be switched to shooting READY state
.
A
5
s countdown is needed in each shooting
.
During the countdown
,
the work indicating lamp will flash continuously
,
accompanied by a sound prompt
.
Be sure to keep away from the camera within the
5
s
,
to avoid a
ff
ecting the shooting
e
ff
ect
.
There will be a sound prompt a
er the shooting is done successfully
.
3.
Specification and level for shooting