Do you have a question about the Instant Pot Omni and is the answer not in the manual?
Safety, unpacking, initial cleaning, and proper placement instructions for first-time use.
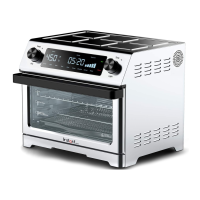
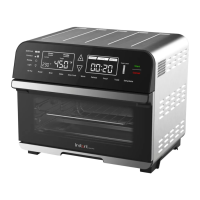
Identifies and describes the main components and features of the Omni Toaster Oven.
Illustrates and lists the various accessories included with the toaster oven, like rack and basket.
Explains the functions of the LED display, temperature dial, and time dial.
Details the various messages displayed on the oven indicating its operational status.
Instructions for adjusting programs, sounds, and temperature scales (Fahrenheit/Celsius).
A step-by-step guide to perform a test run ensuring proper oven function before cooking.
Instructions on how to properly assemble and attach food to the rotisserie spit for cooking.
Guidance on safely removing cooked food from the rotisserie spit using the lift.
The Instant™ Omni™ Toaster Oven is a versatile 26-liter countertop appliance that combines the functionalities of an air fryer, toaster, and convection oven. Designed for ease of use, it offers 7 Smart Programs and 2 cooking methods, making it suitable for a wide range of culinary tasks.
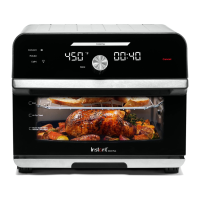
The primary function of the Instant Omni Toaster Oven is to provide a multi-functional cooking experience. It allows users to air fry, toast, bake, broil, roast, reheat, and dehydrate food items. The appliance is equipped with both top and bottom heating elements, ensuring even cooking. Convection cooking, which involves rapid air circulation, heats the oven quickly and cooks food efficiently and uniformly. The rotisserie function, available for Air Fry and Roast programs, allows for rotating food items for thorough cooking.
The Instant Omni Toaster Oven features an intuitive touch screen control panel with an LED display. This display provides essential information such as cooking status indicators (Preheating/Cooking/Keep Warm), temperature, number of toast/bagel slices, cooking time, and toasting level. The 7 Smart Programs (Air Fry, Toast, Bake, Broil, Roast, Reheat, Dehydrate) offer preset cooking times and temperatures, which can be easily adjusted to suit individual preferences.
Two dials on the control panel enhance usability:
The LED display communicates various statuses:
Users can adjust cooking time and temperature during a Smart Program. These adjustments are saved in memory once the Start button is pressed. Individual Smart Programs can be reset to factory defaults by holding the program key for 3 seconds in Standby mode. All Smart Programs can be reset by holding the Cancel button for 3 seconds in Standby mode.
The appliance provides various beeps for different actions, such as opening/closing the door, touching a key, program start, preheating completion, and error codes. Sounds can be turned on or off by holding both Temp and Time dials for 3 seconds in Standby mode, though error alerts cannot be silenced.
The rotisserie function involves assembling the rotisserie spit and forks, securing the food item, and inserting the assembly into the cooking chamber. The rotisserie arm is then placed into the catches on either side of the oven. The "Rotate" function, when selected, ensures the food rotates for even cooking. Removing rotisserie food requires caution due to hot surfaces, using the rotisserie lift hooks to extract the spit.
The Instant Omni Toaster Oven requires regular cleaning to ensure optimal performance and safety.
For baked-on grease residue on accessories and in the cooking chamber, unplug the appliance and allow it to cool. Spray the affected area with a mixture of baking soda and vinegar, then wipe clean. For stubborn stains, allow the mixture to sit for several minutes before removing.
The manual provides solutions for common issues, such as the oven not turning on (checking power cord, outlet, circuit), condensation/water dripping (ensuring proper ventilation, 5 inches of space around the oven), and white/black smoke (avoiding high-fat foods, checking for excess oil/fat, drying moist ingredients, being mindful of seasoning, cleaning food particles/residue). Error codes (E1, E2, E3, E6, E7) indicate specific circuit or function abnormalities and require contacting customer care. Users are advised not to attempt repairs themselves.
| Model | Omni |
|---|---|
| Capacity | 18 Liters |
| Power | 1800 Watts |
| Functions | Air Fry, Roast, Bake, Broil, Dehydrate, Toast, Reheat, Rotisserie |
| Accessories | Air Fry Basket, Rotisserie Spit |