5
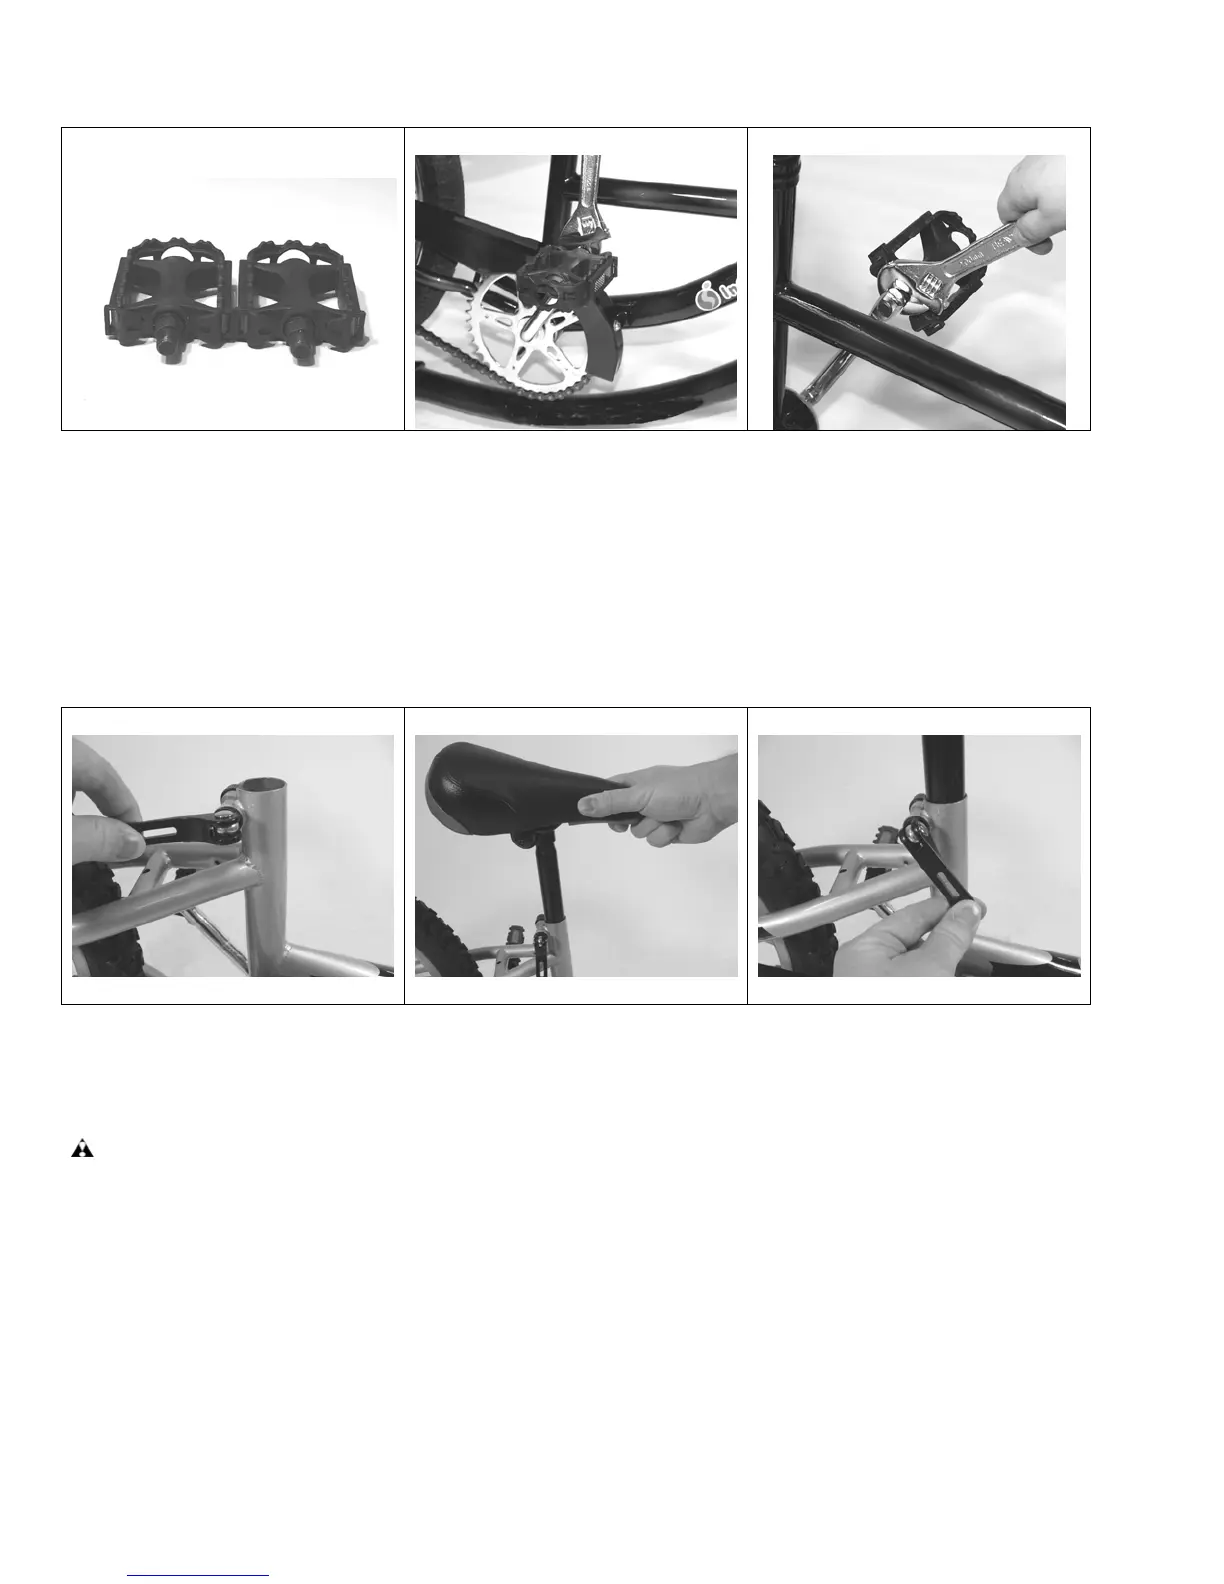
STEP 5 Attach the pedals to the cranks
5A
5B 5C
5A. Locate the right pedal (marked with an “R” at the end of the threaded shaft), and the left
pedal (marked with an “L” at the end of the threaded shaft).
5B. Thread the right pedal clockwise into the right crank arm (the side with the chain) by
hand. Tighten using an adjustable (or 15mm) wrench.
5C. Thread the left pedal counter-clockwise into the left crank arm (the side opposite the
chain) by hand. Tighten using an adjustable (or 15mm) wrench.
STEP 6 Install the seat post assembly and adjust the seat
6A
6B 6C
6A. Open the quick release lever, loosening the seat clamp.
6B. Slide the tube of the seat post assembly into the frame seat tube to a depth of at least
2-1/2 inches.
WARNING! Minimum insertion line must be completely inserted into frame and must not be visible!
6C. Adjust the seat to the desired height. With the seat facing forward, tighten the seat post
clamp by closing the quick release lever. Make sure the seat does not spin or move up
and down. If it does, open the lever and tighten the nut on the other side to adjust the
clamp tightness. Repeat this process until the seat doesn’t move while the lever is
closed.