26
§ Centrifugal fan installation.- for CV-CF models.
1. Fix the unit to the cold room wall before installing the centrifugal fan.
2. Take out the side panels of the centrifugal box to access the fixing screws.
3. Screw the centrifugal box to the refrigeration unit and connect the fan electrical wiring.
4. Re install the side panels.
The INTARTOP unit series are specially designed for roof mounting. To do so, please follow below
steps:
§ Before assembling the roof of the cold room, cut out the roof frame as indicated in the plan and
dimensions chart (page 16)).
§ Once the cold room is assembled, place the unit on the roof.
§ In some operation conditions (e.g. intenstive use in wet environmment, air infiltrations, etc.), it
could be possible that the unit is not able to evaporate all condensing water. In that case, install a
draining pipe in the drain bucket to a permanent draining point.
§ Finally seal with silicon the gap between the unit and the wall panel.
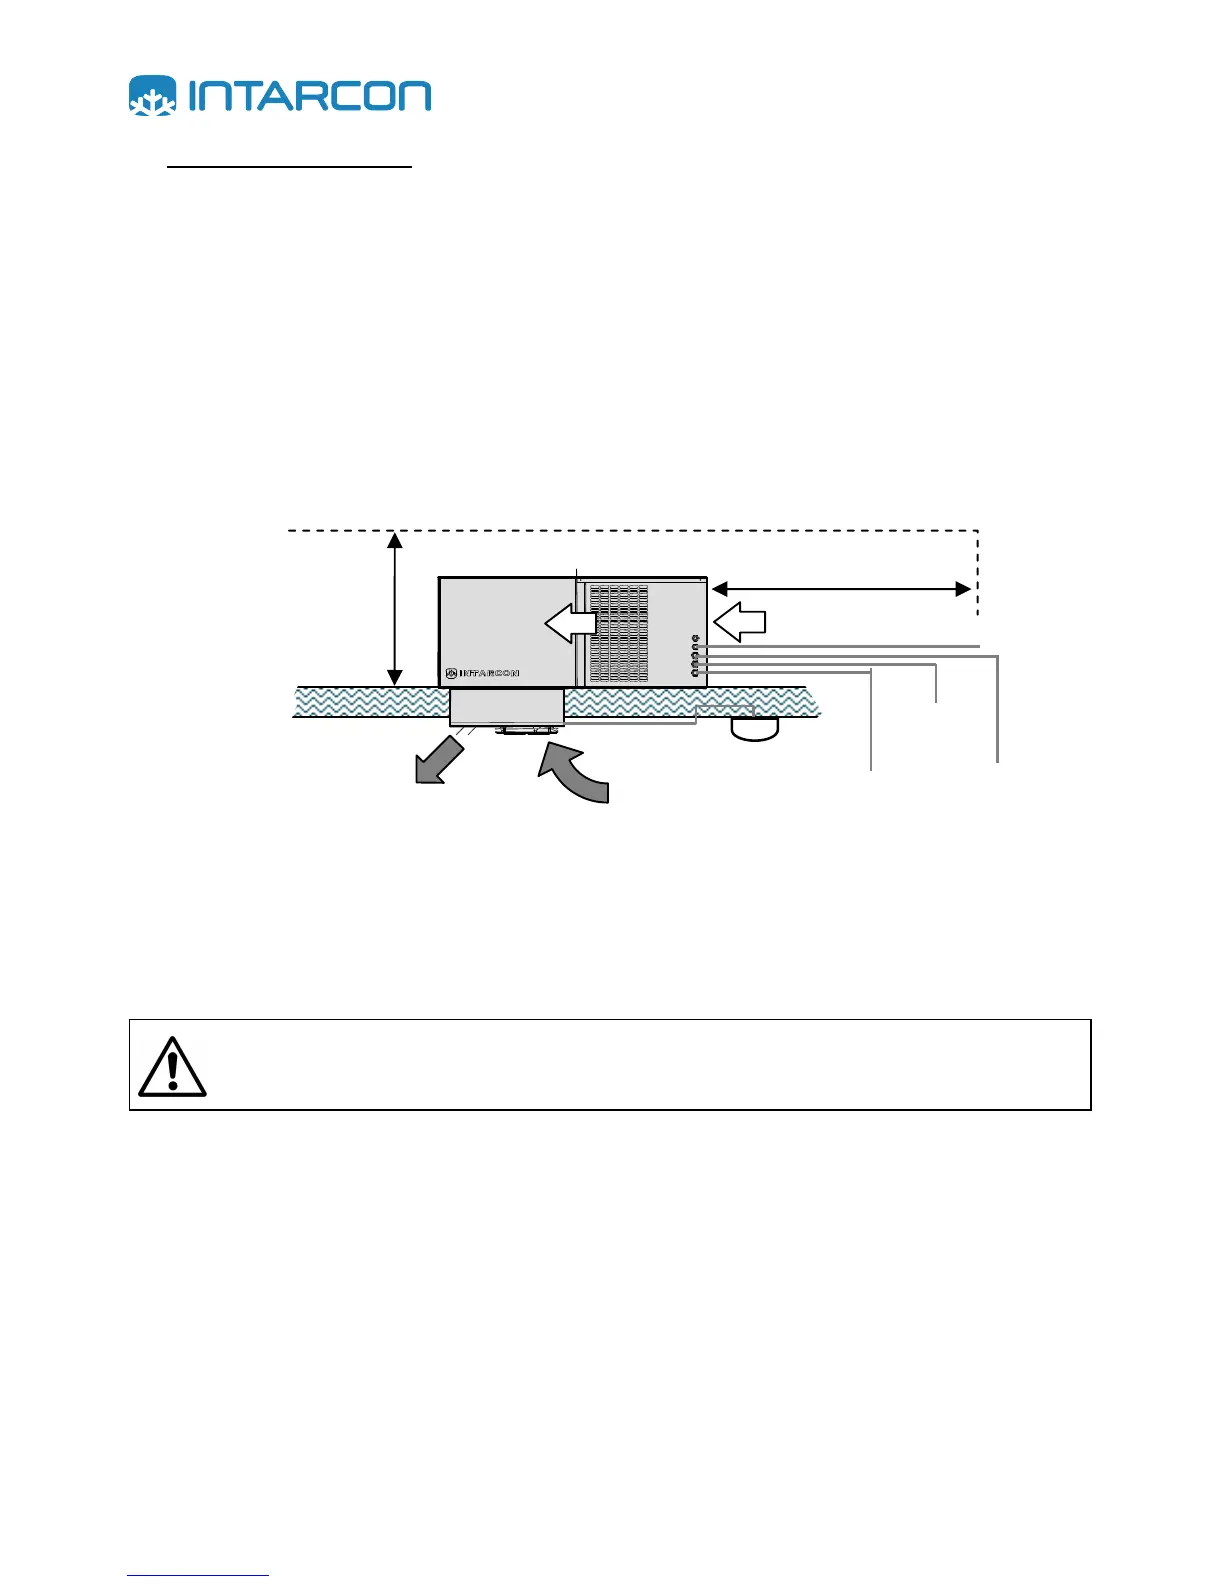
To ensure good working conditions and easy access for maintenance, please keep free
the recommended separation around the unit.
Condensation air ducts (CV-C and CR-C models)
§ Units of CV-C and CR-F series feature a centrifugal condensation fan to be ducted. It is
recommended to duct the air extraction. Optionally, it is also recommended to duct the air suction
through semi-flexible ducts in aluminium or rigid ducts in PVC plastic, steel or fibreglass.
§ Failing a detailed calculation, the following chart shows the recommended dimensions according
to the duct type, for an equivalent total length of 20 m and both air intake-outtake grilles.
RECOMMENDED
SEPARATION
MINIMUM 650 mm
COLD
ROOM
LIGHT
DOOR
MICROSWITCH
RECOMMENDED