Intel NUC Kit NUC7i7BNH, NUC7i5BNH & NUC7i3BNH User Guide
6
5. Gently spread the retaining clips at each end of the SO-DIMM socket. The SO-DIMM pops out of
the socket.
6. Hold the SO-DIMM by the edges, lift it away from the socket, and store it in an anti-static package.
7. Reinstall and reconnect any parts you removed or disconnected to reach the SO-DIMM sockets.
8. Replace the computer’s cover and reconnect the AC power cord.
Install a 2.5” SSD or Hard Drive
For a list of tested 2.5” hard drives, go to the Intel® Product Compatibility Tool:
• NUC7i7BNH
• NUC7i5BNH
• NUC7i3BNH
Follow these instructions to install a 2.5” Solid State Drive (SSD) or Hard Disk Drive (HDD):
1. Observe the precautions in "Before You Begin" on page 2.
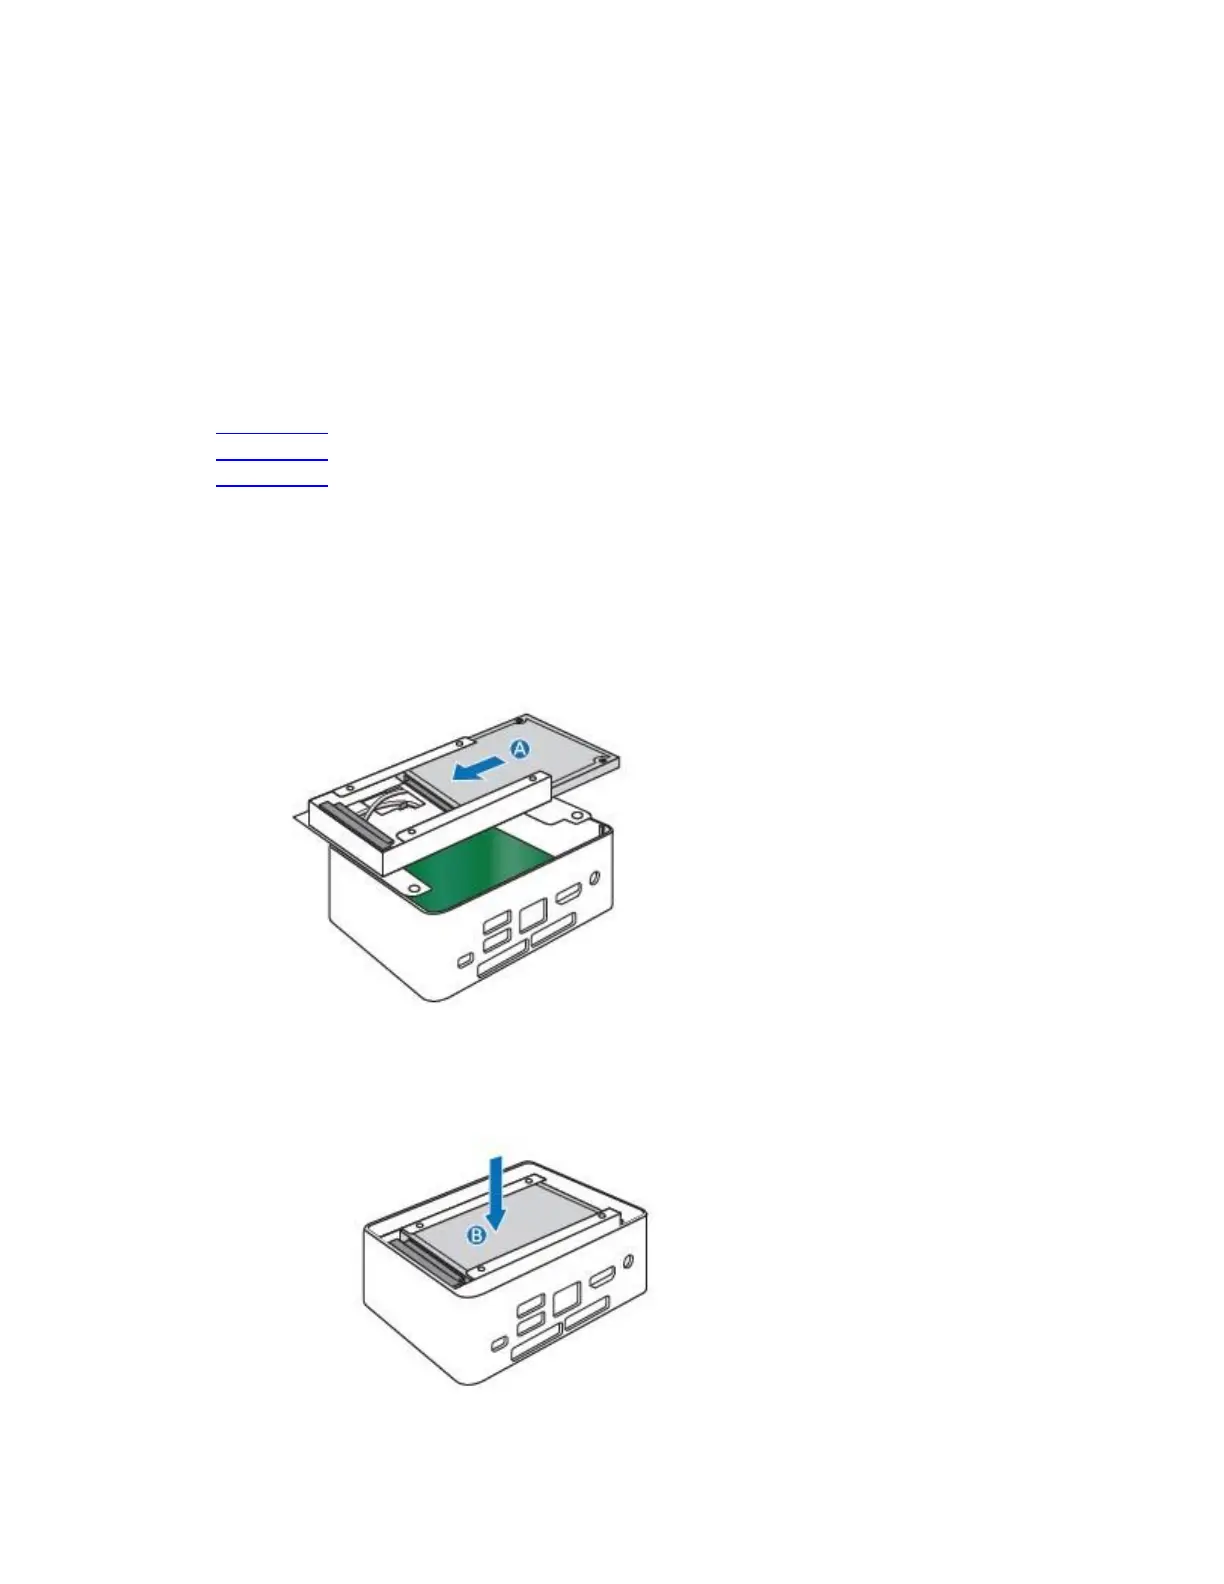
2. Slide the 2.5” drive into the drive bay, ensuring the SATA connectors are fully seated into the
connectors of the SATA daughter card (A).
3. Secure the drive into the drive bay with the two small silver screws that were included in the box.
4. Set the drive bay bracket down inside the chassis (B).