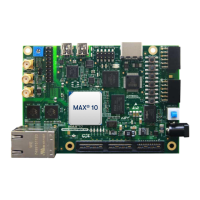
Quick Start Guide | Intel Stratix 10 GX FPGA Development Kit
If you cannot connect to the Board Update Portal, go to
www.intel.com/content/www/us/en/programmable/
products/boards_and_kits/dev-kits/altera/kit-s10-fpga.
html to ensure that you have the latest development kit
software.
Step 2. Install the development kit software
Install the latest development kit software tools from
www.intel.com/content/www/us/en/products/program-
mable.html and follow the on-screen instructions to
complete the installation.
Step 3. If necessary, use the Board Update Portal to
update your board and load the latest BTS
The Board Update Portal allows you to download new FPGA
congurationstothe“user”portionoftheboard’sash
memory. If your board is up to date, you can skip this step
and proceed to Using the BTS section of this quick start
guide.
If you cannot connect to the Board Update Portal, refer to
thekit’suserguideforotheroptionstoupdatetheash
memory.
Toupdatetheuserportionofashmemoryonyourboard,
follow these steps:
1. Perform the steps in Step 1 to display the Board Update
Portal web page.
2. IntheHardwareFileNameeld,specifythe.ashle
(<package root directory>\factory _recovery\build_
factory _source\<silicon type>\bts_cong.ash) that
you downloaded from the Intel website. Because the
design does not have a software component, leave the
SoftwareFileNameeldblank.
3. Click Upload.
4. ReconguretheFPGAwiththenewles:
a. Press the PGM_SEL (S2) push button on the LED
daughter board until LED D2 (on the LED daughter
board), labeled PGM1 illuminates.
b. Press the PGM_CONFIG (S1) push button on the LED
daughterboard,toconguretheFPGAfromthe
“user_hardware1”portionoftheashmemory.
The BTS design now runs in the FPGA.
The Board Update Portal can also be used to upload your
custom designs. The kit’s user guide describes in detail how
to prepare your designs for use with the Board Update
Portal.
The BTS interface allows you to verify most of the
componentsonyourboard.AlldesignlesfortheBTSare
included in the <package root directory>\examples\
board_test_system directory.
Using the BTS
Figure 1. BTS Interface
Figure 2. Power Measurement Tool
Power Measurement Tool
The power measurement tool, available via the buttons in
the upper left of the BTS interface, can be used to see how
anydesign—includingyourcustomdesign—aectsthe
FPGA’s power consumption.
BTS Interface
WhenyoulaunchtheBoardTestSystem.exeleinthat
directory, the screen shown in Figure 1 appears. To view
eachtab,selectthedesignfromtheConguremenu.Each
tab has options for interfacing to one or more of the board
components. The Help menu provides further information
about each test design.