3
The battery voltage is continuously
monitored. If a low voltage is detected,
the low battery indicator will be displayed
(Fig. 15).
The timer requires two LR44 batteries to
keep time up to three months without
power.
Replace the batteries as soon as possible after the low battery
indicator appears.
Change the batteries within one minute of unplugging in order to
keep the time and date settings. Afterwards, if the display is wrong
or flashes “12:00 AM”, reset the time and date. All other settings
(your ON and OFF programming) remain in memory indefinitely
without battery or AC power.
While the batteries are removed, the timer will turn off the display
to conserve power.
Dispose of the used batteries promptly according to local
regulations. Keep batteries away from children.
•
•
•
•
•
•
About the Batteries
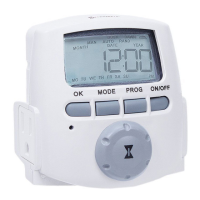
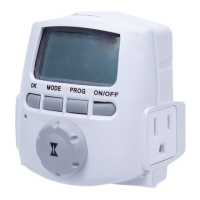
To conserve battery power, as soon as setup and programming are
complete, plug the desired devices into the timer and plug the timer
into a properly grounded outlet.
7 – Plug In Timer
Changing Program Times
Skipping an ON or OFF Event
Use these steps to disable an existing ON or OFF event that you no
longer want (for example, special settings from a vacation).
Ensure that the timer is in a normal operating mode by pressing
the MODE button, if necessary, until MANual, AUTO or RANDom
appears in the mode display area.
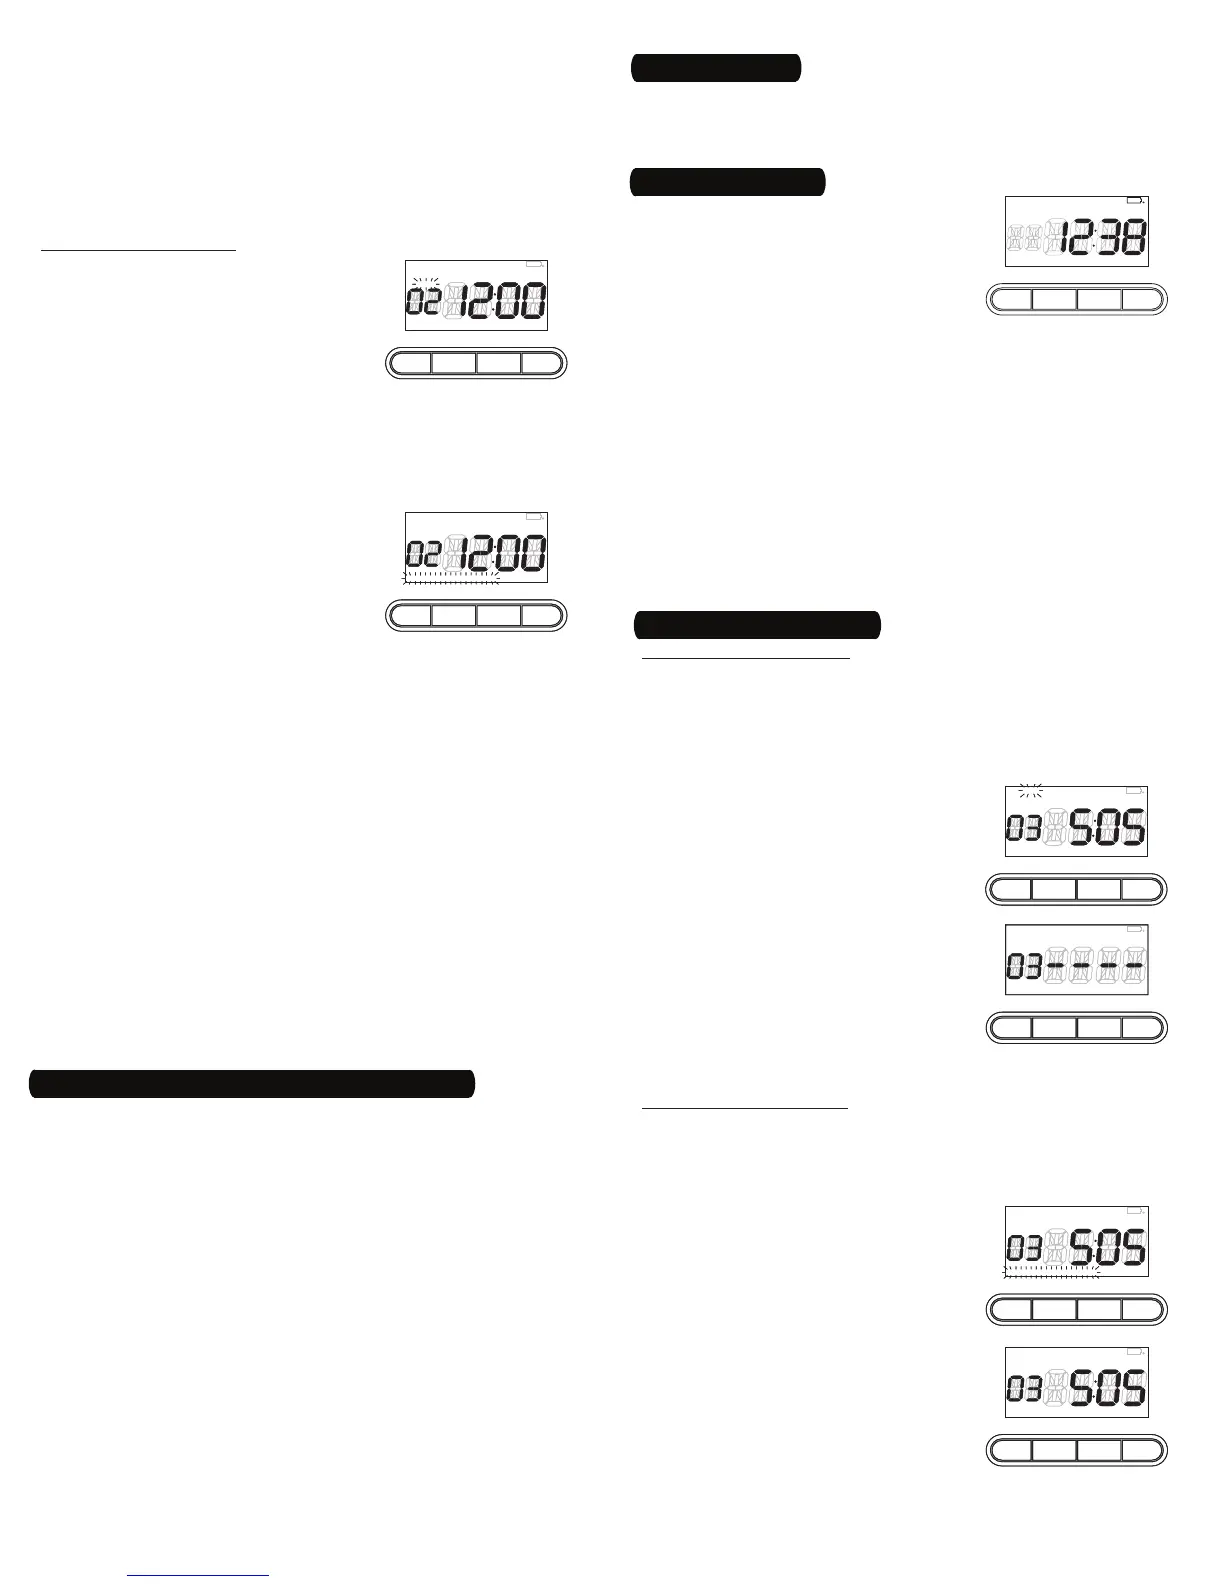
Press the PROG button to view the first
event screen (“01”).
Turn the selector knob until the desired
event screen is displayed.
Press PROG again. ON or OFF will be
flashing (Fig.16).
Turn the selector knob until SKIP shows
in the display and “-- --” replaces the
time (Fig. 17), then press PROG to accept
the new setting.
Continue to press PROG until the next
event is viewed.
Continue programming or press OK to
return to normal operating.
Revising an ON or OFF Event
Use these steps to revise an existing ON or OFF event.
Ensure that the timer is in a normal operating mode by pressing
the MODE button, if necessary, until MANual, AUTO or RANDom
appears in the mode display area.
Press the PROG button to view the first
event screen (“01”).
Turn the selector knob until the desired
event screen is displayed.
Press PROG as many times as necessary
to display the setting you want to revise,
for example, DOW (Fig. 18).
Turn the selector knob until you reach
the DOW setting you want (Fig. 19) and
press PROG to accept the new setting.
Continue to press PROG until the next
event is viewed.
Continue programming or press OK to
return to normal operating.
1.
2.
3.
4.
5.
6.
7.
1.
2.
3.
4.
5.
6.
7.
ON
DAYSAV MAN AUTO RAND CLOCK
YEARDATE
MONTH
SKIP
EVENT
MO TU WE TH FR SA SU AM PM
OFF LOC DUSK DAWN
OK MODE PROG ON/OFF
Fig.
16
ON
DAYSAV MAN AUTO RAND CLOCK
YEARDATE
MONTH
SKIP
EVENT
MO TU WE TH FR SA SU AM PM
OFF LOC DUSK DAWN
OK MODE PROG ON/OFF
Fig.
16
ON
DAYSAV MAN AUTO RAND CLOCK
DATE
MONTH
SKIP
EVENT
MO TU WE TH FR SA SU AM PM
OFF LOC DUSK DAWN
OK MODE PROG ON/OFF
Fig.
17
ON
DAYSAV MAN AUTO RAND CLOCK
DATE
MONTH
SKIP
EVENT
MO TU WE TH FR SA SU AM PM
OFF LOC DUSK DAWN
OK MODE PROG ON/OFF
Fig.
17
ON
DAYSAV MAN AUTO RAND CLOCK
YEARDATE
MONTH
SKIP
EVENT
MO TU WE TH FR SA SU AM PM
OFF LOC DUSK DAWN
OK MODE PROG ON/OFF
Fig.
18
ON
DAYSAV MAN AUTO RAND CLOCK
YEARDATE
MONTH
SKIP
EVENT
MO TU WE TH FR SA SU AM PM
OFF LOC DUSK DAWN
OK MODE PROG ON/OFF
Fig.
18
ON
DAYSAV MAN AUTO RAND CLOCK
YEARDATE
MONTH
SKIP
EVENT
MO TU WE TH FR SA SU AM PM
OFF LOC DUSK DAWN
OK MODE PROG ON/OFF
Fig.
19
ON
DAYSAV MAN AUTO RAND CLOCK
YEARDATE
MONTH
SKIP
EVENT
MO TU WE TH FR SA SU AM PM
OFF LOC DUSK DAWN
OK MODE PROG ON/OFF
Fig.
19
Turn the selector knob until the desired minutes are reached.
Press PROG to accept the entire ON event setting.
NOTE: Do not press OK before pressing PROG this final time or the
timer will return to normal operating without accepting the new
setting.
The timer will move on to view the next event screen and you
may continue programming or press OK to return to normal
operating.
Programming an OFF Event
While viewing an event screen, press
PROG. The SKIP display (or ON or OFF, if
the timer has been programmed) will
begin flashing (Fig.13).
Turn the selector knob until the screen
displays the event setting you desire:
OFF only — for turning off at a preset time
OFF and DUSK — for turning off at sunset
OFF and DAWN — for turning off at sunrise
NOTE: The settings with SKIP or ON are used for disabling an
event or programming an ON event.
Press PROG to accept the event setting.
The Days Of Week (DOW) display will
begin to flash (Fig. 14).
Turn the selector knob until the screen
displays the DOW setting you desire:
MO TU WE TH FR SA SU — for an event
that occurs every day
MO TU WE TH FR — for a weekday event
SA SU — for a weekend event
MO (or TU, or WE, etc.) — for a single day event
Press PROG to accept the DOW setting. If you have chosen DAWN
or DUSK, skip to step 19. If you have chosen a preset time, the first
two digits of the Time Of Day (TOD) will begin to flash.
Turn the selector knob until the desired hour is reached and press
PROG. The last two digits of the Time Of Day (TOD) will begin to
flash.
Turn the selector knob until the desired minutes are reached.
Press PROG to accept the entire OFF event setting.
NOTE: Do not press OK before pressing PROG this final time or the
timer will return to normal operating without accepting the new
setting.
The timer will move on to view the next event screen and you
may continue programming or press OK to return to normal
operating.
9.
10.
11.
12.
13.
-
-
-
14.
15.
-
-
-
-
16.
17.
18.
19.
20.
ON
DAYSAV MAN AUTO RAND CLOCK
YEARDATE
MONTH
SKIP
EVENT
MO TU WE TH FR SA SU AM PM
OFF LOC DUSK DAWN
OK MODE PROG ON/OFF
Fig.
13
ON
DAYSAV MAN AUTO RAND CLOCK
YEARDATE
MONTH
SKIP
EVENT
MO TU WE TH FR SA SU AM PM
OFF LOC DUSK DAWN
OK MODE PROG ON/OFF
Fig.
13
ON
DAYSAV MAN AUTO RAND CLOCK
YEARDATE
MONTH
SKIP
EVENT
MO TU WE TH FR SA SU AM PM
OFF LOC DUSK DAWN
OK MODE PROG ON/OFF
Fig.
14
ON
DAYSAV MAN AUTO RAND CLOCK
YEARDATE
MONTH
SKIP
EVENT
MO TU WE TH FR SA SU AM PM
OFF LOC DUSK DAWN
OK MODE PROG ON/OFF
Fig.
14
Once set up, you have three choices for operating the digital timer.
The screen will display MANual, AUTO or RANDom and you may choose
between them by pressing the MODE button.
AUTO — uses the timer settings you have programmed.
RANDom — gives your home a “lived-in” look by varying your
settings by random 5-minute increments of ±30 minutes.
MANual — makes the switch into a standard ON/OFF switch
without timer settings. Press the ON/OFF button to operate
plugged-in devices.
NOTE: While in AUTO or RANDom and you may override the timer by
pressing the ON/OFF button.
If the timer has a device turned on, pressing the ON/OFF button will
turn it off and leave it off until the next ON event.
If the timer has a device turned off, pressing the ON/OFF button will
turn it on and leave it on until the next OFF event.
•
•
•
•
•
6 – Select AUTO, RANDom or MANual Operation
ON
DAYSAV MAN AUTO RAND CLOCK
YEARDATE
MONTH
SKIP
EVENT
MO TU WE TH FR SA SU AM PM
OFF LOC DUSK DAWN
OK MODE PROG ON/OFF
Fig.
15
 Loading...