346
NL
S AVE THESE INSTRUCTIONS
(346NL) SPA ENGLISH 7.5” X 10.3” PANTONE 295U 08/09/2019
English
Page 11
SET UP (continued)
Infl ation
Infl ate the Spa Tub Wall
1.
Take out the ground cloth
(19)
and spread it over the cleared area. Then spread out the spa liner over
the ground cloth and point the drain valve towards a suitable draining area.
NOTE:
Spread the ground cloth with the bubbles facing down over the cleared area where you intend
to setup your spa.
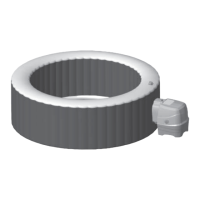
2.
Flip up the control base side cover
(4)
to reveal the air blower infl ation outlet. Pull out the latch to open
the cover, insert the hose adaptor
(24)
with hose and reattach the latch to the hose adaptor to secure it
in place
(see drawing 3)
.
3.
Unscrew the air valve cap on the spa tub to reveal the
stem in the up position for infl ation. Insert the other end of
the infl ation hose
(7)
into the valve and turn to the right to
lock it in position
(see drawing 4)
.
3
1
2
3
4
5
4
7
1 2
Optional equipotential bonding system
Depending on local building codes and regulations, have a qualifi ed electrician to connect the spa
equipotential terminal with a conductor (wire) having a nominal cross-sectional area of 2.5 mm
2
to 6mm
2
to
the household equipotential terminal. (Wire not included)
 Loading...