348
PO
S AVE THESE INSTRUCTIONS
(348PO) SPA ENGLISH 7.5” X 10.3” PANTONE 295U 10/25/2019
English
Page 11
7
7
SET UP (continued)
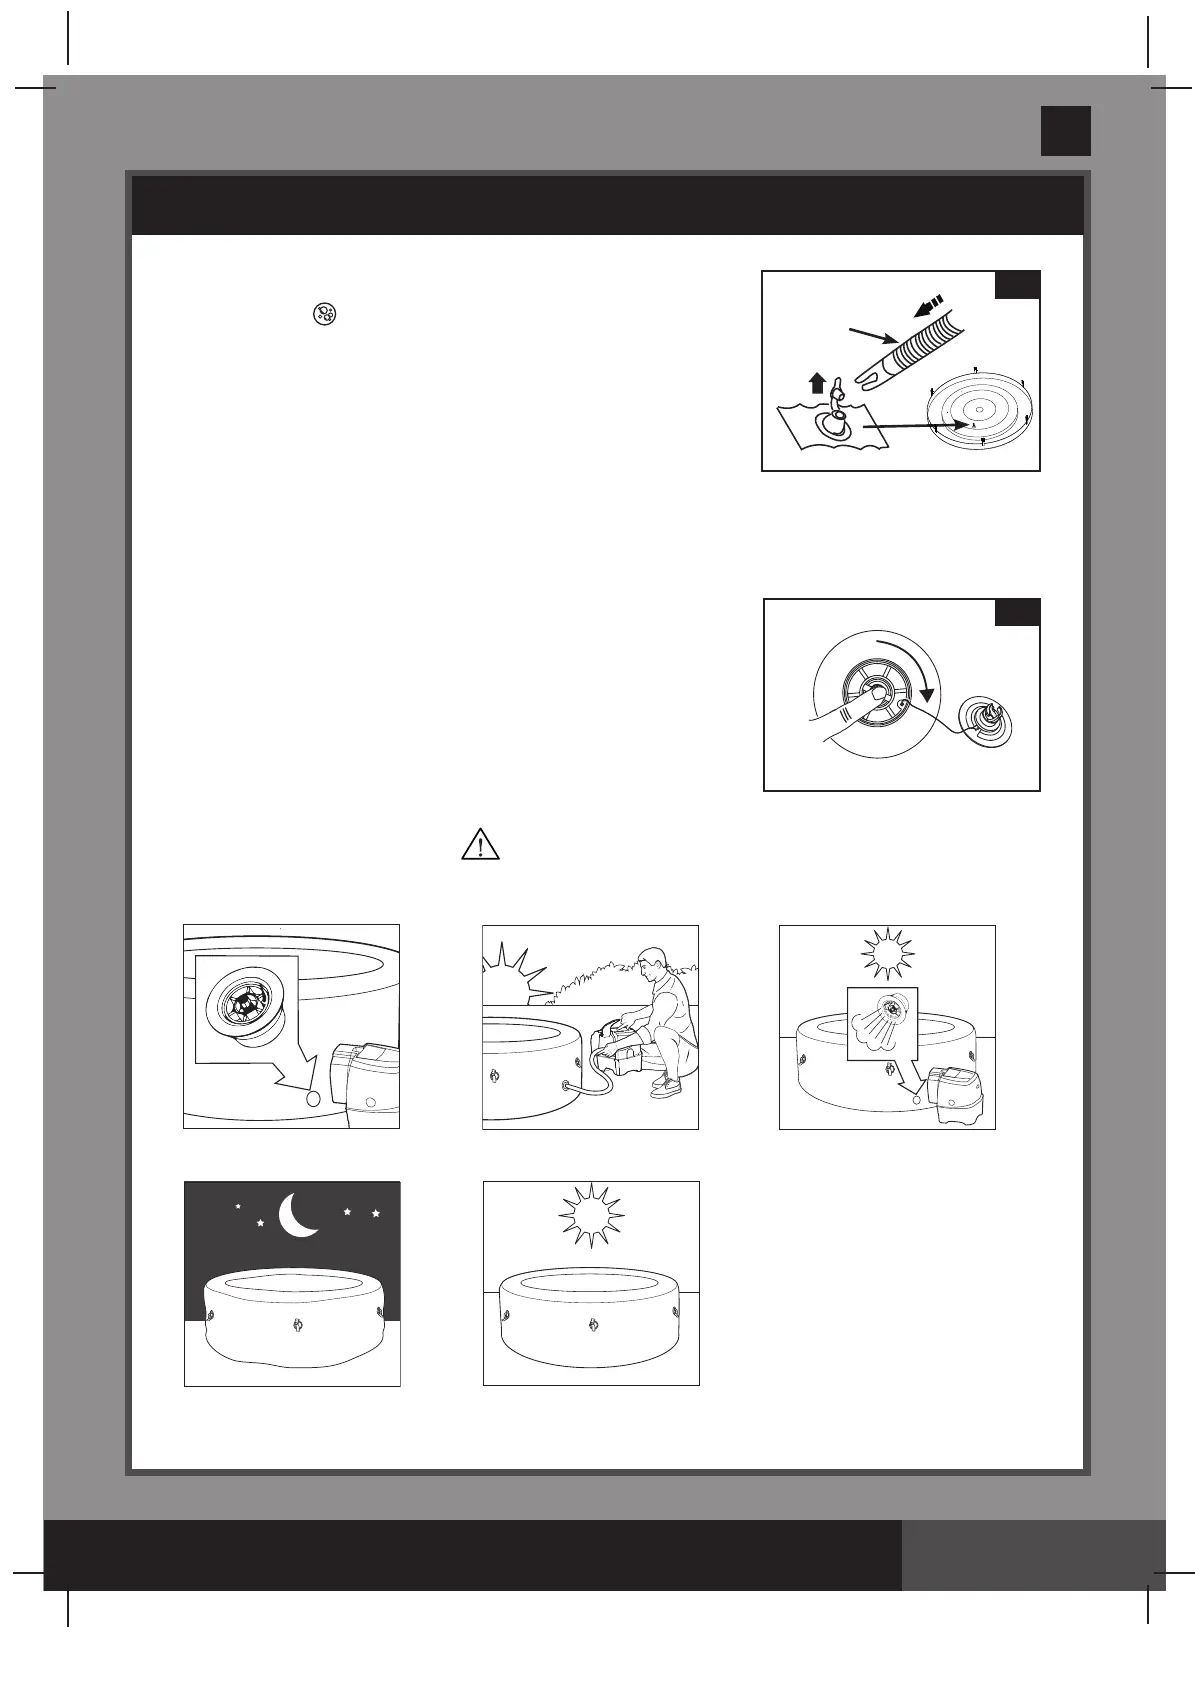
The spa tub ination/deation valve incorporates an “air pressure release” function that automatically
releases excess air when the spa tub internal pressure is between 0.363 - 0.508 psi (0.025 - 0.035 bar).
Air pressure release valve.
Colder temperatures at night
cause the spa to seem less
inated.
Air expands in the midday
heat and correct air
pressure is restored.
Air expands in the midday heat.
Air pressure release valve kicks
in and releases excess air.
Ination of spa in the morning.
IMPORTANT
Inate the Spa Cover Air Bladder
1.
Open the ination valve and insert the ination hose
(7)
into the
valve; press to inate until it is rm to the touch but not hard
(see drawing 7)
.
2.
Disconnect the ination hose
(7)
from the air blower ination
outlet and the valve.
3.
Replace the control base ination latch back; close and recess
the ination valve.
NOTE:
If there is a need to add some air to the spa tub wall or spa
cover air bladder after they have been setup, refer to above “Inate
the Spa Tub Wall” and “Inate the Spa Cover Air Bladder” sections.
The cover air bladder is preinstalled inside the spa cover. If it needs to
be reinstalled, place the uninated air bladder inside the spa cover lip before inating the bladder.
Deation
For Spa Tub Wall:
1.
Unscrew the cap to reveal the stem, push the stem in and turn
90 degree right to secure it in the down position
(see drawing 8)
.
2.
Once the deation is completed, push the stem in and turn 90
degree left to return it to the ination position.
3.
Replace the cap back.
NOTE:
To deate the spa tub for storage, see “STORAGE” section.
For Cover Air Bladder:
1.
Pull valve cap out and squeeze the valve at its base until deated.
2.
Close and recess the valve back.
8