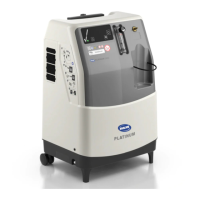
Do you have a question about the Invacare PLATINUM 5 and is the answer not in the manual?
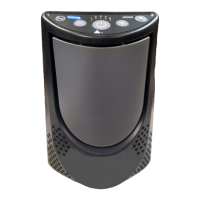
General safety precautions for operating the oxygen concentrator.
Guidance on routine upkeep and service intervals for the unit.
Information regarding the effects of RFI on electronic equipment.
Specific safety warnings to prevent hazards during operation.
Steps to check and verify the battery-free power loss alarm.
Step-by-step description of the unit's functional flow.
Explanation of the SensO2 oxygen sensor technology.
Detailed technical explanation of the oxygen sensor's function.
How the SensO2 system operates during use.
Baseline status indication for normal unit function.
Diagnosis and solutions for power supply failures.
Further details and solutions for power loss issues.
Specific power loss troubleshooting for SensO2 models.
Troubleshooting steps for high pressure conditions.
Troubleshooting specific to the 4-way valve component.
Troubleshooting steps for low pressure conditions.
Identifying and addressing failed component parts.
Diagnostic steps for a unit that fails to start.
Troubleshooting low oxygen concentration output.
Continued troubleshooting for low oxygen concentration.
Diagnosing and resolving inconsistent flow rates.
Troubleshooting and resolving excessive operational noise.
Diagnosing and addressing unit overheating issues.
Troubleshooting issues related to oxygen purity.
Further diagnostic steps for a non-operational unit.
Troubleshooting specific operational states of the unit.
Procedure for removing the unit's exterior cabinet.
Instructions for cleaning the main cabinet air filters.
Procedure for replacing the outlet HEPA filter.
Procedure for replacing the compressor inlet filter.
Maintenance for specific older exhaust components.
Procedure for replacing the throttling muffler.
Instructions for cleaning the heat exchanger.
Procedure for replacing the entire compressor unit.
Step-by-step guide to replacing the compressor capacitor.
Detailed instructions for rebuilding specific compressor models.
Detailed instructions for rebuilding the Gast compressor.
Steps for initial disassembly of the compressor.
Procedure for removing/installing valve strips and O-rings.
Procedure for replacing the piston cup component.
Procedure for installing new intake and exhaust valves.
Procedure for installing new cylinder assembly parts.
Procedure for installing new head cover and O-ring gaskets.
Final steps for assembling the compressor head.
Procedure for replacing the Pressure Equalization (P.E.) valve.
Procedure for replacing the sieve bed components.
Procedure for replacing the directional check valves.
Procedure for replacing the pressure regulator.
Steps for setting the correct pressure output.
Procedure for replacing the heat exchanger.
Procedure for removing the control panel assembly.
Procedure for replacing the unit's cooling fan.
Procedure for replacing the Printed Circuit Board.
Procedure for replacing the transformer assembly.
Procedure for replacing the power switch.
Procedure for replacing the oxygen flowmeter.
Procedure for replacing the unit's hour meter.
Procedure for replacing the 4-way valve assembly.
Manifold replacement for units made before July 24, 2003.
Manifold replacement for units made after July 24, 2003.
Procedure for replacing pilot valve stem and O-rings.
Explanation of the SensO2 oxygen purity alarm system.
How the oxygen purity indicator functions during operation.
Description of the meaning of different indicator light states.
Indicator explanations for models without an O2 sensor.
Specific indicator light explanations for LX models.
General overview of the timing adjustment process.
Procedure for automatic timing calibration.
Procedure for manual adjustment of the unit's timing.
Steps for performing a leak test on the system.
General procedures for testing unit alarms and sensors.
Test procedure for the power loss alarm.
Test procedure for low pressure alarms.
Test procedure for time-out failure alarms.
Test procedure for high pressure alarms.
Test procedure for the oxygen sensor functionality.
Test procedure for the P.E. valve coil.
Full procedure for installing kit and checking bed pressure.
Steps for disassembling the unit for pressure testing.
Steps for installing the pressure test kit.
Performing the actual sieve bed pressure test.
Steps to complete after the pressure test.
| Brand | Invacare |
|---|---|
| Model | PLATINUM 5 |
| Category | Oxygen Equipment |
| Language | English |