Step 3a (Preparation)
Mark on the wall where your bracket will fit using the wall fixing plate as a template or measure accurately
between wall fixing plate mounting holes then mark accordingly using a spirit level and pencil (ensure
mounting holes are clearly marked level horizontally & vertically on the wall).
Please Note - Before drilling holes: As with most single arm cantilevers, the centre line of the TV will
be 127mm (5”) offset to the wall fixing centre line.
This bracket is designed to be attached to either fixed wooden studs within traditional plasterboard
(drywall) walls or into solid brick or concrete walls.
Step 3b (Wood Stud Installation)
For mounting to wooden studs – carefully locate the
wooden stud and mark the position of the holes level
vertically and drill into the wood using a 4mm drill to
a depth of 80mm.
To mount your bracket hold in position and insert the
supplied screws ‘L’ and fully tighten into the wood
using a 12mm socket set or spanner (plastic plugs
are not required).
L
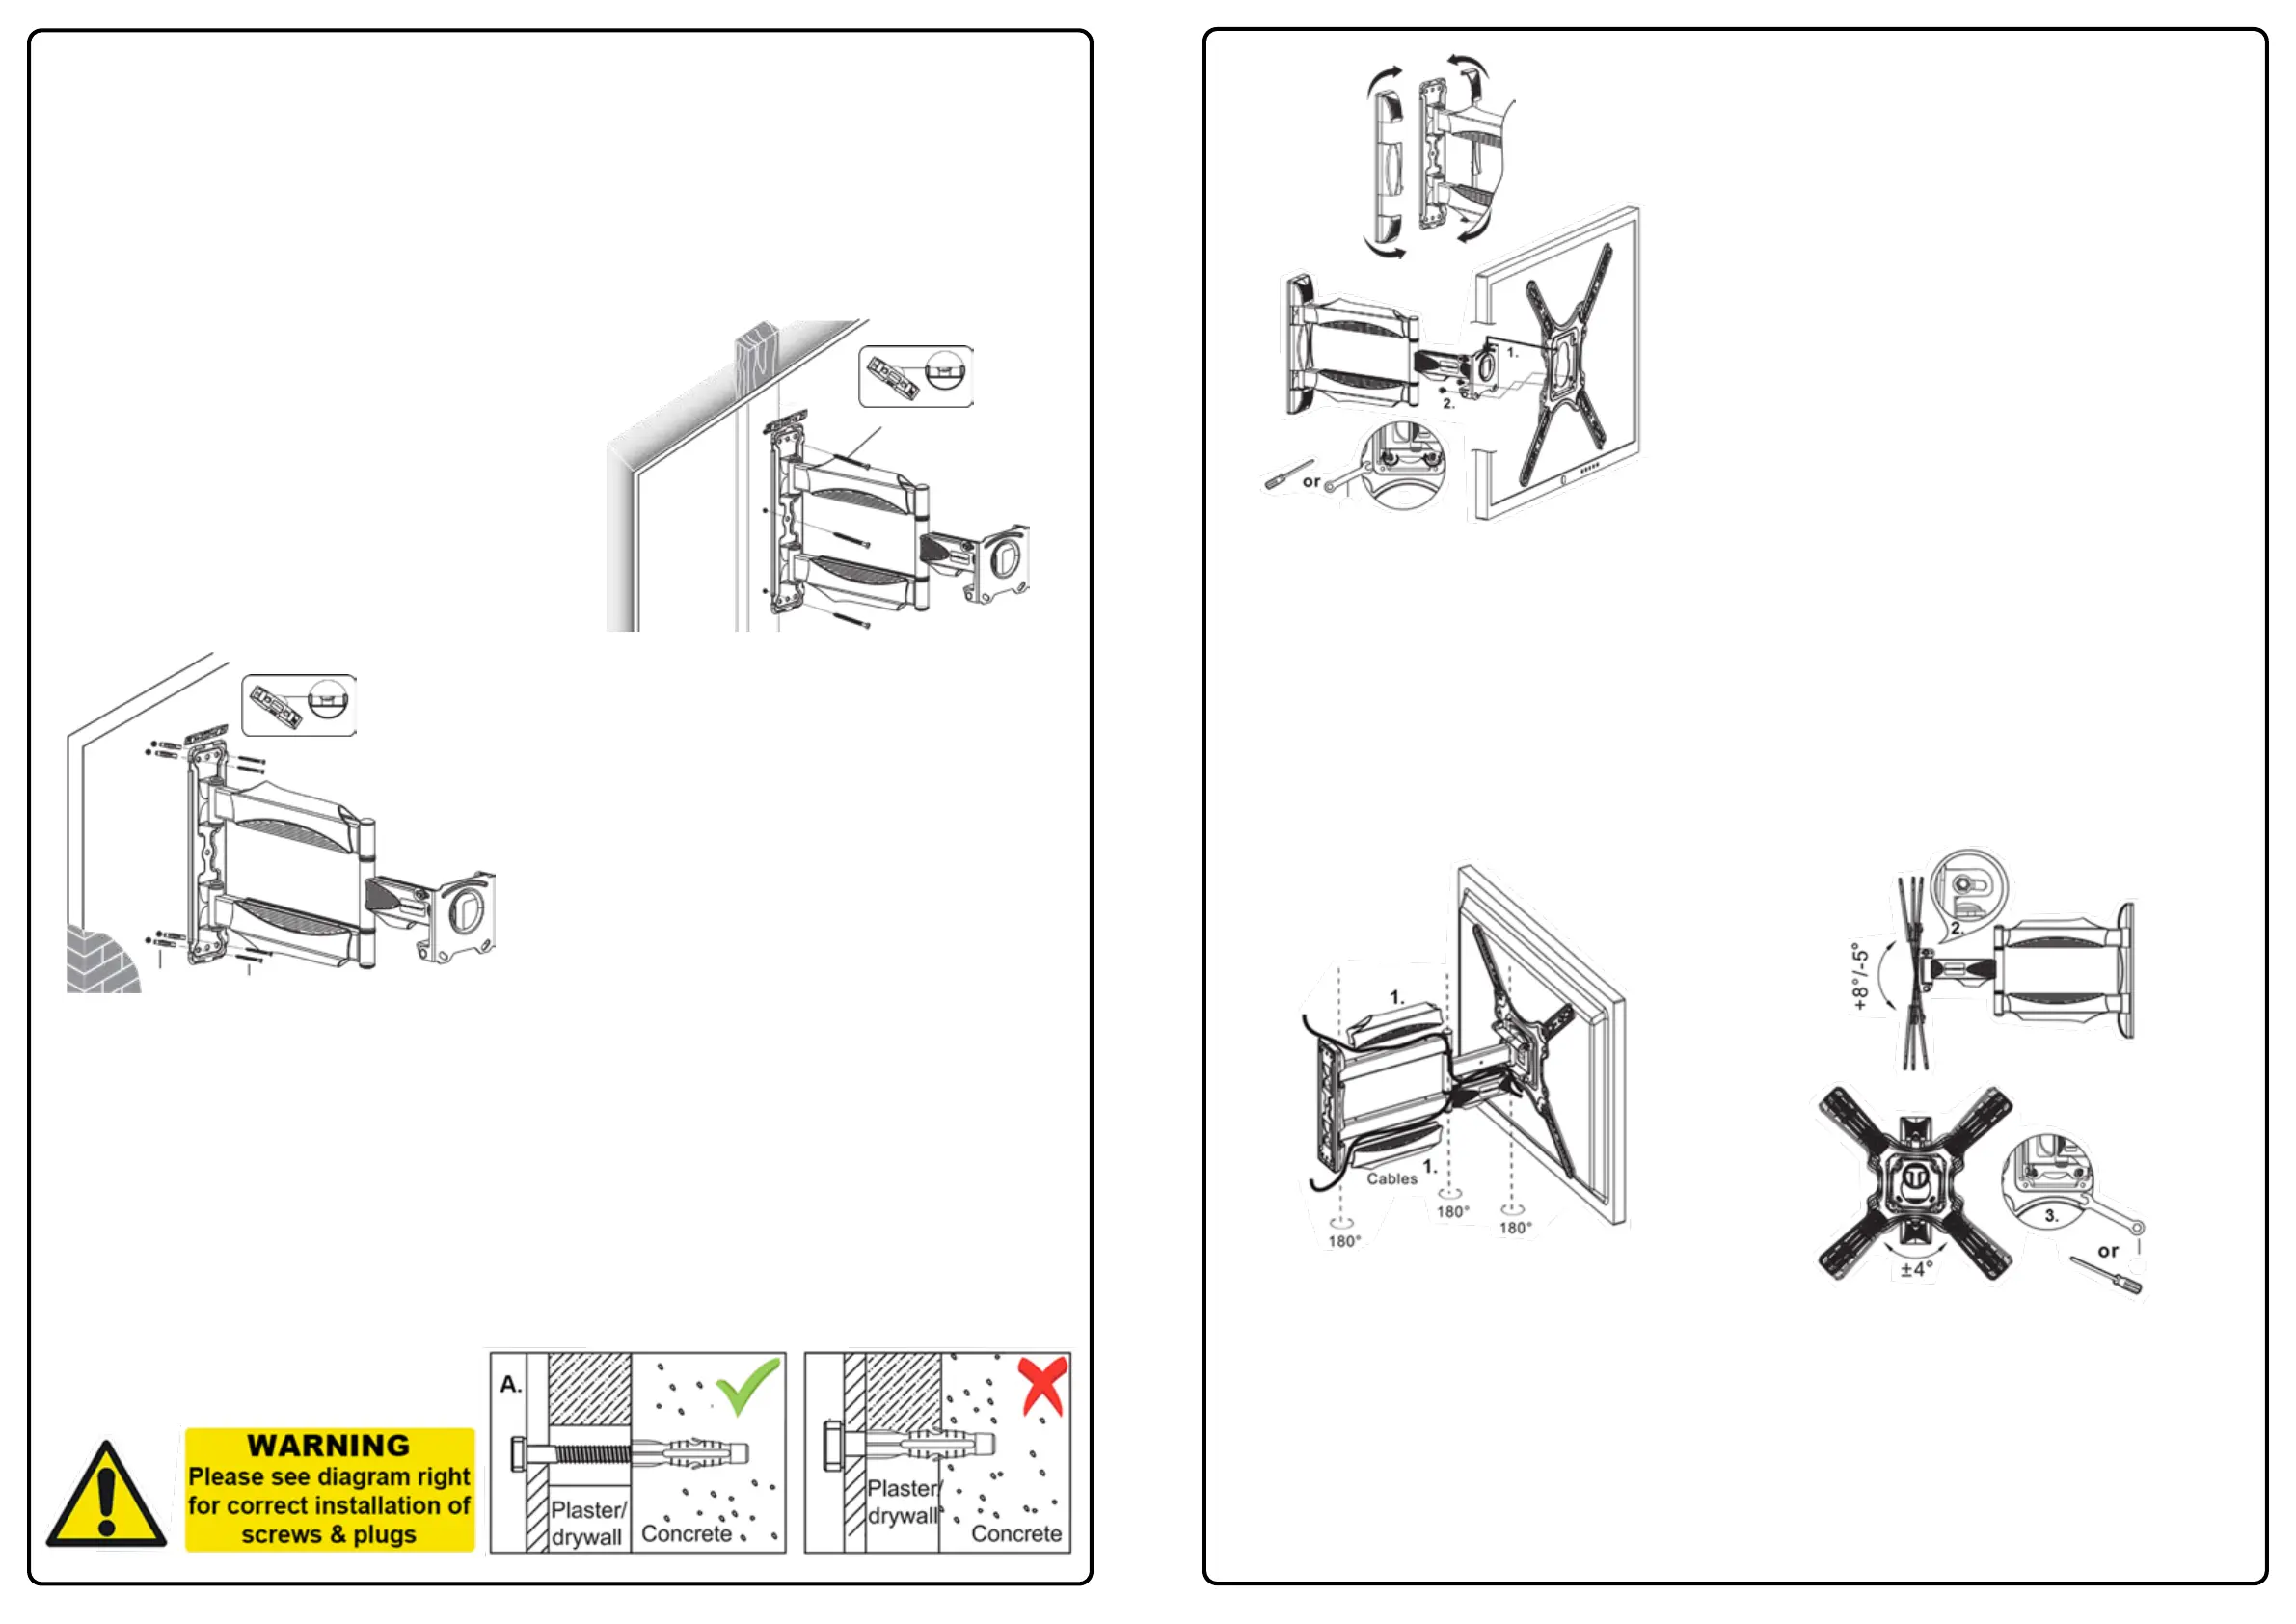
Step 3c (Brick & Concrete Installation)
For mounting to concrete or brick walls, please mark
the wall carefully and drill using a 10mm masonry drill
to the length of the screw, a depth of 80mm.
Fully insert the plastic plugs into the solid wall (pushed
beyond any plaster) closely following the warning
diagram below.
Please ensure they fit securely and are not visible in
the holes before tightening the screws into the plastic
plugs.
L
M
Step 3d
Many modern houses have an air-gap behind plasterboard or drywall. Our fixings are only designed to work
with the plastic plug fully inserted into the brick or concrete that lies behind any plaster or drywall air gap. To
use our fixings in this way YOU MUST insert the plug past any plaster/drywall and fully into the underlying
brick or concrete to gain a secure fixing. (The drill depth may have to be increase to make sure the plug can
be fully inserted to the brick or concrete).
When fitting, the screw must be at least 3/4 of the way into the plug, and the plug must be fully inserted into
brick or concrete to be effective.
Depending on the plasterboard/dry wall air gap you may need to purchase longer fixings to ensure a secure
fix.
3
Step 4a
Two people are recommended to complete this step.
Carefully lift the TV & mounting plate assembly from
Step 2a/b, hook the keyhole slot over the wall brackets
circular safety securing point (1.). Slide down to secure
in place and before letting go pull down gently to
test TV is located securely whilst keeping a firm
grip of the TV.
Once located in place make sure your TV is level and
replace the 2x M6 securing bolts (2.) which were
removed in Step 1, then fully tighten both bolts to
secure your TV to the wall bracket see Diagram ‘A’.
Now re-attach the plastic wall fixing plate covers.
K
2.
Diagram ‘A’
Step 4b
Route your TV cables along the arms of bracket, leaving slack around the joints and clip the cable
management pieces (1.) back on.
Now set tilting operation (2.) tighten to required torque so TV tilts freely by hand, but not on its own accord.
Directly behind the tilting bolts are 2x M6 securing bolts (3.) which can be loosened to adjust the horizontal
level of your screen if required.
K
Troubleshooting:
Don’t panic! In case of any issues with compatibility or for any advice on fitting, please contact our team at
help@InvisionTechnology.co.uk and we will help you overcome any problems. All our products carry our
Compatibility Promise.
Your installation is now complete - Sit back & enjoy!
To activate your 25 year warranty please email your Name, Order Number
and Product Reference HDTV-E to warranty@InvisionTechnology.co.uk
4
 Loading...