EasyManua.ls Logo

inVue AK4400 User Manual

inVue AK4400
2 pages
To Next Page IconTo Next Page
Page #1 background imageLoading...
Page #1 background image
Charger Mounting Options
Screw Mount: Drill two screws
provided into xture 5” (128 mm)
apart (horizontally or vertically). Hang
charger on screws using holes on
back of charger.
Adhesive Mount: Remove liner from
adhesives on bottom of charger.
Press and hold charger to xture for
10 seconds.
Connect cable components of power
supply. Plug 5.3 USB-A power supply
into charger and outlet.
Fully charge key. Note: Charger may
take several seconds to recognize
inserted key. Once key has been
recognized, battery indicator will light
up. A completely depleted battery may
take up to 3 hours to reach full charge.
Conrm green LED is on. If
green LED is not on, conrm
power is getting to charger.
Plug power supply into outlet and IR2
Programming Station (PK4401) or Key
Authorization Station (AK4408). Note:
For auditing and zoning capabilities,
refer to InVue Access Manager
installation.
IR3 Key
AK4400
IR3 Charger
AK4408
1 2
3 4
System Components
1. IR3 Key (AK4400)
2. IR3 Charger (AK4408)
3. IR2 Programming Station (PK4401)
or Key Authorization Station (AK4401)
4. Power Supply for Programming Station /
Key Authorization Station (KAS)
5. Power Supply for Charger
System Overview
IR3 Keys need to be reauthorized after each
charge. The IR3 Key is compatible with
either the IR2 Programming Station or the
Key Authorization Station. For auditing and
zoning capabilities, use the Key Authorization
Station with InVue Access Manager. Refer
to installation of InVue Access Manager for
programming instructions.
Battery Warnings
› Key contains a lithium-ion battery
› Battery is not replaceable
› Entire device should be recycled at an
approved center for rechargeable batteries
› Do not immerse in water
› Do not place in fire or heater
› Do not disassemble, puncture or pierce
5
Green LED
BATTERY INDICATOR
Flashing RED = Charging
Solid GREEN = Charged
For use with IR2 Programming Station,
conrm green light is on and constant.
If green light is not on, conrm power
is getting to programming station.
momentarily.
6
Key Authorization Station
AK4401
Once key has been fully charged,
place key on IR2 Programming
Station. Press button on IR3 Key
and wait for “beep”. Note: If double
“buzz”, then a programming error
has occured. Try again.
BLUE = Valid Activation
RED = Programming Error (try again)
GREEN LIGHT
Question and Answer IconNeed help?

Do you have a question about the inVue AK4400 and is the answer not in the manual?

inVue AK4400 Specifications

General IconGeneral
BrandinVue
ModelAK4400
CategorySecurity System
LanguageEnglish

Summary

System Components and Setup

System Components List

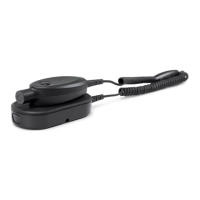
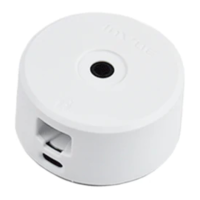
Lists the IR3 Key, IR3 Charger, Programming Station/Key Authorization Station, and power supplies.

System Overview and Compatibility

Explains IR3 Key reauthorization and compatibility with programming stations.

Battery Warnings

Details warnings regarding the non-replaceable lithium-ion battery and proper disposal.

Charger Installation and Power

Charger Mounting Options

Describes screw and adhesive mounting methods for the IR3 Charger.

Charger Power Connection

Instructs to connect the charger's power supply via USB-A to an outlet.

Key Charging and Initial Programming

Confirm Charger Power Status

Advises checking the green LED on the charger to ensure power is supplied.

Charging the IR3 Key

Guides on fully charging the IR3 Key and notes the battery indicator.

Battery Indicator Lights

Explains flashing red for charging and solid green for a fully charged battery.

Programming Station Power and Status

Instructs connecting station power and checking for a constant green light.

Activate IR3 Key

Details placing the charged key on the station and indicators for activation.

Key Authorization Station (KAS) Usage

KAS Green Light Confirmation

Advises checking the constant green light on the Key Authorization Station.

KAS Key Checkout Process

Guides inserting the key, the purple LED, and pressing the 'OUT' button for activation.

Key Activation Duration

Notes that the key is activated for 12 hours of use after checkout.

Key Return and Status Indicators

Key Check-in Procedure

Instructs checking the key back in at the end of a shift to de-authorize it.

Return Key to Charger

Advises returning the key to the charger at the end of each shift.

LED Status Indicators

Explains battery, activation, and power indicator lights for the IR3 Key.

Related product manuals