Installation Guide
1
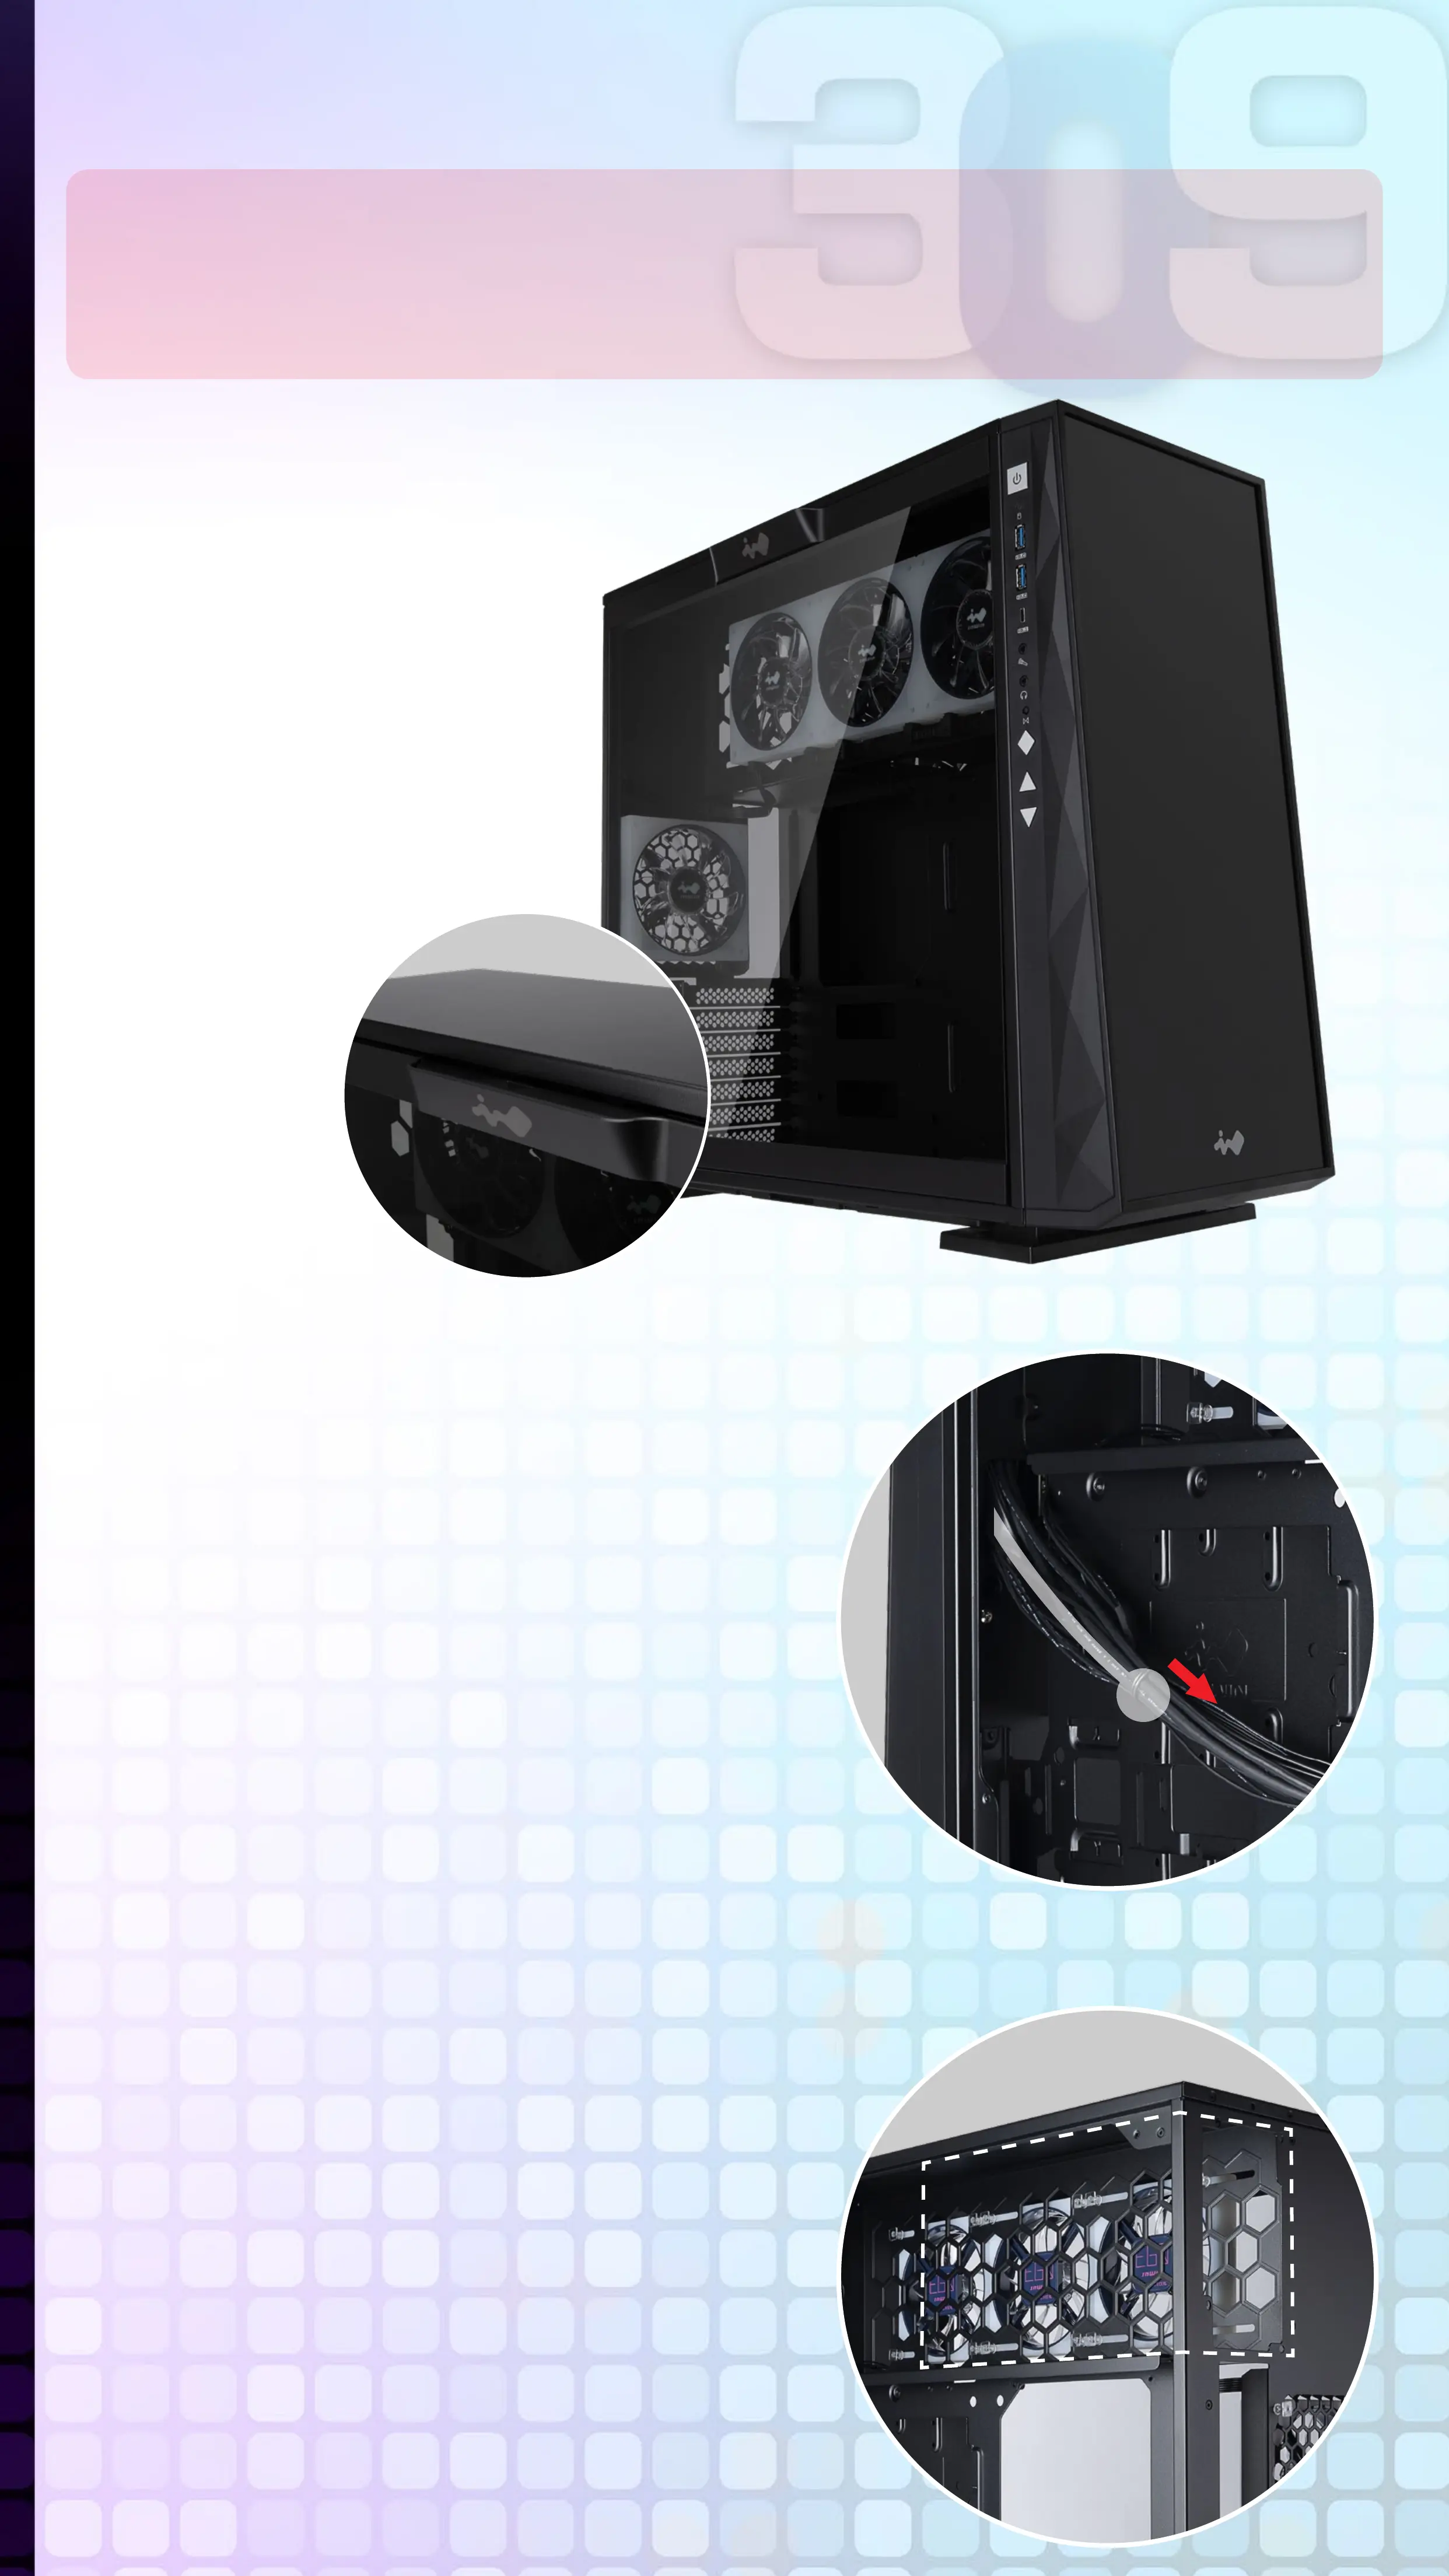
Opening the
Chassis
▪ Please follow the related chapters to assemble.
▪ Please use original provided accessories to avoid
damage to the product.
Please remove by
pressing the handle
on top of panel.
2
Clock Synchronization
Please pull the plastic mylar tab to
activate the clock synchronization,
then run the GLOW2 software to
provide accurate time on the front
panel.
3
Power Supply Installation
Parts Required:
Hexagon Head Screws
Power supply can be mounted on
the top bracket
Pull